How to Insert Ready-Made Designs from the Clipart Library
DRAWings PRO XII includes a Clipart Library containing ready-made embroidery designs that you can quickly add to your own projects.
In this tutorial, you’ll learn how to browse the Clipart Library, search and filter designs, insert a clipart design at its original size, and interactively resize or rotate it while placing it.
Step 1: Open the Clipart Library
- Open your design in DRAWings PRO XII.
- From the main menu, select Tools.
- Open the Clipart Library submenu.
- Select Insert Clipart.
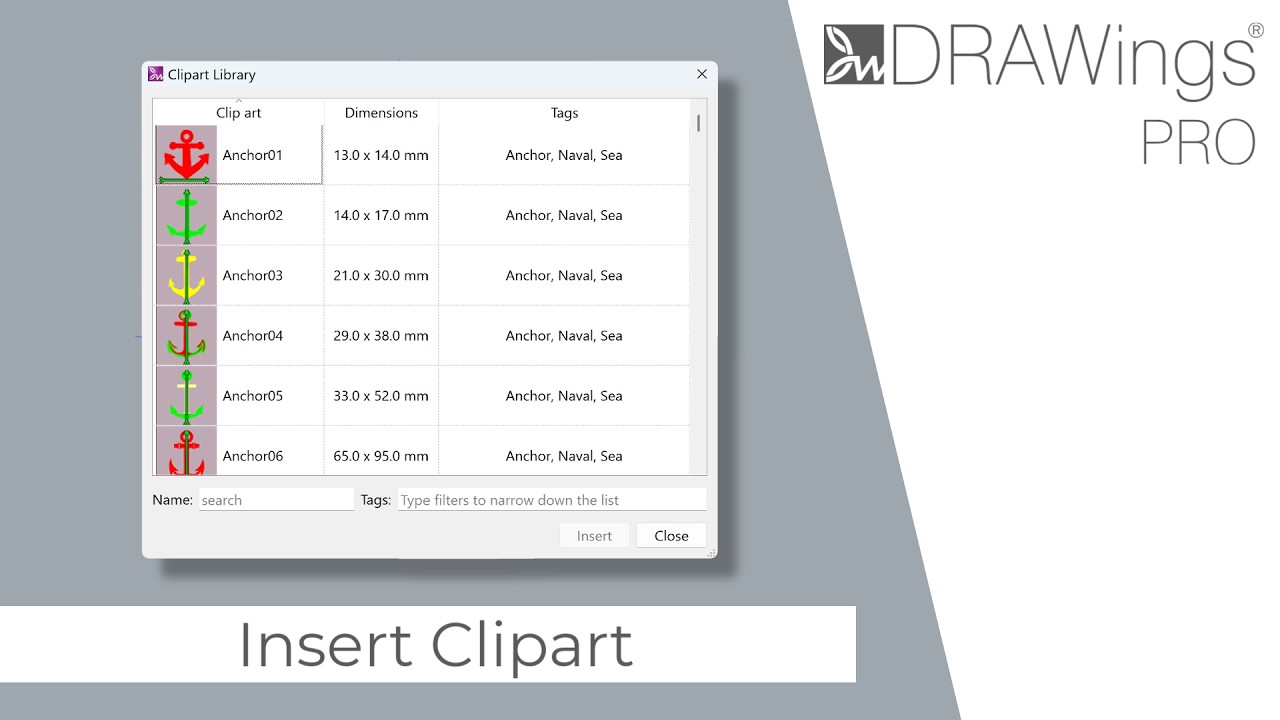
The Clipart Library selection window will appear.
Tip: The Clipart Library submenu also includes a Create Clipart option. Use Insert Clipart when you want to add an existing library design to your current project.
Step 2: Browse the Available Clipart Designs
The Clipart Library displays the ready-made designs currently available to you.
For each design, you can see:
- A preview of the design
- The design name
- Its actual dimensions
Scroll through the list to browse the available designs.
Tip: Check the listed dimensions before inserting a design. This can help you determine whether it is already suitable for your project or whether you will need to resize it during placement.
Step 3: Search for a Clipart Design by Name
If you know what type of design you are looking for, use the search field instead of browsing the entire library.
- Click in the search field.
- Enter part or all of the design name.
For example, type heart to display clipart designs that include “heart” in their name.
This is especially useful when your Clipart Library contains a large number of designs.
Step 4: Filter Designs Using Tags
You can further narrow the displayed designs by using the available Tag categories.
- Locate the Tag categories in the Clipart Library window.
- Select the category or categories you want to use.
Only clipart items belonging to the selected Tag categories will appear in the list.
Tip: Search and Tag filters can be used to locate designs more quickly. If you cannot find the design you expect, check whether an active Tag filter is hiding it.
Step 5: Select a Clipart Design
Once you find the design you want:
- Click the clipart item to select it.
- The Insert button becomes available.
- Click Insert.
Alternatively, you can right-click the clipart item and choose Insert from the context menu.
The Clipart Library window will close, and your mouse pointer will change to a crosshair, indicating that the design is ready to be placed.
Step 6: Insert the Design at Its Original Size
To place the clipart using its original dimensions and orientation:
- Move the crosshair to the desired position on the design page.
- Left-click once.
The clipart is inserted using its original size and orientation.
Tip: Use this method when the clipart’s original dimensions already match the size you need.
Step 7: Resize and Rotate the Design While Inserting It
Instead of inserting the design at its original size, you can define its size and orientation directly while placing it.
- Position the crosshair where you want to begin placing the design.
- Click and hold the mouse button.
- Drag the mouse to adjust the design.
- While dragging, watch the preview of the clipart.
The preview scales and rotates according to the movement of your mouse.
- Release the mouse button when the design reaches the desired size and orientation.
The clipart is then finalized and added to your design.
Tip: The interactive preview lets you evaluate the size and angle of the clipart before committing to its placement.
Step 8: Rename a Clipart Item
Clipart items can also be renamed when you want to organize the library or give an item a more recognizable name.
You can rename an item in either of these ways:
- Right-click the clipart item and select the appropriate Rename option.
- Double-click the editable name field and enter the new name.
Using clear, descriptive names can make frequently used clipart designs easier to locate with the search function later.
Quick Workflow
For a fast way to add a ready-made design:
- Go to Tools > Clipart Library > Insert Clipart.
- Browse, search, or filter the Clipart Library.
- Select the desired design.
- Click Insert, or right-click it and choose Insert.
- Click once to use the original size, or click and drag to set the size and orientation.
- Release the mouse button to finalize the design.
Useful Tips
- Use the search field when you know part of the clipart name.
- Use Tag categories to narrow large collections.
- Review the displayed design dimensions before inserting.
- Single-click during placement to retain the original dimensions and orientation.
- Click and drag during placement when you want to resize or rotate the design interactively.
- Give clipart items meaningful names to make them easier to search for later.
The Clipart Library provides a quick and convenient way to reuse ready-made embroidery designs in DRAWings PRO XII, helping you build new compositions without having to create every design element from scratch.
DRAWings PRO Help Group
Happy crafting and don’t forget to share your creations with us in the
DRAWings PRO Help Group!
Related posts





Projects
Digitizing a Knockout Layered Varsity Monogram with Nested Script Lettering
Layering script text over a bold collegiate letter is a staple in team apparel, varsity jackets, and custom fleece.How to Embroider a Photo onto a T-Shirt with PaintStitch™ and Sketch
A favorite vacation photo does not have to stay on your phone or disappear into a folder. With DRAWings PRO embroidery software, you can turn a photo into an embroidery design and stitch it onto a T-shirt as a wearable keepsake.How to Digitize an Optical Illusion Monogram Design for a Tote Bag
Learn how to design and stitch a stunning Optical Art-inspired monogram design using advanced embroidery digitizing software.