
How to Set Default Fill and Outline Colors
In DRAWings PRO XII, any new object you create, such as a shape or text, is automatically assigned a default color style (e.g., a white fill and a black outline). To improve your workflow, you can change these default settings to match your preferences. This guide will show you how to set new default colors for fills and outlines, including how to create objects with no fill or outline by default.
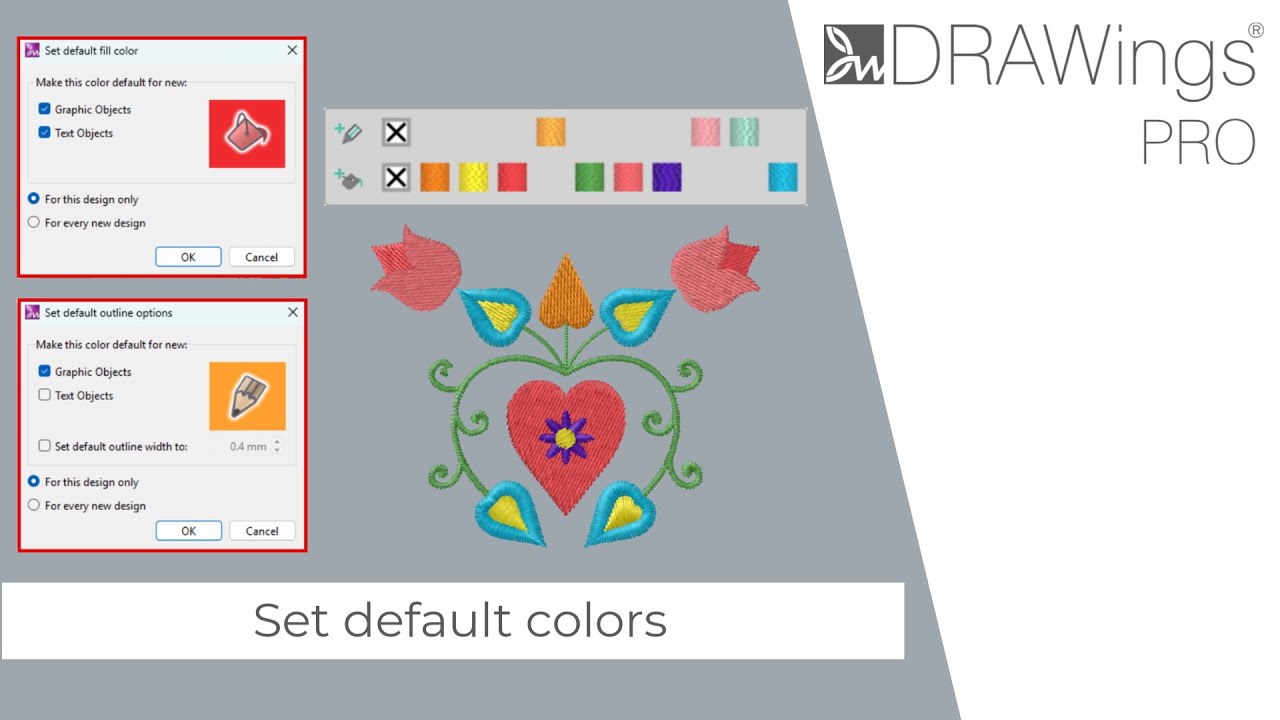
The Core Principle
The most important step for changing any default setting is to ensure no objects are selected on your canvas. Clicking on a color or style option while an object is selected will change that specific object only. Clicking on a color when nothing is selected tells the software you want to set a new default.
Setting a New Default Fill Color
- Start by making sure nothing is selected. You can do this by pressing the
ESCkey or clicking on an empty area of the design canvas. - From the color palette at the bottom of your screen, left-click on the color you want to use as your new default fill.
- The “Set default fill” dialog box will appear.
- In this dialog, you can:
- Select the type of objects for which the default will be applied.
- Decide if the change is temporary (“Just for this design”) or permanent (“Permanent choice for all new designs”).
- Click OK to confirm. Any new object you create will now automatically have your selected fill color.
Setting a New Default Outline Color and Width
- Again, ensure no objects are selected on the canvas.
- From the color palette, right-click on the color you want to use as your new default outline.
- The “Set default outline” dialog box will appear.
- Here, you can set both the color and a default Width for the outline.
- Useful Tip: For embroidery, setting a default outline width can be very powerful. If you set the Width to be more than
1mm, the software will automatically convert the outline to a Satin Serial stitch type by default. - Choose whether to apply this setting just for the current design or permanently for all new projects.
- Click OK. New objects will now be created with your chosen outline color and width.
Setting “No Outline” as the Default
If you frequently create objects without outlines, you can set this as your default.
- Ensure nothing is selected on the canvas.
- Locate the Outline color properties at the bottom of the screen and click the ‘X’ icon (None).
- The “Set default outline” dialog will appear.
- Confirm the object types and whether this should be a permanent change or just for the current design.
- Click OK. All newly created objects in the selected scope will now have no outline by default.
Setting “No Fill” as the Default (for Line Art)
This is especially useful if you are creating line art designs and want objects to be transparent by default.
- Ensure nothing is selected on the canvas.
- Locate the Fill color properties at the bottom of the screen and click the ‘X’ icon (None).
- The “Set default fill” dialog will appear.
- Choose your desired settings for object type and scope (current design or permanent).
- Click OK. Any new object you create will now have no fill, allowing you to focus on its outline properties immediately.
DRAWings PRO Help Group
Happy crafting and don’t forget to share your creations with us in the
DRAWings PRO Help Group!
Related posts





Projects
How to Modify Built-In Fonts into Custom Designs: Dripping Halloween Lettering
Every embroidery program ships with fonts that are already digitized. They stitch cleanly, and they are also the same fonts everyone else has.Digitizing a Knockout Layered Varsity Monogram with Nested Script Lettering
Layering script text over a bold collegiate letter is a staple in team apparel, varsity jackets, and custom fleece.How to Embroider a Photo onto a T-Shirt with PaintStitch™ and Sketch
A favorite vacation photo does not have to stay on your phone or disappear into a folder. With DRAWings PRO embroidery software, you can turn a photo into an embroidery design and stitch it onto a T-shirt as a wearable keepsake.










