
How to Reshape and Combine Objects in Embroidery Design: Weld, Trim, and Intersect
The Shaping tools allow you to manipulate vector objects to create complex designs. You can combine shapes, cut holes, or create entirely new shapes based on overlapping areas.
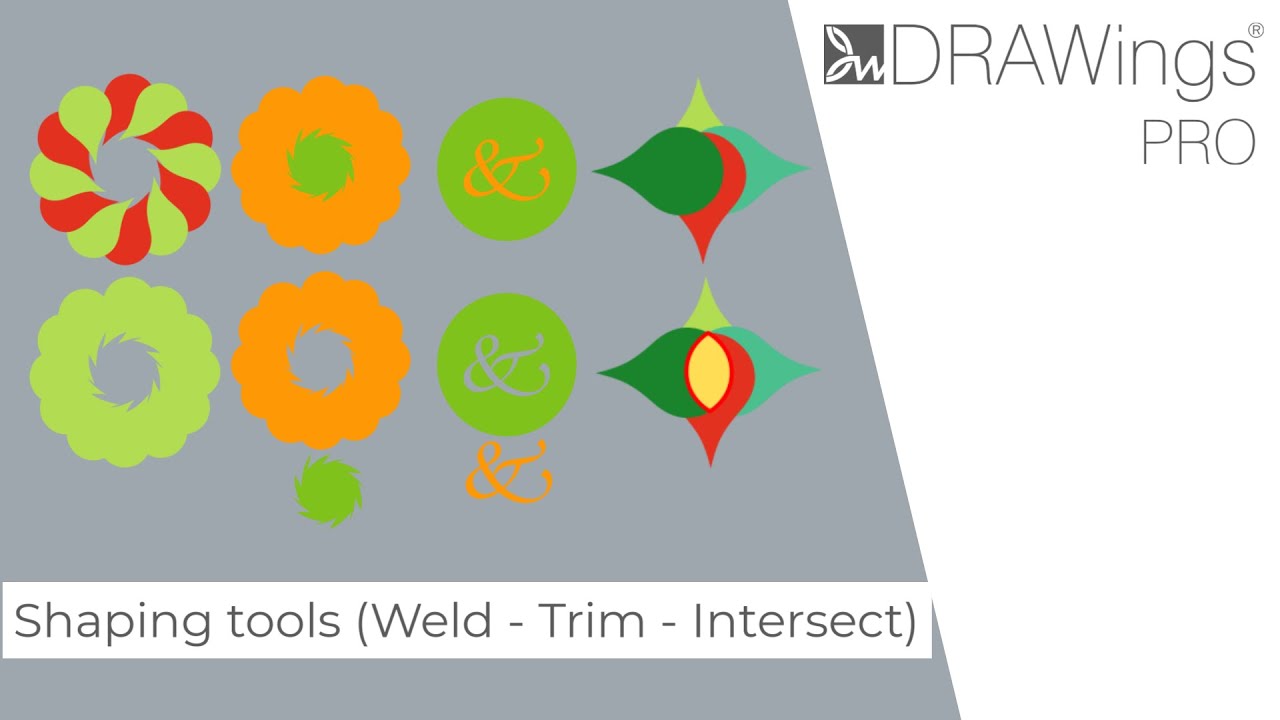
This guide covers the three main shaping functions: Weld, Trim, and Intersect.
Accessing the Shaping Tools
The Shaping tools are located on the Standard Toolbar.
Note: The Shaping icon and menu are context-sensitive. They will only become visible when you have two or more objects selected on your workspace.
- Select the objects you wish to manipulate.
- Locate the Shaping section on the Standard Toolbar.
- Click the icon to reveal the drop-down menu containing Weld, Trim, and Intersect.
1. The Weld Tool
The Weld tool combines multiple selected shapes into a single object with a single outside boundary.
How to use it:
- Select the objects you want to combine.
- Click the Weld tool from the Shaping menu.
- The objects will merge into one.
Understanding Property Inheritance: The resulting welded object will inherit the fill and outline properties (color, stitch type, etc.) of the last selected object.
- In the software, the last selected object is indicated by a magenta outline.
- Example: If you select a red circle first and a green square last, the final welded shape will be green.
Useful Tip: Welding Non-Overlapping Objects You can weld objects even if they do not touch. This acts like a “Group” or “Combine” function.
- A new single object is created containing the sub-objects.
- All sub-objects will share the same attributes.
- To reverse this, right-click the object and select Break Apart.
2. The Trim Tool
The Trim tool allows you to create holes or reshape objects by removing the overlapping areas.
How to use it:
- Place the object you want to use as a “cutter” on top of the object you want to cut.
- Select both objects.
- Click the Trim tool from the Shaping menu.
- The area covered by the top object will be removed from the bottom object.
Requirements:
- Objects must overlap partially or entirely for Trim to work.
Useful Tip: Creating Vector Designs Trimming is the fastest way to create “negative space” in embroidery designs. For example, if you want a donut shape, place a smaller circle inside a larger one and use Trim to remove the center, rather than trying to digitize a ring manually.
3. The Intersect Tool
The Intersect tool creates a new object defined strictly by the area where selected objects overlap.
How to use it:
- Select two or more overlapping objects.
- Click the Intersect tool from the Shaping menu.
- A new object is created that matches the shape of the common overlapping area.
Multi-Object Intersection:
- If you select more than two objects (e.g., 4 overlapping circles), the new shape will be the small area common to all 4 objects.
Useful Tip: Property Inheritance for Intersect Unlike Weld, the new object created by the Intersect tool typically inherits the color and properties of the object that is on top of the stacking order.
Troubleshooting Common Issues
If you are having trouble using the Shaping tools, check the following common solutions:
1. The Shaping icon/menu is missing or greyed out.
- Cause: The software requires at least two objects to be selected to activate these tools.
- Solution: Ensure you have selected multiple objects (hold
CtrlorShiftand click, or drag a selection box around them). Once two or more objects are highlighted, the Shaping icon will appear on the Standard Toolbar.
2. The “Weld” tool changed my object to the wrong color.
- Cause: The Weld tool applies the properties (color, stitch type) of the last selected object to the final shape.
- Solution: Undo the action (
Ctrl+Z). Deselect your objects, then select them again in a specific order. Ensure the object with the properties you want to keep is selected last (it will have a magenta outline).
3. The “Trim” tool didn’t cut a hole.
- Cause: The objects selected do not overlap.
- Solution: Move the top object so that it covers part of the bottom object. The Trim tool only functions on areas where objects physically touch or overlap.
4. “Weld” didn’t merge the shapes; it just grouped them.
- Cause: You welded objects that were not touching or overlapping.
- Solution: This is normal behavior. When non-overlapping objects are welded, they are combined into a single “Curve” object but remain visually separate. To reverse this, right-click the object and select Break Apart.
DRAWings PRO Help Group
Happy crafting and don’t forget to share your creations with us in the
DRAWings PRO Help Group!
Related posts





Projects
How to Modify Built-In Fonts into Custom Designs: Dripping Halloween Lettering
Every embroidery program ships with fonts that are already digitized. They stitch cleanly, and they are also the same fonts everyone else has.Digitizing a Knockout Layered Varsity Monogram with Nested Script Lettering
Layering script text over a bold collegiate letter is a staple in team apparel, varsity jackets, and custom fleece.How to Embroider a Photo onto a T-Shirt with PaintStitch™ and Sketch
A favorite vacation photo does not have to stay on your phone or disappear into a folder. With DRAWings PRO embroidery software, you can turn a photo into an embroidery design and stitch it onto a T-shirt as a wearable keepsake.










