How to Elevate Your 3D Foam Embroidery with Custom Textured Patterns
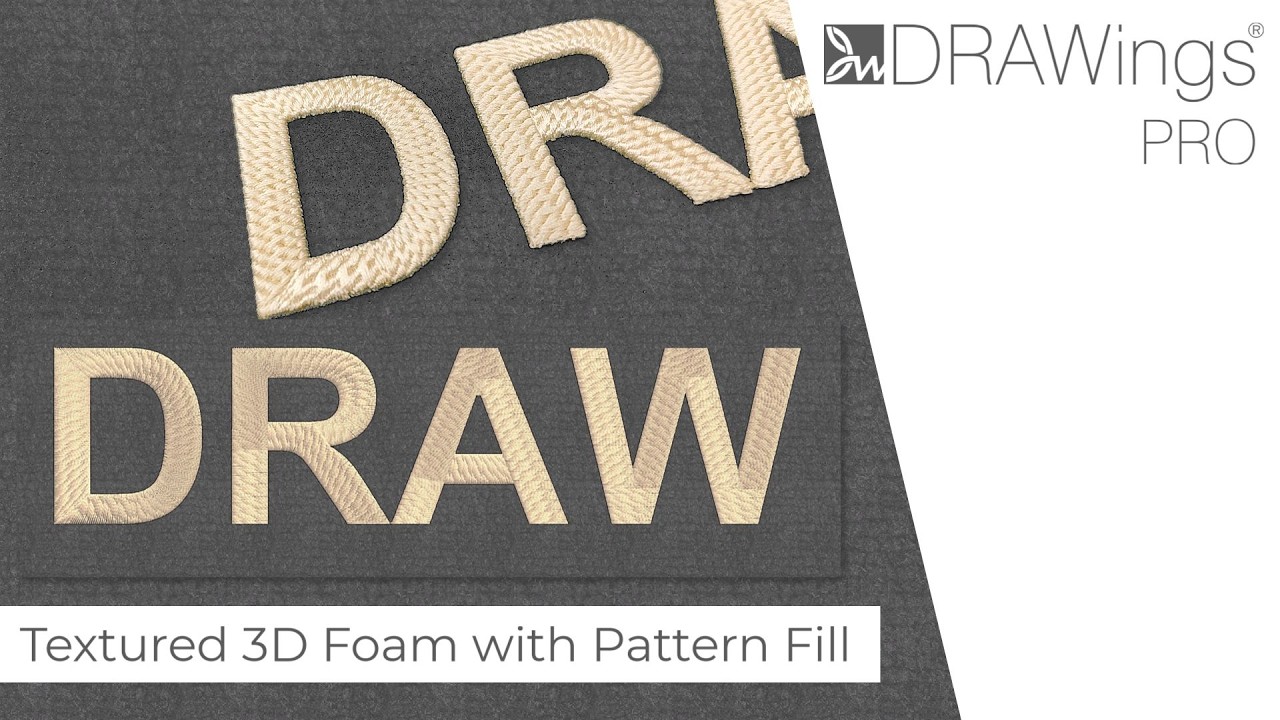
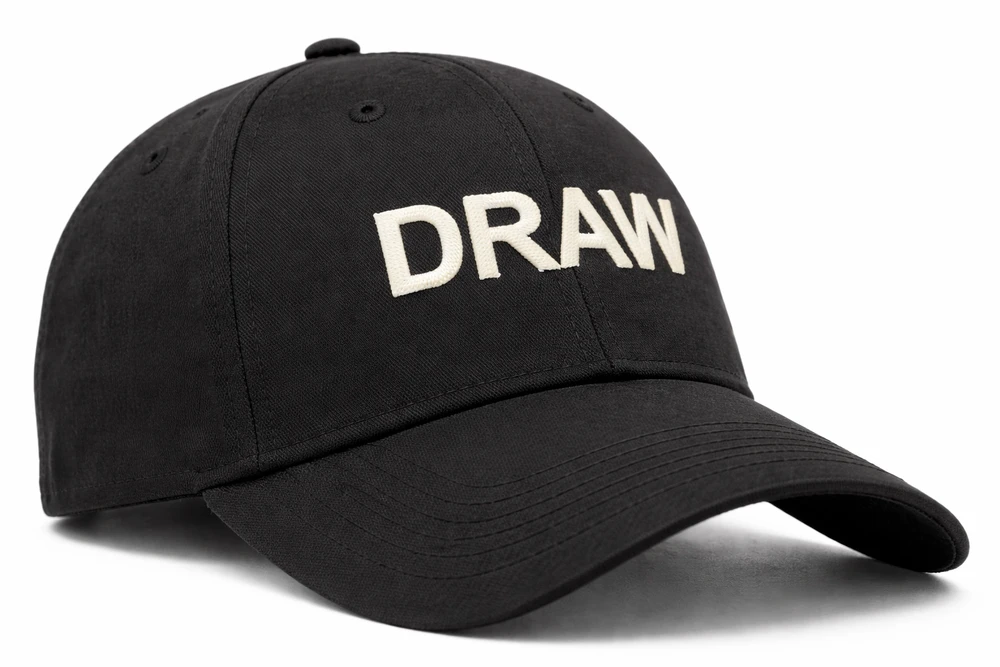
If you have been in the embroidery game for more than a few minutes, you already know that 3D foam is the undisputed king of making a design pop. We’ve all seen it on premium sports caps, streetwear hoodies, and high-end varsity jackets. It adds that incredible height, a bold, significant dimension, and a tactile texture that makes people literally want to reach out and touch the fabric.
But if we are being completely honest with ourselves, standard 3D puff can sometimes feel a little… predictable. You digitize a wide satin stitch, you lay down your foam, you stitch it out, and you get a smooth, elevated surface. It looks great, but it’s what everyone else is doing.
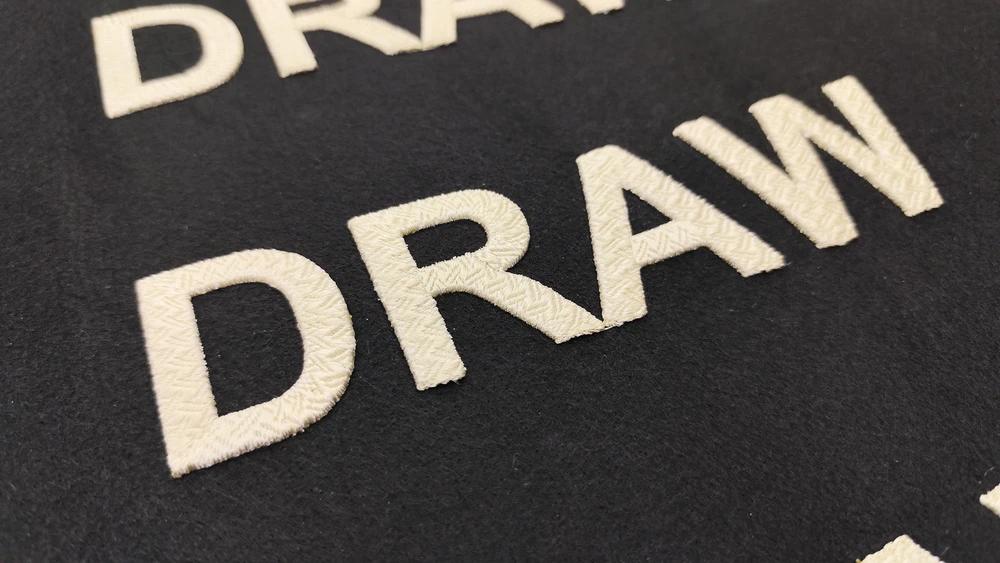
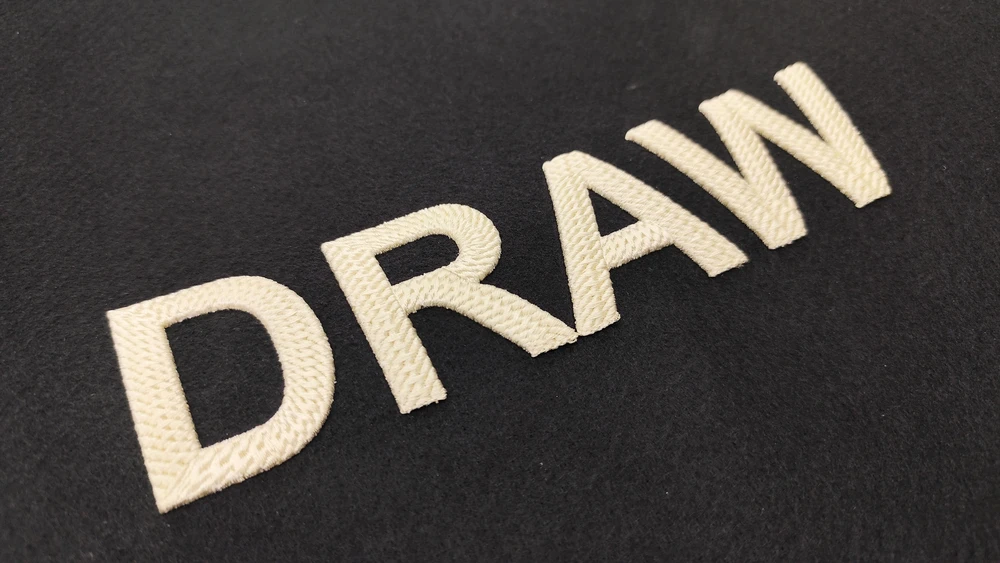
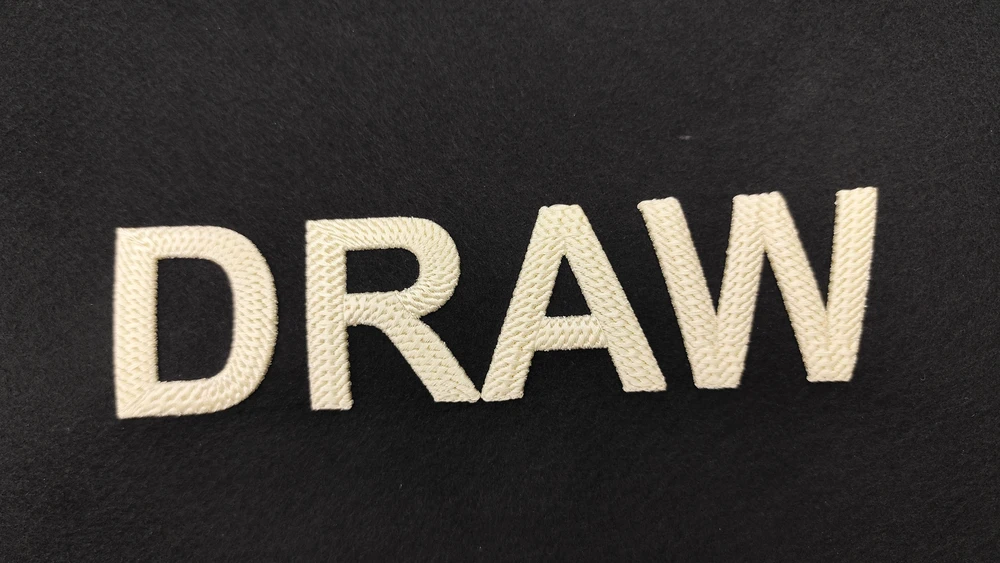
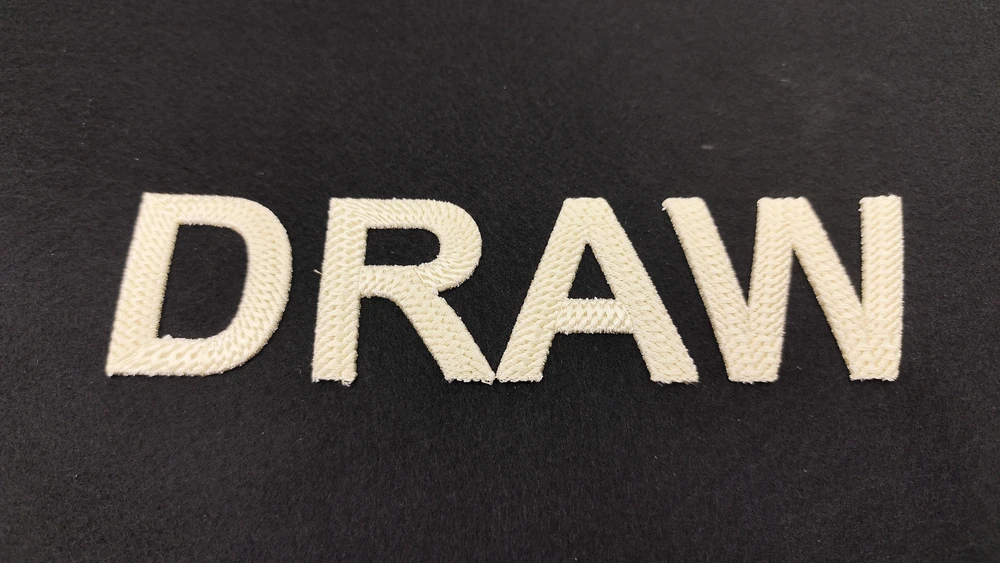
So, how do we push the envelope? As someone who spends almost every waking hour inside DRAWings PRO and behind a running machine, I am always looking for that next “wow” factor. Recently, I started asking myself: What happens if we don’t just settle for a smooth satin finish? What if we add a custom pattern style straight into that covering satin stitch? When you combine the elevated, raised effect of 3D foam with a beautifully textured stitch pattern, something magical happens. The way the thread reflects the light changes entirely. It creates a fresh, intricate, textured look that makes your design completely unique and truly stand out from the crowd.
In this post, I am going to walk you through exactly how to achieve this textured 3D foam look in your embroidery software. We aren’t just going to cover what buttons to press; we are going to dive deep into why we are using these specific settings so you can master the technique and apply it to any project you dream up. Let’s get into it.
The Foundation: Choosing the Right Text and Scale
Before we start playing with fun patterns, we need a solid foundation. 3D foam embroidery requires space. If your columns are too narrow, the foam won’t puff up correctly, and your needle will end up tearing the material to shreds.
To start your project, open up your Lettering tool and type out your word in capital letters. For this specific technique, uppercase letters generally work best because they tend to have blockier, wider columns. In our studio example, we are using the word “DRAW”.
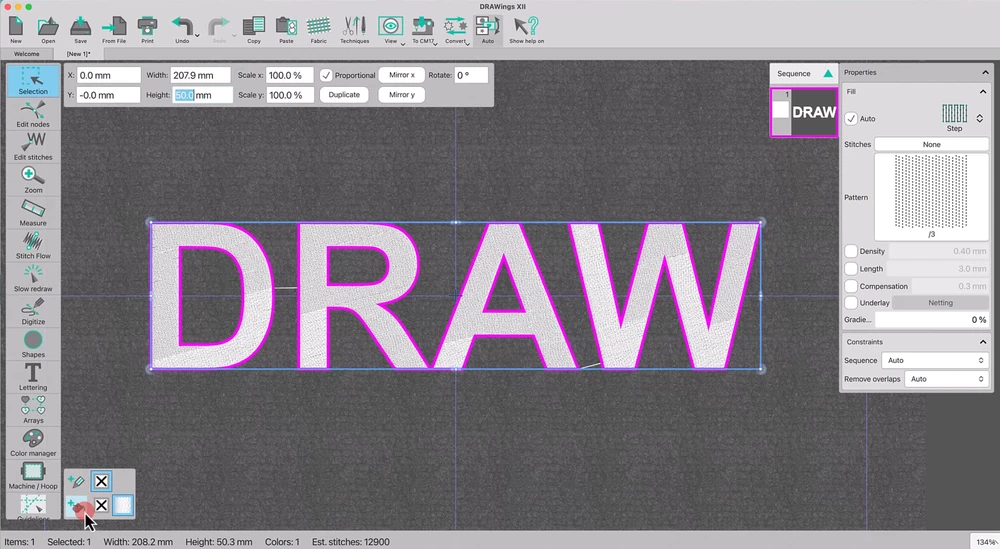
When it comes to font selection, you want to stick to something robust. Choose the Arial Font and make sure you set it to Bold. Arial Bold is practically perfectly engineered for 3D puff because it offers wonderfully consistent column widths without any fussy, microscopic serifs that would get lost in the foam.
Next, head over to the Tool Options pane. Make sure the ‘Proportional’ box is checked, and set your Height to 50mm. Why 50mm? When you are working with standard 3mm thick embroidery foam, you need a satin stitch wide enough to bridge over that foam without pinching it too tightly. A 50mm letter height ensures that our satin columns are wide and generous, giving the foam plenty of room to expand underneath the thread.
Finally, pick a bright Fill color for your lettering. This doesn’t dictate your thread color, of course, but choosing a high-contrast color on your screen just gives you a much better preview as you work through the digitizing process. Once you have your color, head to the Properties bar and change your Fill type to Satin.
Applying the Magic: The Textured Pattern
Here is where the traditional 3D puff process takes a detour into something much more exciting. Usually, you would leave that satin stitch perfectly smooth. But we are going for texture.
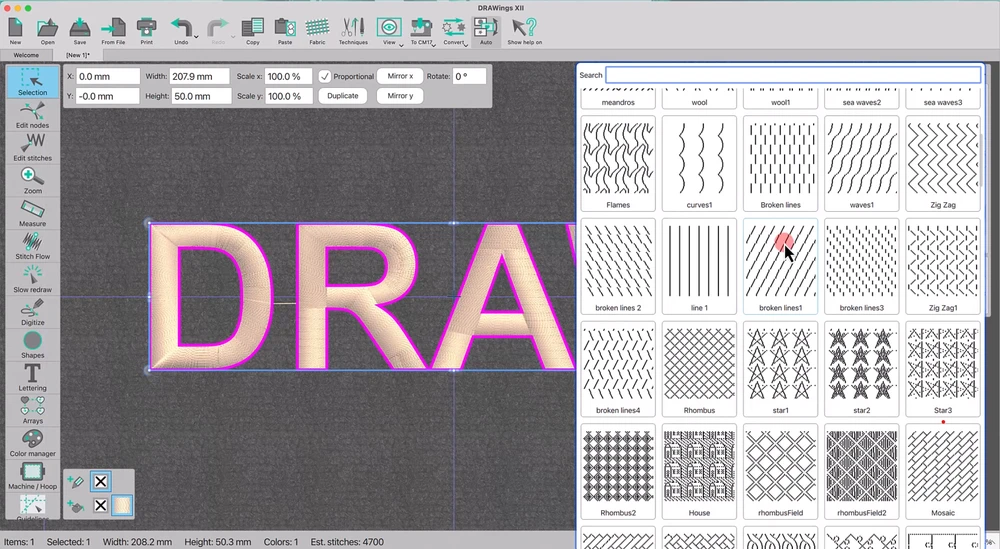
Open up the Pattern selection menu in your software. This area is a goldmine of creative potential, giving you access to all the pre-digitized patterns that can be applied directly into your fill shapes. You can scroll through the library, but to save time, use the search bar to find the pattern called “sea waves3”.
Click to apply it, and watch your screen. You will notice how your design preview updates instantly in the workspace! Suddenly, that boring, flat satin stitch has life, movement, and incredible texture.
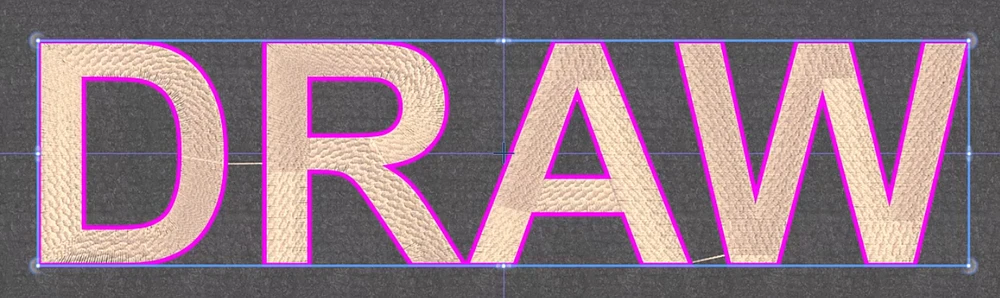
However, we can’t just apply a standard pattern and walk away. The default parameters for these patterns are usually optimized for flat embroidery, not for wrapping around a thick piece of spongey foam. By default, the Length of the pattern stitch might be set to around 3 mm. Because our satin stitch is draping over 3D foam, we need those pattern variations to be wider and more pronounced so they don’t just get buried in the puff. Go ahead and set the Length to 6 mm.
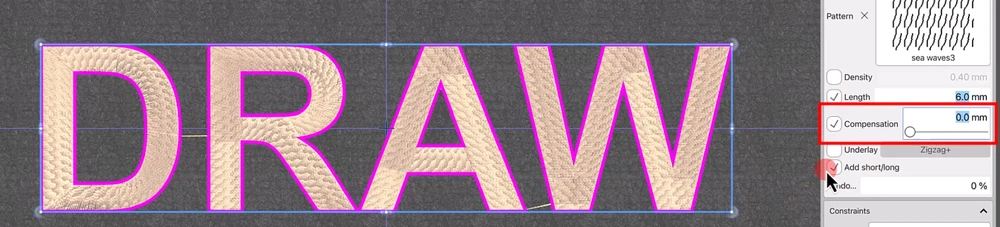
Next, find your Compensation setting and drop it down to 0mm. Pull compensation is normally crucial in embroidery to account for the fabric pulling inward as the thread tightens. But with 3D foam, the foam itself acts as a massive stabilizer and dictates the shape. Adding standard software pull compensation here can actually distort the pattern and over-saturate the edges, so keeping it at zero gives us a cleaner, more predictable result.
The Secret to Preserving Your Foam: Mastering Underlays
If you have ever tried 3D embroidery and ended up with a flat, mashed-up design that looked like it went through a blender, your underlay was probably the culprit.
In standard embroidery, we use dense underlays (like zig-zags or double edge runs) to bond the fabric to the stabilizer and create a raised foundation. If you do that with foam, you will literally flatten the foam before your top stitch even begins. Even worse, too many needle penetrations will slice the foam into tiny pieces, ruining the structural integrity of the “puff.”
To fix this, go to your underlay settings and set the Underlay to “Tacking”.
Why Tacking? Tacking underlay is specifically designed for 3D foam. It uses long, sparse running stitches simply to travel between the different areas of the letter. It avoids excess needle penetrations, essentially tip-toeing across the foam rather than trampling it. This ensures your foam stays plump, whole, and perfectly intact until the top covering stitches are applied.
Engineering the Perfect Edge: The 8-Pass Secret
Now we arrive at the most critical mechanical part of digitizing for 3D foam: getting the foam to cut cleanly.
In 3D foam embroidery, you do not manually cut the foam out from the inside of your letters. Your embroidery machine’s needle acts as a tiny perforation blade. Every time the needle penetrates the foam along the edge of your satin stitch, it creates a hole. If you put enough holes close together, the foam effortlessly separates and peels away once the stitching is done. Dense edges are absolutely essential to cleanly slice and remove excess foam later.
To see what we are working with, you need to disable the 3D preview. You can do this from the View menu, or by simply pressing the “P” key on your keyboard. Switch to the Stitch view and enable the Stitch points option. This is a game-changer. It replaces the pretty thread graphics with technical dots, helping you see exactly where each individual needle will pierce the fabric.
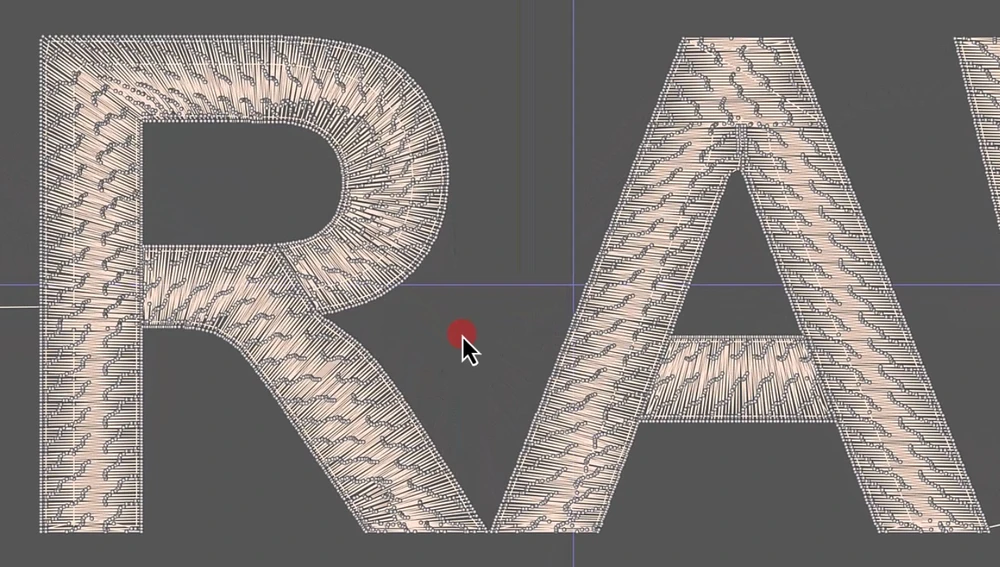
Looking at our patterned design, you’ll notice that because of the custom wavy pattern, the needle drops on the edges aren’t perfectly uniform. If we stitch it like this, the foam won’t cut, and you’ll be left with hairy, frustrating bits of foam poking out everywhere. We need to manually add stitch points along the edges of each letter for clean foam cutting.
The traditional approach to fixing this in standard puff embroidery involves using small, narrow satin rectangular caps placed under the covering stitches at the open ends of columns. But if we do that here, those dense satin caps will peek through and completely disrupt our beautiful “sea waves3” custom pattern.
Instead, we are going to use a brilliant hack: straight Running stitches.
Grab your outline tool. In the Outline properties, set the number of Passes to 8. You heard that right—eight passes. This will make the stitching incredibly dense along the absolute border of the shape. Now, you might be thinking, “Won’t the needle just hit the exact same hole 8 times and snap my thread?” No! Our software is incredibly smart. It automatically offsets the starting point of each of those passes by a microscopic fraction. This ensures the needle hits fresh spots each time, creating a perfect, dense perforation line without causing thread build-up or breakage.
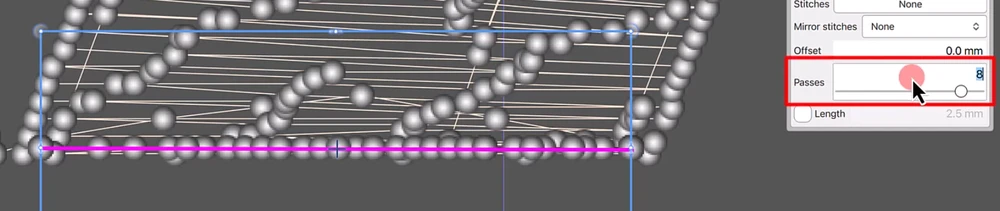
Carefully apply these 8-pass Running stitches to every single outer and inner edge of your letters. Take your time here; better results come from precision. Hold down the Shift key as you click to create Cusp Nodes (sharp corners) around the sharp angles of the letters. To finalize each section you draw, press Escape, press Enter, or simply right-click once.
Once you have traced an object, go to Selection mode to close the Object. Make sure the number of Passes is set to 8, and then Break the lines apart. This turns them into individual, manageable stitch blocks that we can easily sequence later.
Securing the Canvas: The Centerline Tacking Stitch
Before any of that beautiful edge work or patterned satin gets stitched, we need to make sure the physical piece of foam doesn’t slide around in the hoop while the machine is moving rapidly. We need to add a tacking stitch.
To do this quickly, duplicate your “DRAW” word layer. Right-click on the duplicate and select the ‘Convert fill to center line’ option. This strips away all the dense fill and leaves you with a single line running perfectly down the middle of your letters.
In the Outline properties bar for this new layer, set the type to Running, and set the Outline width to 0.4 mm. Most importantly, you need to set the stitch length to 4.0mm.
Why 4.0mm? Remember what we said about the needle acting like a knife? If you use a standard 2.5mm running stitch to hold your foam down, you will inadvertently perforate the very center of your puff, causing it to split down the middle once the satin stitches pull tight over it. A long 4.0mm stitch holds the foam securely in place while minimizing the number of holes, ensuring the foam is held tight without cutting it.
Organizing the Chaos: Sequencing and Manual Mode
Now we have all our elements: the patterned satin fill, the 8-pass cutting edges, and the centerline tacking stitch. But if your machine stitches them in the wrong order, the whole project will fail.
Switch your software into Manual mode so you can refine the sequence.
First, select your main Satin-patterned layer. Right-click, go to the Order submenu, and choose ‘Send to Front’ of the design. In embroidery software terminology, “Front” means it stitches last. We absolutely want that beautiful, textured satin to be the final thing the machine lays down, covering all the mechanical edge work we just did.
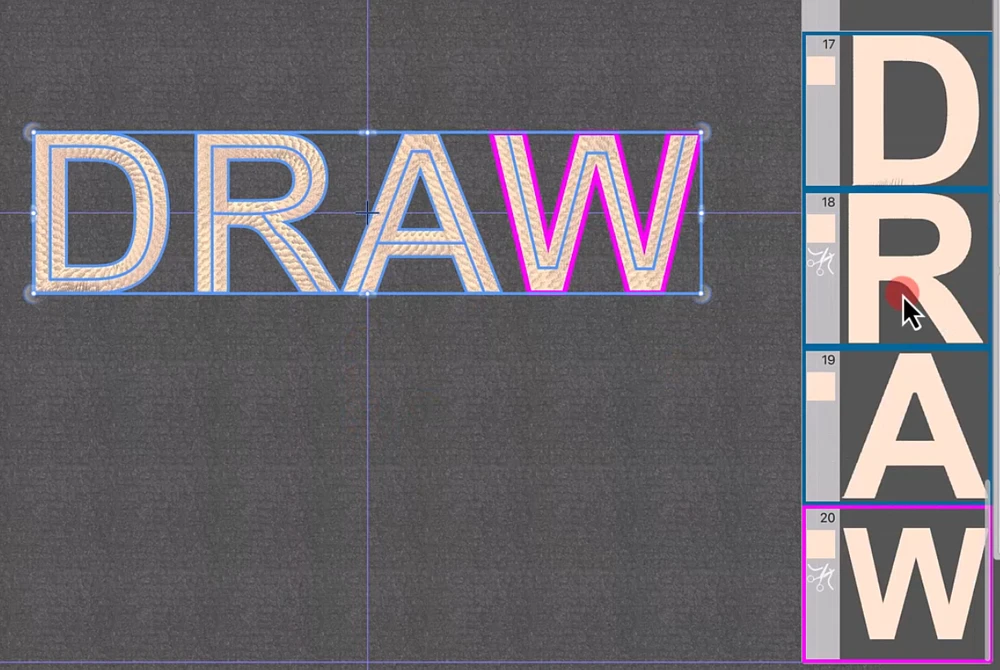
While you have that layer selected, go to the Properties menu and set ‘Remove overlaps’ to Never. This is a crucial 3D foam tip. Usually, if embroidery overlaps, the software deletes the hidden stitches to prevent bulk. But in foam embroidery, we want everything to stitch exactly as we programmed it, directly on top of the foam. If the software auto-removes overlapping stitches, your foam will be exposed.
Finally, use the control key on your keyboard to select both this main layer and your centerline Running stitch (which should be at the very beginning of the sequence). Right-click and select Break them apart. This decouples any automated grouping, giving you absolute, granular control over exactly when each element stitches.
Your sequence should look like this:
- Centerline tacking stitch (holds the foam).
- The 8-pass running stitches (cuts the edges).
- The patterned satin stitch (the beautiful cover).
Once your sequence looks right in your software’s object manager, send the design to your machine. You are going to love that wavy texture!
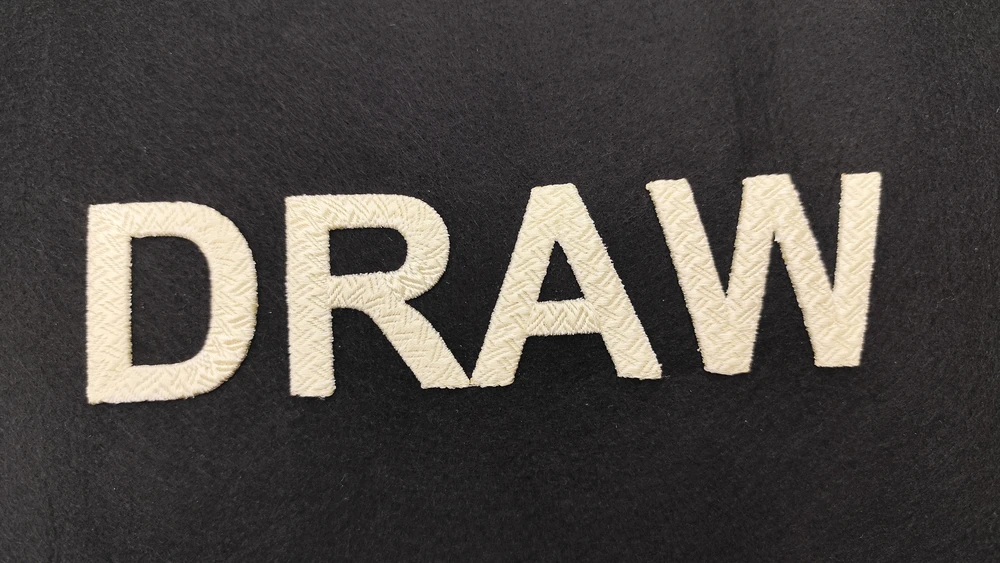
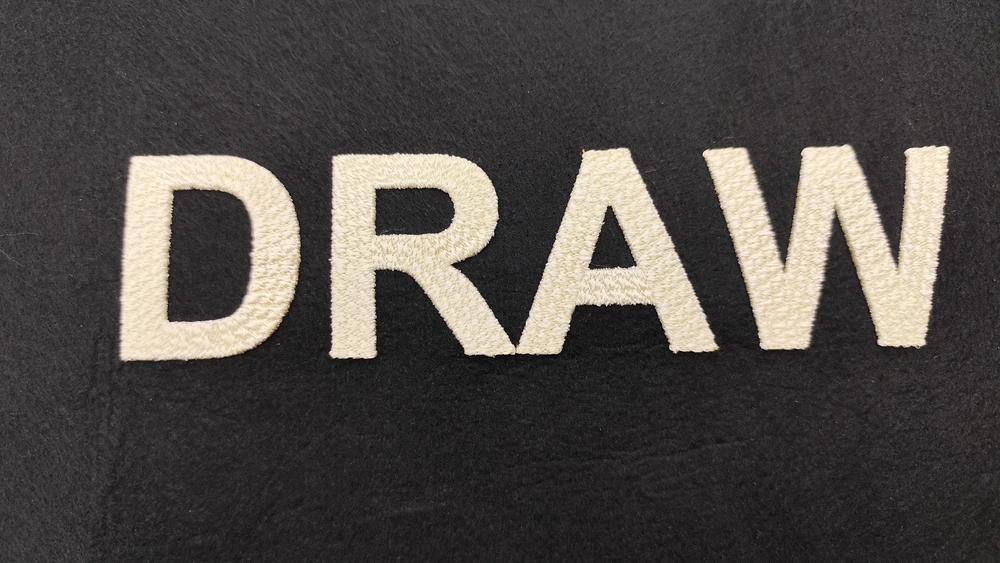
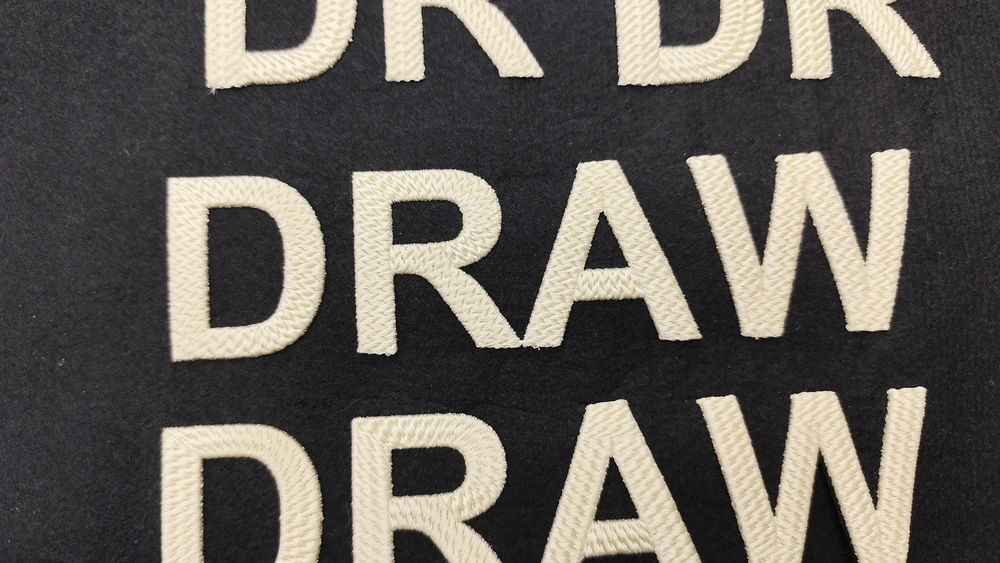
Expanding Your Repertoire: 5 More Incredible Pattern Combos
Once you master the “sea waves3” pattern, you will immediately want to start experimenting. Here are 5 more pattern combos I have personally embroidered, each utilizing the exact same 3D foam setup, 8-pass edge routing, and tacking sequence we just discussed.
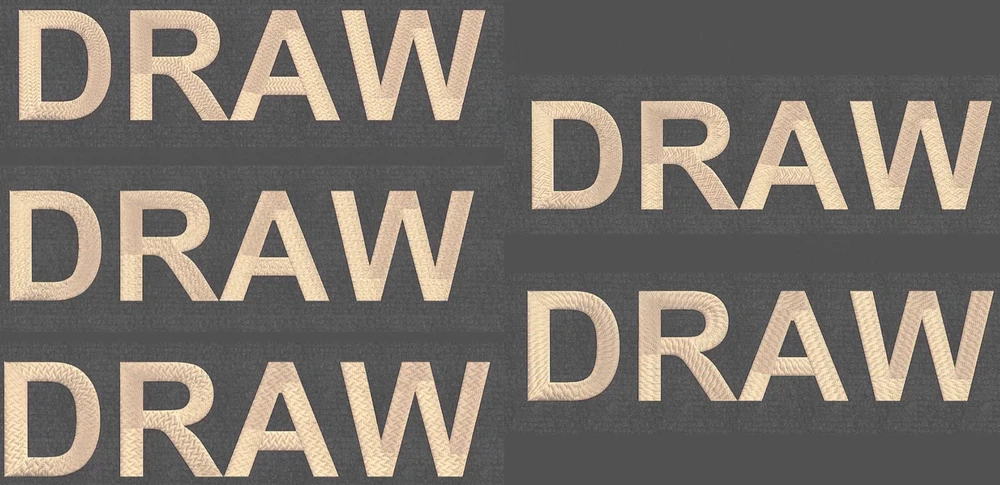
- Pattern Broken lines 2: This creates a fantastic, slightly distressed, barcode-like texture that looks amazing on modern streetwear designs.
- Pattern Broken lines 4: Similar to the above, but with a different frequency. For both Broken lines 2 and 4, I recommend setting your stitch Length to 4mm and your Compensation to 0mm.
- Pattern Mosaic 14: This pattern gives an almost reptilian, scaly texture to the foam. It catches the light brilliantly.
- Pattern Mosaic 16: A slightly more geometric variation of the mosaic style. For the Mosaic combos, set your Length to a wider 6mm and keep the Compensation at 0mm so the geometric shapes don’t blur together.
- Pattern Triangle2: Last but certainly not least, this pattern gives a sharp, aggressive, diamond-cut look. It looks fantastic on sports logos. Set your Length to 4mm and Compensation to 0mm for this one.
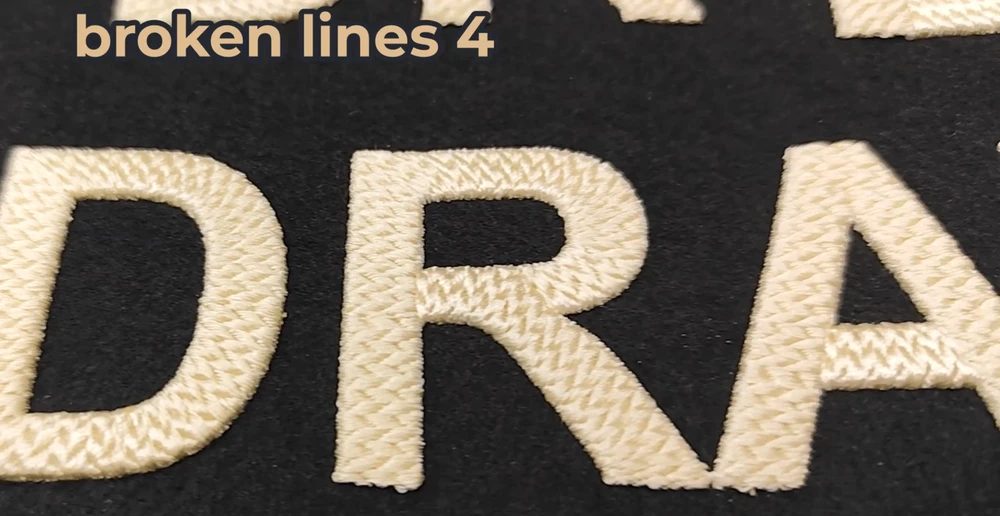
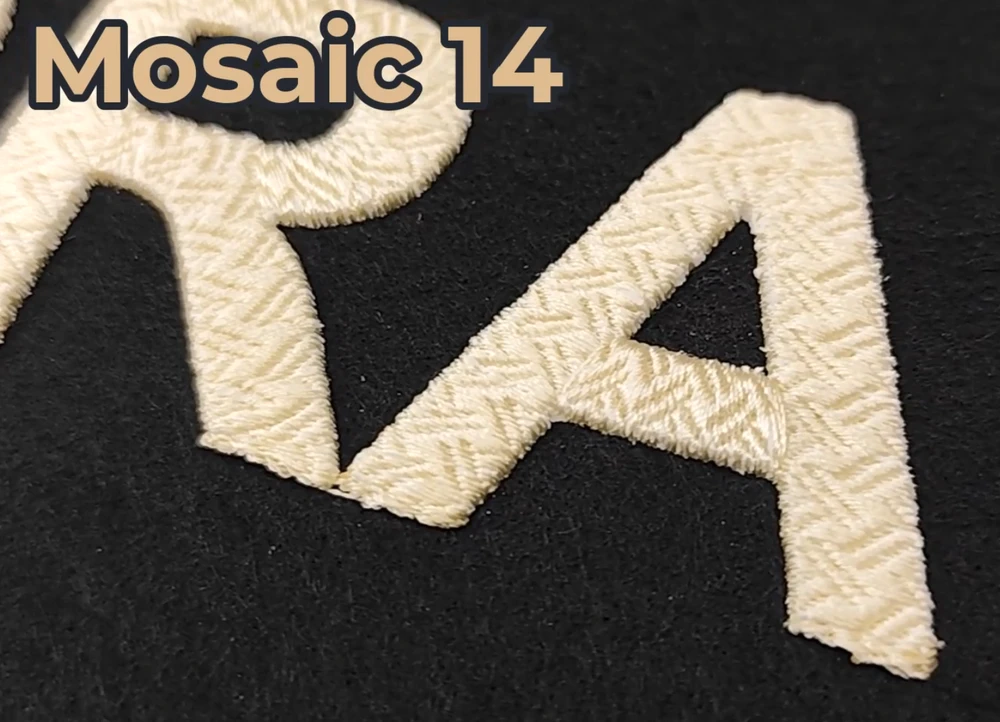
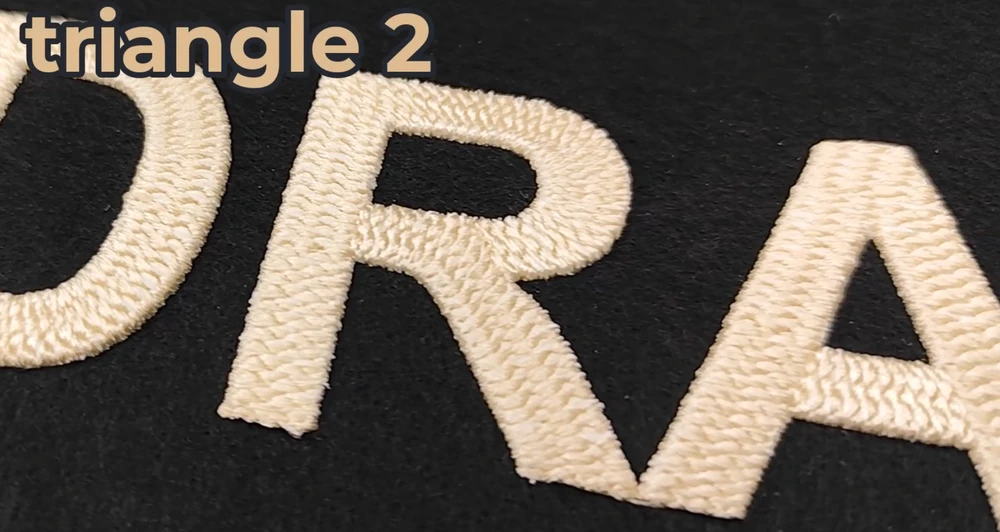
Which one is your favorite? Do share your feedback in the comments, or better yet, play around in the software and try your own combos!
From Screen to Machine: The Embroidery Process
You have perfectly engineered your file. Now, let’s move on to the actual physical embroidery part, because how you hoop and run the machine is just as important as how you digitized the file.
Start by hooping your fabric along with a piece of high-quality, sturdy cut-away stabilizer. Foam adds a lot of density and tension to a garment, so you need a stabilizer that will not stretch or yield under pressure.
Next, place a piece of 3mm embroidery foam directly on top of the hooped fabric. Here is a massive pro-tip: always match the foam color as closely as possible to your top thread. No matter how perfectly you digitize your edges, tiny micros-gaps can occur when the thread shifts. If you use white foam under black thread, it will stick out like a sore thumb. Using black foam under black thread hides a multitude of sins.
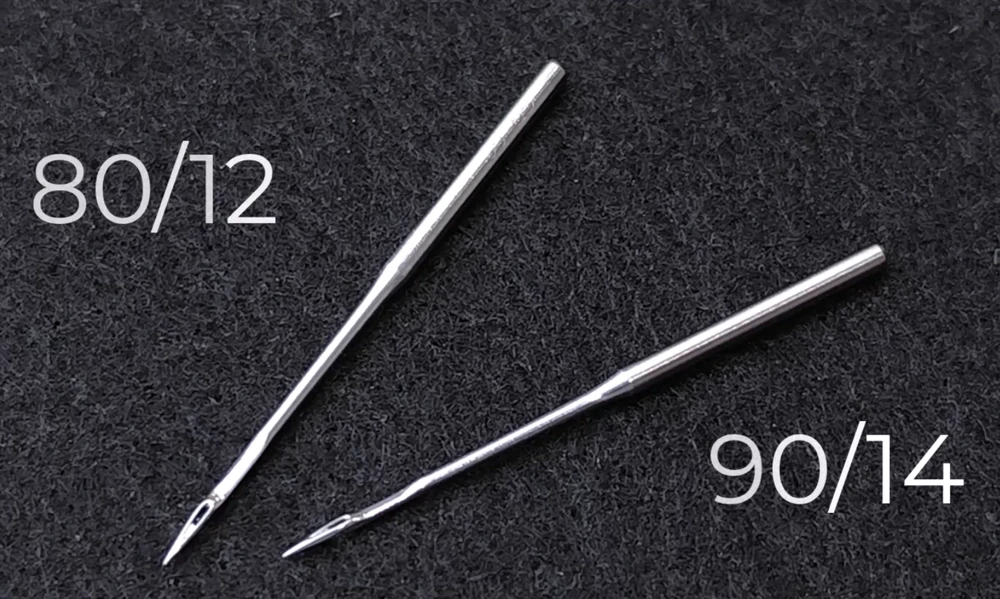
When you thread your machine, you need to change your needle. Standard 75/11 needles will bend, deflect, and potentially snap when trying to push through dense thread and 3mm of foam multiple times. Start embroidering using a thick, sharp needle—either a 90/14 or an 80/12. The thicker shaft prevents deflection, and the sharp point ensures it cuts the foam rather than just punching blunt holes in it.
Hit start on your machine. Watch as it works through the sequence you built:
First will be the long, 4.0mm running stitch that keeps the foam perfectly in place without ruining it.
Then, you will see the machine trace the borders, laying down those 8-pass edge stitches, essentially perforating the outline.
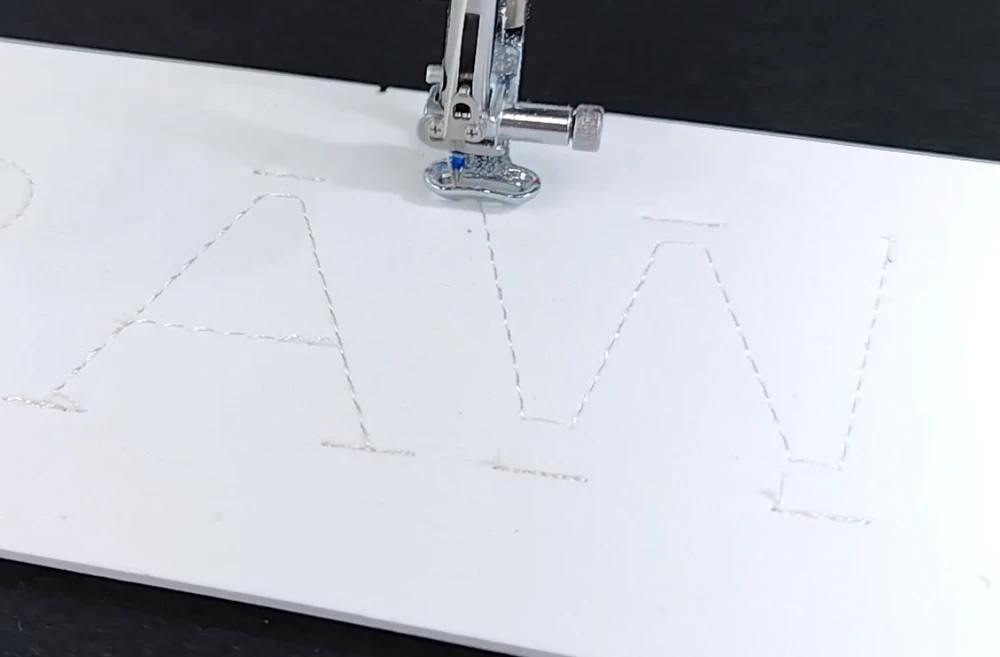
Finally, the chosen patterned satin-cover will sweep back and forth, completing the design and locking all the texture in place.
The Finishing Touches: Achieving Professional Perfection
Once the machine ties off and finishes, unhoop your garment.
Now, grab the edges of the excess foam and remove the foam carefully. Because we digitized those brilliant 8-pass borders, the foam should cleanly tear away from the edges of your letters almost like perforated paper.
However, you might still see tiny, microscopic little “hairs” of foam poking out between the needle penetrations along the edge of your satin stitches. Don’t try to pick these out with tweezers; you’ll be there all day and you risk pulling your threads loose.
For a true, professional finish, use a heat gun tool. Turn the heat gun on a medium setting and briefly, carefully sweep it over the surface of the embroidery. Keep the gun moving—do not hold it in one spot or you will melt your thread and burn your garment! The heat causes those tiny, errant bits of foam to instantly shrink and pull back underneath the thread, completely hiding them from view.
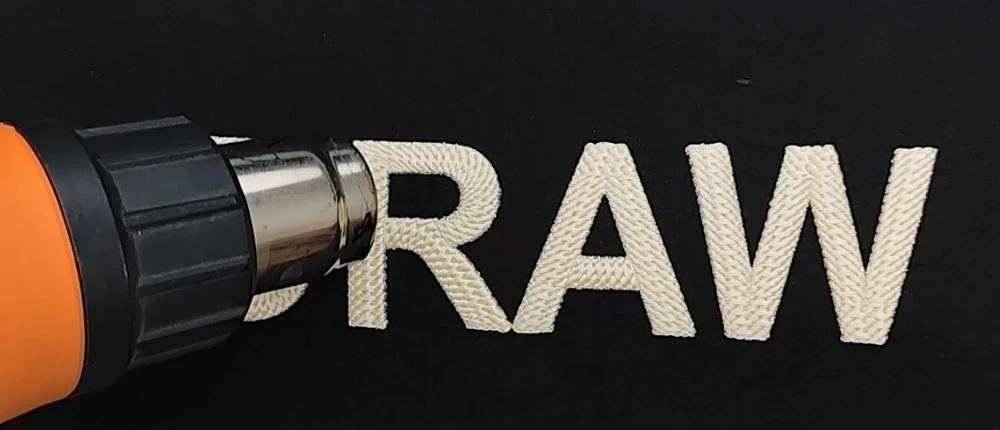
Once it cools, take a step back and look at your work. Look at how the custom stitch pattern reflects the light, giving your 3D puff a unique, premium finish that standard flat satin simply cannot compete with.
By taking the time to understand the ‘why’ behind the software settings—from the tacking underlay to the 8-pass edges—you have unlocked a whole new level of digitizing capability. I highly encourage you to experiment with other pattern combinations, tweak the stitch lengths, or try different robust fonts to find your own signature style.
When you do, be sure to share your creations in the comments! Happy digitizing, and we will see you in the next project.
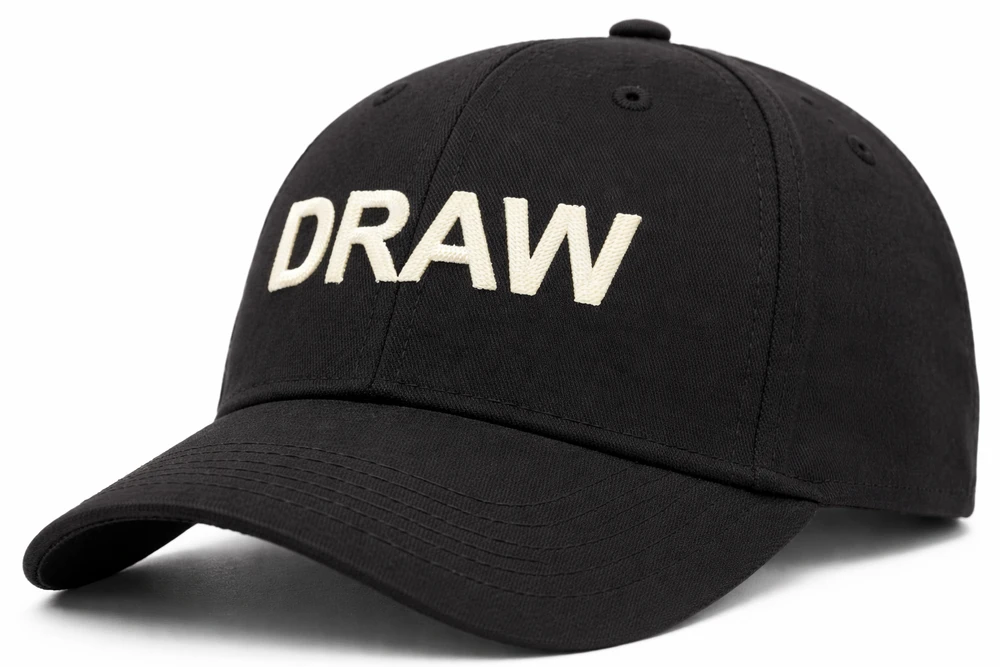
Happy crafting and don’t forget to share your creations with us in the
DRAWings PRO Help Group!
You can download the .DRAW file of the project and the image used, for free, from the link below:
- Project’s .DRAW file: How to Elevate Your 3D Foam Embroidery with Custom Textured Patterns
It can open only with the XII and later versions of DRAWings embroidery software
Share your experiences in our Facebook group, and don’t forget to subscribe to our blog for more innovative embroidery techniques and inspiration.
Frequently Asked Questions
Check also, our related projects
How to Modify Built-In Fonts into Custom Designs: Dripping Halloween Lettering
Every embroidery program ships with fonts that are already digitized. They stitch cleanly, and they are also the same fonts everyone else has.Digitizing a Knockout Layered Varsity Monogram with Nested Script Lettering
Layering script text over a bold collegiate letter is a staple in team apparel, varsity jackets, and custom fleece.How to Embroider a Photo onto a T-Shirt with PaintStitch™ and Sketch
A favorite vacation photo does not have to stay on your phone or disappear into a folder. With DRAWings PRO embroidery software, you can turn a photo into an embroidery design and stitch it onto a T-shirt as a wearable keepsake.