
How to Use Auto and Manual Sequencing in Embroidery Software
Properly sequencing your design is crucial for an efficient and clean embroidery stitch-out. DRAWings PRO XII offers two distinct ways to handle this: Auto mode, which intelligently calculates the best sewing order for you, and Manual mode, which gives you complete control over the timeline.
Here is a step-by-step guide to mastering both sequence modes.
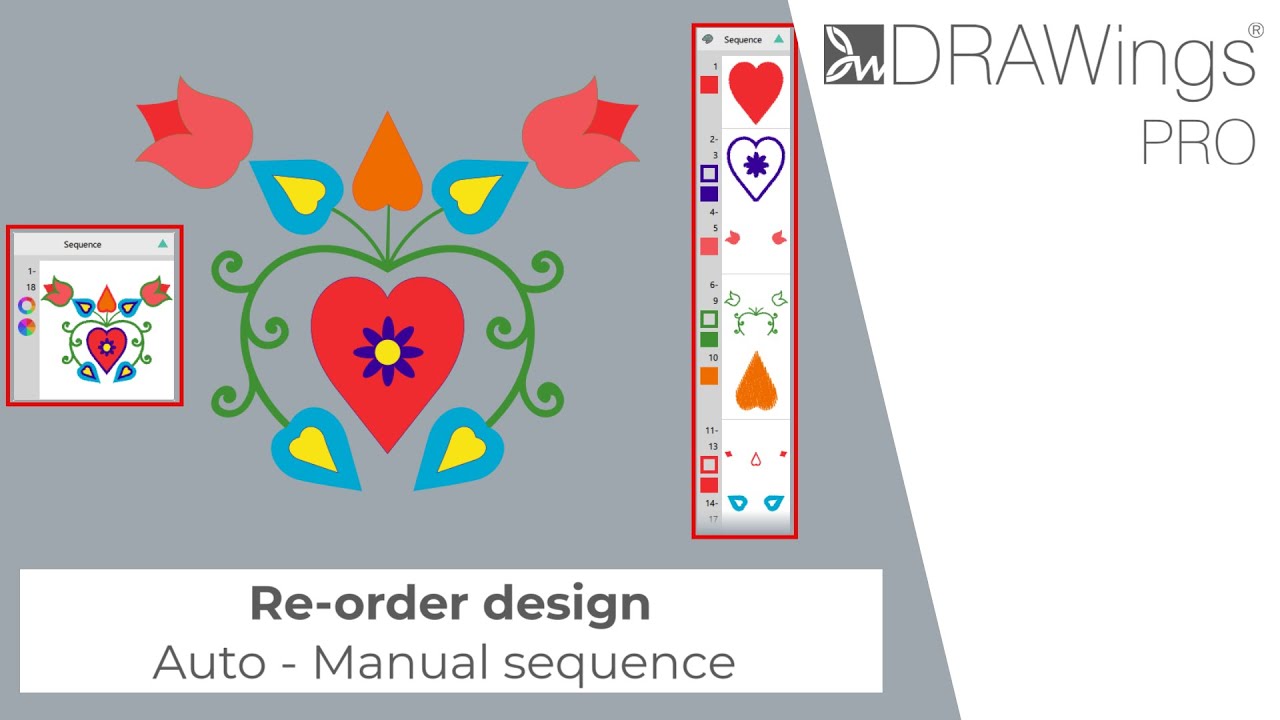
Understanding Auto Mode
By default, any new design is set to Auto mode. This means the software uses intelligent mechanisms to find the optimum sewing sequence based on built-in rules.
- Open your design in DRAWings PRO XII.
- Locate the Sequence window positioned at the top right edge of your design area.
- Observe the sequence timeline. You will see only a single icon representing the entire design, which indicates that the Auto function is currently controlling the order.
💡 Tip: You can adjust the size of the sequence icons to better fit your workspace. Simply hover your mouse over the left edge of the sequence window until a double arrow appears, then click and drag left or right.
Adjusting the Optimization Strategy
Even while in Auto mode, you can change the underlying rules the software uses to determine the sewing order.
- Open the Optimizer options menu.
- Navigate to the Optimization strategy section.
- Select a new strategy from the list. For example, selecting Large to small ensures the largest objects are embroidered first, while Small to large reverses this rule.
- Activate the Slow redraw feature to preview your design and verify the new sewing order.
Switching to Manual Mode for Custom Control
If you need to make specific adjustments to the sewing order that the Auto mode cannot accommodate, you can easily take full control.
- Locate the Auto button on the standard toolbar.
- Click the button to disable automatic optimization. The button’s label will change to Manual.
- Check the Sequence window. The single design icon will now be broken down into individual icons for every separate shape.
- Click and drag any individual icon to a new position on the timeline to create your exact desired sequence.
💡 Tip: Switching to Manual mode doesn’t mean you have to start from scratch. Upon switching, the software automatically applies your chosen Optimization strategy one last time. This does the heavy lifting for you, so you only need to make minor drag-and-drop tweaks to get the perfect final result.
How Manual Mode Handles Fills and Outlines
It is important to understand how the software modifies object properties when moving from automated to manual control.
- Note that in Auto mode, a single object can contain both a fill and an outline.
- Switch to Manual mode. The software will automatically separate the fill parts from the outline parts, creating distinct objects for each.
- Observe how the optimizer automatically rearranges these newly separated objects to minimize machine color changes and applies necessary trimmings.
- Drag and drop these separate fill and outline objects in the sequence timeline just as you would any other shape.
💡 Tip: Because Manual mode strictly requires objects to be either a fill or an outline, applying an outline color to a fill-only object will automatically remove its fill color, converting it into an outline-only object (and vice versa).
DRAWings PRO Help Group
Happy crafting and don’t forget to share your creations with us in the
DRAWings PRO Help Group!
Related posts





Projects
How to Modify Built-In Fonts into Custom Designs: Dripping Halloween Lettering
Every embroidery program ships with fonts that are already digitized. They stitch cleanly, and they are also the same fonts everyone else has.Digitizing a Knockout Layered Varsity Monogram with Nested Script Lettering
Layering script text over a bold collegiate letter is a staple in team apparel, varsity jackets, and custom fleece.How to Embroider a Photo onto a T-Shirt with PaintStitch™ and Sketch
A favorite vacation photo does not have to stay on your phone or disappear into a folder. With DRAWings PRO embroidery software, you can turn a photo into an embroidery design and stitch it onto a T-shirt as a wearable keepsake.










