How to Digitize an Optical Illusion Monogram Design for a Tote Bag
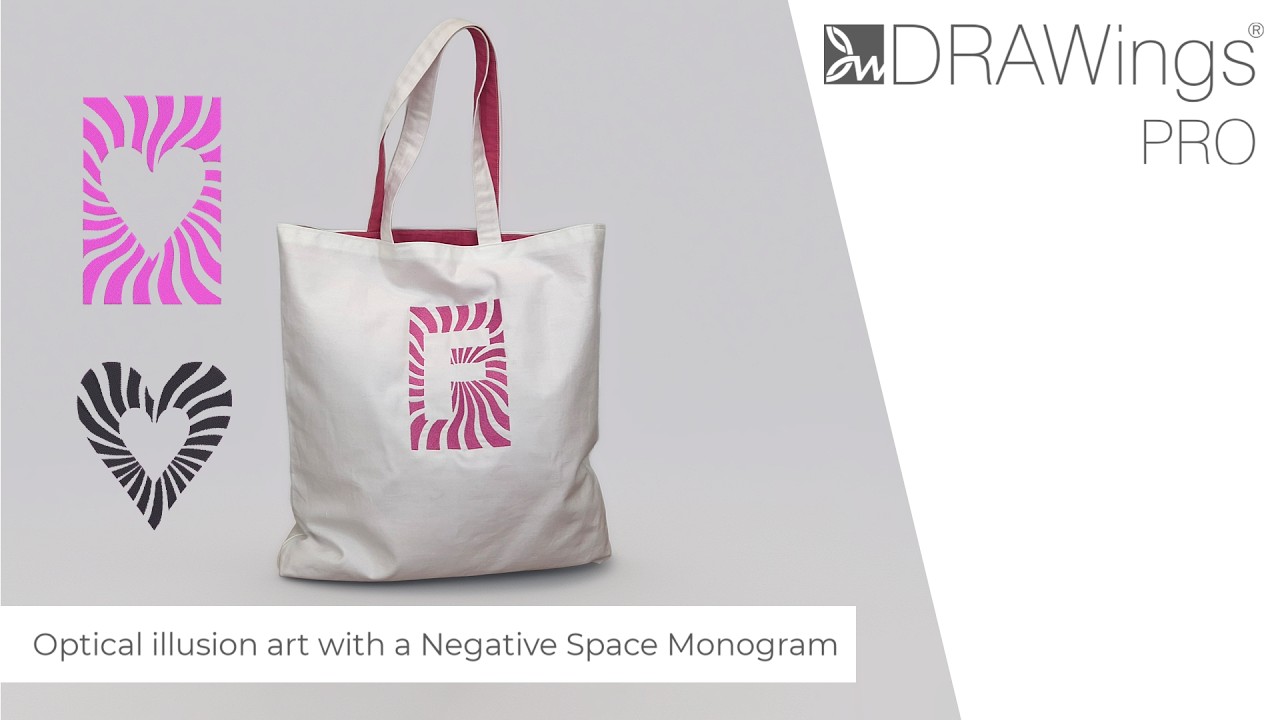
Op art has a funny effect on people. Show them a ring of straight-edged shapes arranged just right, and they’ll swear the pattern is moving. That’s the effect we’re borrowing for this project: a circle of geometric shapes that seems to spin in place, with a monogram sitting in the middle that isn’t stitched at all — it’s implied by the empty space where thread doesn’t go. It works from one shape, one array, and one letter, and it holds up just as well on a t-shirt as it does on a tote bag, which is what we used here.
Adding the Sew Tech Hoop as a Custom Hoop
For this one we used the Sew Tech 8-in-1 magnetic embroidery frames, in the 8 × 6 inch (15.24 × 20.32 cm) size — big enough to give a tote bag some presence without pushing the design past a size that stitches cleanly. (More on the Sew Tech range is linked below if you want it.) If this hoop isn’t already in your DRAWings list, adding it as a custom hoop takes about a minute, and once it’s saved you won’t need to do it again.

Hoops provided by SEWTECH Embroidery Machines and Magnetic Hoops
On Windows, that’s the Tools menu on the Welcome screen, then Options. On macOS it’s under Preferences in the DRAWings menu instead — DRAWings runs natively on both, so the dialog itself looks the same either way. From there, go to the Custom hoops tab, where every hoop you’ve saved lives, and press Add. Name the hoop, pick the machine manufacturer and model, set the shape to Rectangular, and define the stitch area: Width 130 mm, Height 180 mm. Press Create and it’s saved. The one step people forget is restarting the software afterward — DRAWings won’t pick up a new hoop until it relaunches.
Once it’s back open, click Create new, press the Machine icon on the Standard toolbar, and select Change. Scroll down past the built-in presets until you reach your custom hoops, and click the one you just added.
Setting the Work Area
Before drawing anything, it’s worth knowing exactly how big the finished piece needs to be, separate from the hoop itself. Under Guidelines mode, open the Work area option, leave the area type on Rectangular, and set Width to 100 mm and Height to 150 mm. That’s the actual footprint the design will occupy once it’s stitched, and having it marked out as a guide is easier than eyeballing it later. Press OK and it sits on the canvas without becoming part of the stitched design.
Drawing the Base Shape
The whole effect starts from one long triangle. From the Tools toolbar, activate Polygon under Ready-made shapes, set Number of sides to 3, and set the Start angle to 90 degrees so it points the direction we need from the first click. Drag out a long, narrow shape — the exact size comes next, so this first pass doesn’t have to be precise.
Switch to Selection mode and set Width to 17 mm. Height matters more: it needs to be a little longer than the diagonal distance from the center of the hoop to the corner of the design, so set it to 94 mm. Come up short here and the triangles won’t quite reach the center once they’re arrayed, leaving a gap in the middle that’s harder to fix than a bit of overhang would have been. Then set X to 0 mm and Y to −47 mm, which pulls the long edge of the triangle toward the center of the hoop.
With the triangle selected, open the Colors bar and click the X on the upper row to remove its outline, since we only want a filled shape once this gets copied twenty-plus times. Add a fill color using the bucket icon with the plus sign on the lower row, and pick something that contrasts with your fabric — we used an ivory bag, so dark purple was the obvious choice. Finish by right-clicking the shape and choosing Convert to curves. That turns it from a fixed polygon into an editable curve object, which is what the next section needs.
Building the Circular Array
This is where the design starts to move. From the Arrays section on the Tools bar, choose Circular array. In the Tool options pane, select Full circle from the Preset list, set Step count to 22, and check that both Clone objects and Clockwise are enabled. Rotate the array if the triangle’s long edge isn’t pointing at the center, then apply it. Twenty-two triangles fanning out from the middle already reads as a geometric embroidery design on its own, but it’s still flat.
Clone objects is doing more work than it looks like. Because every copy is linked as a clone of the original, reshaping one reshapes all twenty-two at once — which is the only reason the next step is realistic to do by hand.
Start the Node editor and select one clone. Right-click and choose Add Nodes, which splits both long sides of the triangle into three segments. Select the new nodes as a group, right-click again, and convert them to Auto smooth so the curve rounds off automatically instead of kinking at each node. Select the first two nodes and nudge them with the arrow keys. Because of the clone link, every triangle in the ring bends into the same S-shape at once, and that curve is what gives the whole thing its sense of motion, built from a shape that started out completely straight. Keep adjusting until it looks right — there’s no fixed amount of movement here, just what reads well.
Trimming the Design to a Rectangle
A full circle of triangles looks good, but we want the finished piece inside a rectangle rather than spilling in every direction. Draw a rectangle with the Shapes tool, switch to Selection mode, and set Width to 100 mm, Height to 150 mm, with X and Y both at 0 to center it — the same numbers as the work area from earlier. Right-click and Convert to curves again.
Here’s the part that’s easy to miss: a closed shape can’t act as a cutting edge, so apply Split Outline to it first. That turns the rectangle into an open object with no fill, which is what the Knife tool needs underneath it. Open the Node editor, click a spot between the fill shapes along that outline — not directly on top of one of the triangle rays, or the cut won’t be clean later — and right-click to apply Split Outline. (We go into this in more depth in our Knife tool video, listed under Tutorials on the Welcome screen, if you want the fuller explanation.)


Switch back to Selection mode, select every shape, and right-click to bring up the Knife tool. Hold Control and click-drag over the sections outside the rectangle to select them, then press Delete. Repeat until everything past the border is gone, leaving an optical illusion embroidery design cropped exactly to size.
Creating the Negative-Space Monogram
With the background done, the monogram goes in using the Text option under the Lettering tool. Type a single capital letter in a bold font — Arial Black holds up well here, since the heavier strokes keep their shape once we hollow them out. Switch to Selection mode and resize the letter using the handles, or type a number directly into the Tool options pane, then set X and Y to 0 so it sits centered on the design.

Now for the part that actually makes it a negative-space monogram: open the Properties tab and set the letter’s Fill to Artwork. That removes every fill stitch from the letter’s shape, so instead of a solid embroidered letter you get its exact outline left empty against the stitched background around it — the monogram reads through absence rather than thread. It’s worth remembering outside this project too: any time a fill area shouldn’t be embroidered, setting it to Artwork does the job instantly, and it’s just as easy to switch back.
Checking, Printing, and Sending to the Machine
Run Slow redraw to watch the design simulate as if it were stitching. If any shape looks uneven, the Node editor is still there to fix it before moving on. Once it’s ready, click Print, and on the Print preview screen confirm Scale is at 100% — this printout becomes the placement guide on the fabric a few steps from now, so the scale matters more than it looks like it should. From there, send the file to StitchPort™, which handles the connection to the machine.
Hooping and Embroidering the Tote Bag
For the stitch-out you’ll want the Sew Tech magnetic hoop (or whatever hoop you’re using), the tote bag, a piece of tear-away stabilizer, the printout, and thread in your chosen color.
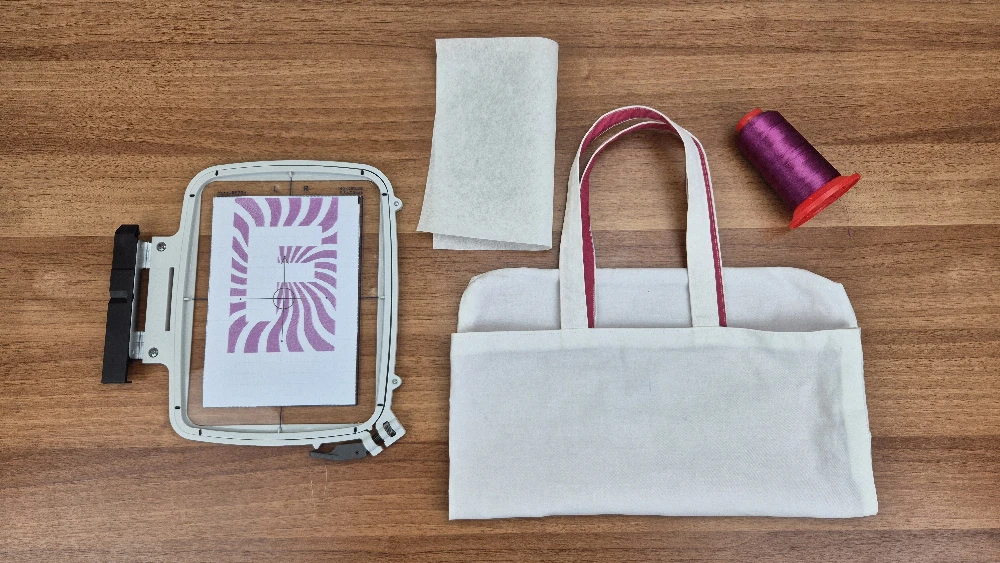
Use tailor’s chalk to mark the front center of the bag, then lay the printout over it to work out where the finished design should sit. Mark the side centers from the printout onto the bag, and connect those marks so there’s a clear center point to hoop around — this matters more on a tote bag than on flat fabric, since there’s no grain line to fall back on if the placement drifts.
Cut a piece of tear-away stabilizer and tape it onto the frame with paper tape. Slide the metal frame inside the bag and move it until it lines up with your marks, then place the magnetic frame on top to hold everything in place. This is really the advantage of a magnetic hoop over a screw-tightened one: bags are thick and uneven, and a magnetic frame clamps evenly without any fighting at odd angles. Check that the center line on the bag matches the hoop frame, then attach the hoop to the main frame and tighten the screw on top to lock it down.
Attach the main frame to the machine, and before starting, make sure the bag is open with the rest of it tucked underneath the machine’s arm so it can’t get caught mid-stitch. Then start embroidering. Once it’s finished, the hoop lifts off the machine on its own, and the bag has a lot more going on than it did an hour earlier.
A Few Ways to Make It Your Own
What makes this project worth repeating is how much changes without touching the method itself. A different letter, a different step count on the array, a different color against a different fabric, or the same negative-space monogram idea moved onto a t-shirt instead of a bag — the workflow stays the same each time. If circular arrays turn out to be your thing, our satin star tutorial builds a completely different look from the same tool, which says a lot about how much range one feature can cover.
The finished piece holds up well as a standalone design or as an embellishment. The combination of the gradient step fill and the open stitch density gives it a lightness that’s harder to achieve with denser fill techniques — and that’s precisely what makes it worth understanding how each setting contributes to the result.


Happy crafting and don’t forget to share your creations with us in the
DRAWings PRO Help Group!
You can download the .DRAW file of the project and the image used, for free, from the link below:
- Project’s .DRAW file: How to Digitize an Optical Illusion Monogram Design for a Tote Bag
It can open only with the XII and later versions of DRAWings embroidery software
Share your experiences in our Facebook group, and don’t forget to subscribe to our blog for more innovative embroidery techniques and inspiration.