
How to Edit Text shape in Embroidery Software: Move Characters, Convert to Curves, and Node Edit
This guide walks through editing text objects in DRAWings PRO XII, from basic positioning to advanced shape editing using Convert to Curves and the Node Editor. It also covers selecting nodes precisely with Select Polyline and transforming characters for custom lettering suitable for embroidery production.
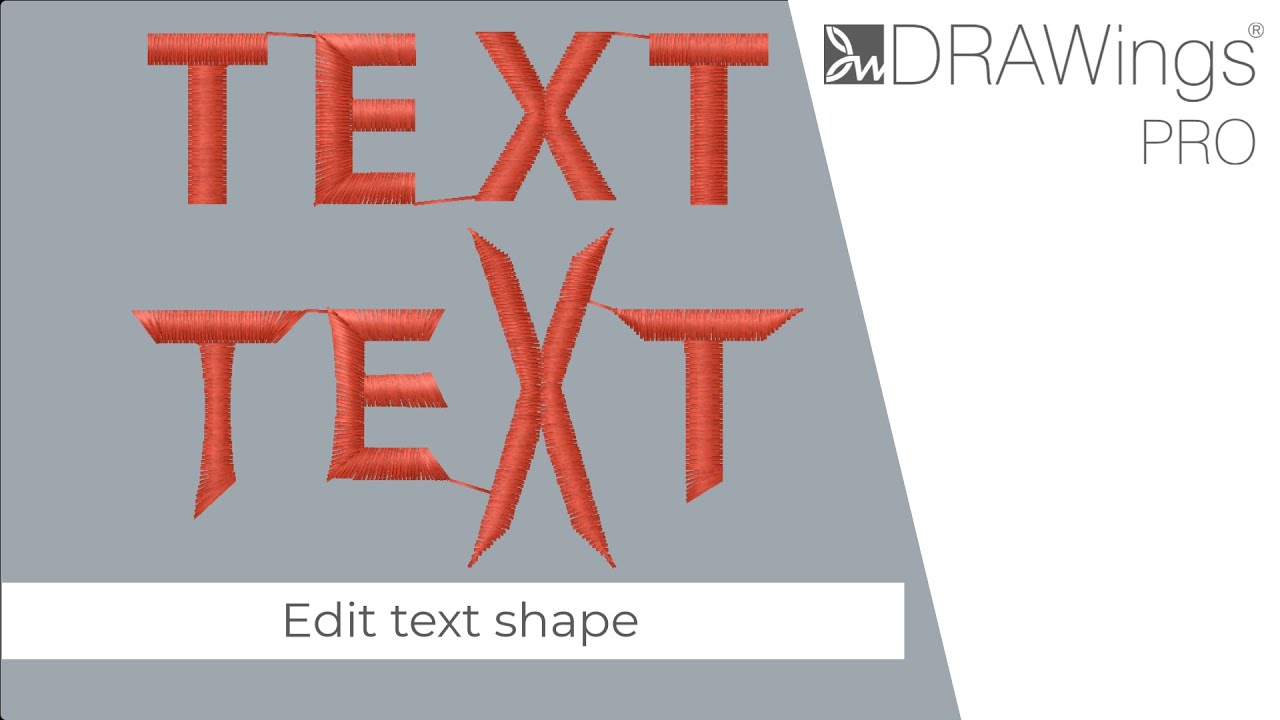
Part 1: Basic Text Manipulation
When you first create text using the Text tool, you are in an active editing mode. This mode provides simple but powerful ways to adjust the placement of your text before finalizing it.
1. Moving the Entire Text Block:
- While the text object is active, move your mouse over the characters.
- The cursor will change into a “Hand” icon.
- Click and drag to move the entire text block to your desired position on the design area.
2. Adjusting Individual Character Placement:
- Notice the small red dots located underneath each character.
- Click and drag any of these red dots to move that specific character independently. This is perfect for creating unique and artistic text layouts (e.g., kerning, baseline shifts).
Useful Tip: These initial adjustments are ideal for getting the general layout and spacing correct while you still have access to all the font and text property options.
Part 2: Finalizing a Text Object and Re-editing
Once you are satisfied with the initial placement, you need to “finalize” the text object to treat it like other design elements.
- To Finalize: Simply select another tool, like the Rectangle Selection tool. The text will be set with its current properties.
- After Finalizing: If you select the text object now, you will see Dimension options in the properties panel, allowing you to resize, rotate, or skew the object as a whole, but you will no longer see the text-specific options (like changing the font or content).
- To Re-edit Text Properties: If you need to change the wording, font, or size using the text options again, simply re-select the Text tool and then click on your existing text object. This will reactivate the text editing mode.
Part 3: Advanced Shape Editing (Convert to Curves)
For complete creative control over the shape of each character, you must convert the text object into editable vector shapes.
1. Using the “Convert to Curves” Option: To unlock advanced shape editing, you need to convert the text. You can find this option in two places:
- Right-click on the text object and select “Convert to curves” from the context menu.
- Select the text object, go to the “Convert” menu at the top of the screen, and choose the option from there.
Important: Once you convert text to curves, it is no longer a text object. It becomes a collection of line objects (vectors). This means you can no longer change the font or edit the text content using the Text tool. This action is best performed when you are certain the text content and font are final.
2. Editing with the Node Editor: After converting, the object is composed of nodes and lines. You can now use the Node Editor for detailed modifications.
- Select individual nodes and drag them to new positions. For example, you can drag the corner nodes of a letter outwards to create sharp, triangular edges.
Techniques for Efficient Node Editing
Editing complex characters can be tricky if you select the wrong nodes. Here’s how to work efficiently.
1. Selecting All Nodes of a Single Character: When trying to select all nodes of one letter with a selection box, you might accidentally select nodes from an adjacent letter. Use the “Select Polyline” feature for perfect selections.
- Right-click on any node of the character you wish to edit.
- From the menu that appears, choose the “Select Polyline” option.
- Now, only the nodes that make up that specific character will be selected.
2. Transforming an Entire Character: With all nodes of a single character selected (using “Select Polyline”), you can easily transform it as a whole:
- Rotate the character.
- Slant it to create an italic effect.
- Resize it independently from the other letters.
- Reposition it anywhere in the design.
3. Practical Example: Creating Custom Edges: Let’s make the edges of the letter ‘X’ triangular:
- After converting to curves, hold down the
Ctrlkey. - While holding
Ctrl, click on each of the outer-most nodes of the ‘X’. - With these specific nodes selected, use the scaling handles to resize the selection, pulling the points outward to create a unique spiked effect.
Conclusion
By mastering these text manipulation and conversion techniques, you can transform standard typography into a unique and integral part of your design. All you need is inspiration, so don’t be afraid to experiment with the tools!
DRAWings PRO Help Group
Happy crafting and don’t forget to share your creations with us in the
DRAWings PRO Help Group!
Related posts





Projects
How to Modify Built-In Fonts into Custom Designs: Dripping Halloween Lettering
Every embroidery program ships with fonts that are already digitized. They stitch cleanly, and they are also the same fonts everyone else has.Digitizing a Knockout Layered Varsity Monogram with Nested Script Lettering
Layering script text over a bold collegiate letter is a staple in team apparel, varsity jackets, and custom fleece.How to Embroider a Photo onto a T-Shirt with PaintStitch™ and Sketch
A favorite vacation photo does not have to stay on your phone or disappear into a folder. With DRAWings PRO embroidery software, you can turn a photo into an embroidery design and stitch it onto a T-shirt as a wearable keepsake.










