How to Add Custom Designs to the Clipart Library in DRAWings PRO XII
The Clipart Library in DRAWings PRO XII allows you to convert custom embroidery elements into reusable digital assets, eliminating the need to digitize or re-import frequent motifs from scratch.
Step-by-Step Guide
- Select Your Design ElementsUsing the Selection tool, click and drag around the object or group of objects on your workspace that you want to store.
- Access the Create Clipart ToolNavigate to the top menu and click Tools > Clipart library > Create Clipart.
- Define the Placement Reference LineYour cursor will change into a crosshair. Click and drag across the design to draw a reference line:
- Center placement: Drag the line through the middle of the design so it inserts evenly balanced over future placement points.
- Base placement: Drag the line along the bottom edge of the design so it always sits directly on top of the insertion point.
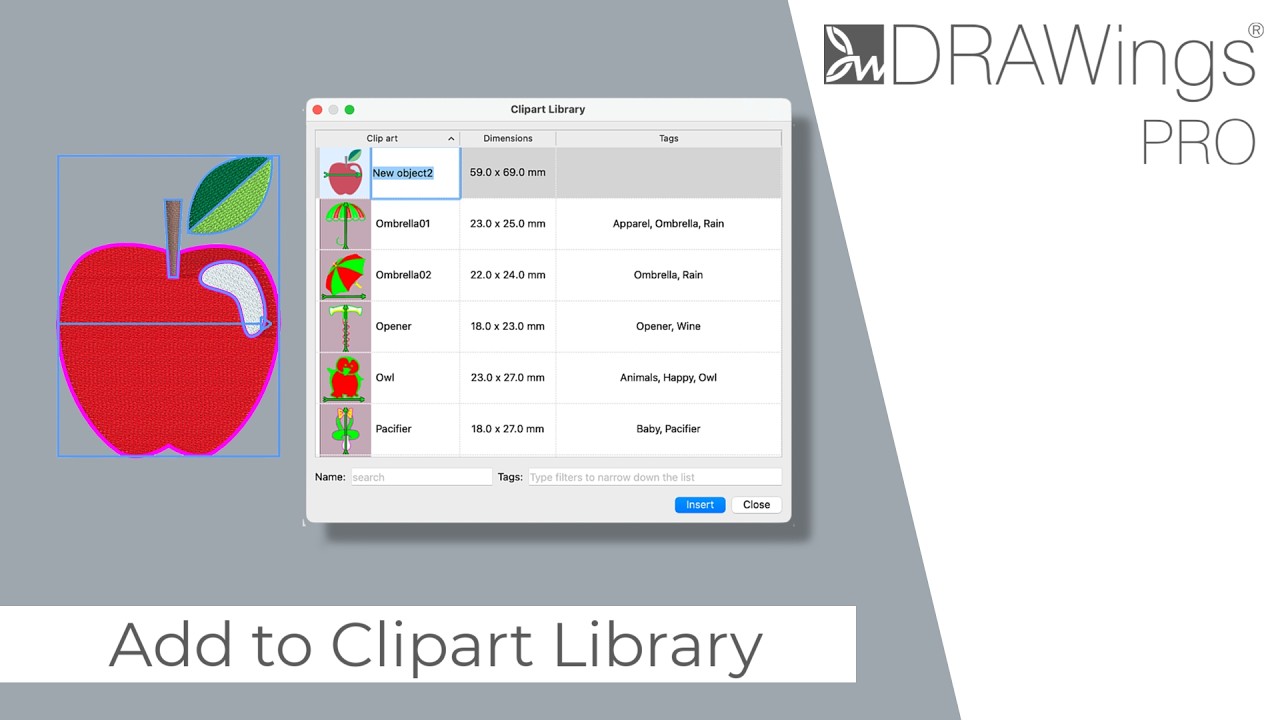
- Assign Metadata (Name & Tags)Release the mouse button. The Clipart Library dialog opens automatically with your new asset displaying the green reference line on top:
- Enter a clear, descriptive Name in the text field.
- Add searchable Tags separated by commas (e.g.,
monogram,floral,crest,applique).
- Save to LibrarySave your settings to finalize the asset. The motif is now immediately available in your library for future designs via Tools > Clipart library > Insert Clipart.
Best Practice Tips
Tip 1: Standardize Your Reference Points
Establish a consistent baseline rule across your library. Setting all borders, letter flourishes, and standing elements with a bottom reference line ensures they align flush against guidelines or existing letter baselines without manual nudging.
Tip 2: Maximize Searchability with Layered Tags
Use a three-tier tagging convention for every saved asset:
- Category: (e.g.,
Holiday,Sports,Fauna)- Object: (e.g.,
Leaf,Star,Eagle)- Stitch Technique: (e.g.,
Satin,Step-Fill,Cross-Stitch)
Tip 3: Group Multi-Object Elements First
If your motif contains multiple overlapping parts or thread colors, group them (
Ctrl + G/Cmd + G) before launching Create Clipart to ensure element spacing and layering remain locked when inserted into new hoop environments.
DRAWings PRO Help Group
Happy crafting and don’t forget to share your creations with us in the
DRAWings PRO Help Group!
Related posts





Projects
Digitizing a Knockout Layered Varsity Monogram with Nested Script Lettering
Layering script text over a bold collegiate letter is a staple in team apparel, varsity jackets, and custom fleece.How to Embroider a Photo onto a T-Shirt with PaintStitch™ and Sketch
A favorite vacation photo does not have to stay on your phone or disappear into a folder. With DRAWings PRO embroidery software, you can turn a photo into an embroidery design and stitch it onto a T-shirt as a wearable keepsake.How to Digitize an Optical Illusion Monogram Design for a Tote Bag
Learn how to design and stitch a stunning Optical Art-inspired monogram design using advanced embroidery digitizing software.