
How to Split Objects Using the Knife Tool in DRAWings PRO
The Knife tool in DRAWings PRO is a powerful feature that allows you to divide objects and create unique shapes by cutting existing design elements. This tutorial will guide you through the process of using the Knife tool effectively.
What is the Knife Tool?
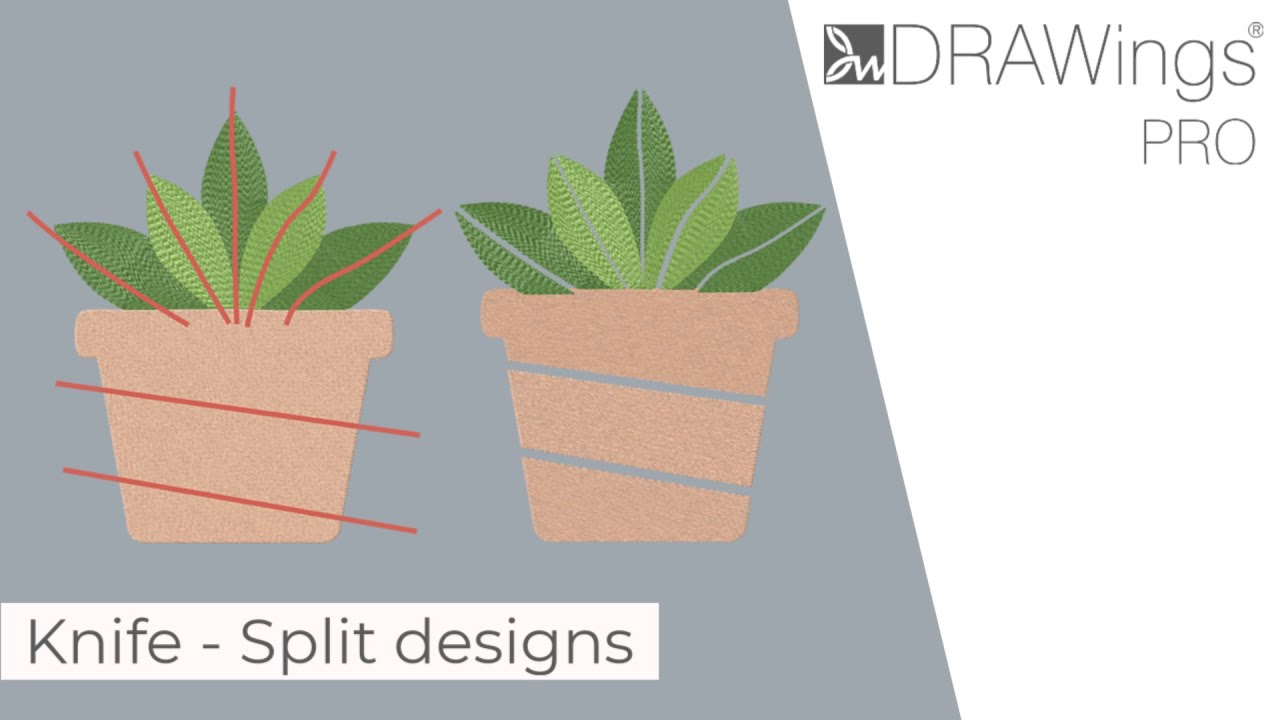
The Knife tool enables you to cut fill objects into multiple pieces using an open outline as a cutting edge. This means you can slice through shapes, creating new, distinct objects from portions of the original.
Applying the Knife Tool
To use the Knife tool, follow these steps:
- Draw your cutting line: Create a line over the object you wish to cut. This line will act as your “knife’s edge.”
- Select objects: First, select the fill object you want to cut. Then, while holding down Shift, select the open outline object (your drawn line).
- Apply the Knife option: Right-click on your selected objects. From the context menu that appears, choose the “Knife” option.
- The fill object will now be split at the points where it intersects with your cutting line.
Cutting Multiple Objects Simultaneously
The Knife tool isn’t limited to cutting just one object at a time. You can use a single line to cut multiple fill objects:
- Select all fill objects: Select all the fill objects you want to cut.
- Select the cutting line: While holding down Shift, select the open outline object (your cutting line).
- Apply the Knife option: Right-click and choose “Knife.”
All selected fill objects will now be cut by the same line.
Important Considerations for Cutting Lines
For the Knife tool to work correctly, the edges of your cutting line must extend beyond the edges of the fill object you intend to cut. If the line doesn’t fully encompass or pass through the shape, it cannot complete the cut.
Cutting an Object into Multiple Slices
There are two ways to cut an object into multiple slices:
- Continuous line: Draw a single continuous line that passes over the object multiple times.
- Multiple sectional lines: Create individual lines in sections. After drawing the first line, right-click once. Any new line you create will then be added to the same object, allowing you to use them all as a single cutting object.
Note: If you have two or more lines that are not part of the same object and you want to use them all as cutting lines, you need to combine them first.
Advanced Precision Cutting
For highly precise cuts, such as cutting exactly at a corner of an object:
- While drawing your cutting line, hold down the Shift key.
- Add a Cusp node directly on top of the point where you want the line to pass through.
This method ensures the line cuts precisely at your desired corner.
Open Outlines as Cutting Lines
It’s crucial to remember that only open outlines can be used as cutting lines with the Knife tool. For example, if you try to use a closed shape like an ellipse directly with a filled object, the Knife option will not be available.
However, if you split the outline of the ellipse, turning it into an open outline, the Knife option will then become available, allowing you to use it as a cutting tool.
The Knife tool is a versatile function that can save you significant time and effort in your embroidery design process, enabling you to create intricate and unique shapes. Experiment with it to discover its full potential!
DRAWings PRO Help Group
Happy crafting and don’t forget to share your creations with us in the
DRAWings PRO Help Group!
Related posts





Projects
How to Modify Built-In Fonts into Custom Designs: Dripping Halloween Lettering
Every embroidery program ships with fonts that are already digitized. They stitch cleanly, and they are also the same fonts everyone else has.Digitizing a Knockout Layered Varsity Monogram with Nested Script Lettering
Layering script text over a bold collegiate letter is a staple in team apparel, varsity jackets, and custom fleece.How to Embroider a Photo onto a T-Shirt with PaintStitch™ and Sketch
A favorite vacation photo does not have to stay on your phone or disappear into a folder. With DRAWings PRO embroidery software, you can turn a photo into an embroidery design and stitch it onto a T-shirt as a wearable keepsake.










