How to Decorate Embroidery Designs Using Style Stitches
Running style stitches are an effective way to elevate line art, enhance borders, and add custom decorative flair to monograms or shape outlines.
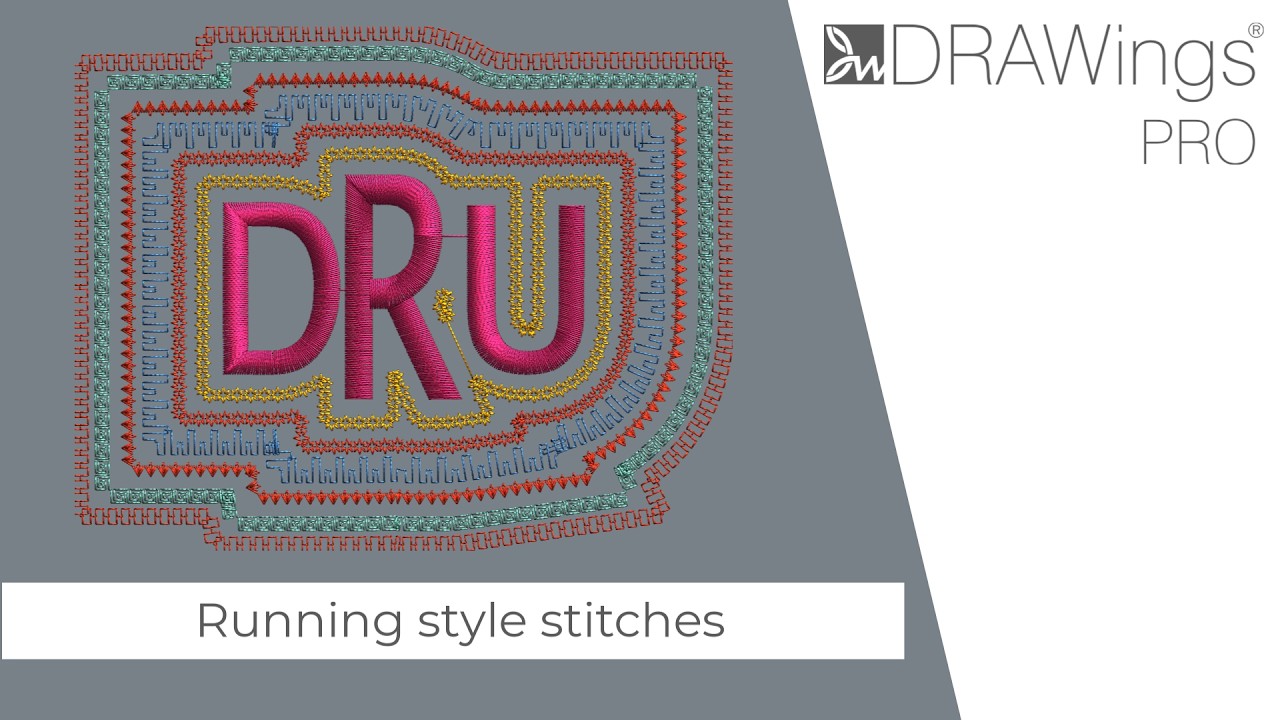
This tutorial walks through three methods for applying style stitches in DRAWings PRO XII:
- Creating multi-line decorative autoborders.
- Layering decorative running stitches onto an existing autoborder with offsets.
- Converting lettering and fill areas into decorative center lines.
Method 1: Create Multi-Line Decorative Borders
Use this method to create a decorative patch border or frame around any monogram or design.
- Select your design: Open your project and select the monogram or embroidery artwork you wish to frame.
- Apply an Autoborder:
- Go to the Autoborder tool to generate an outline around the selected design.
- Assign a distinct thread color from the color palette to separate it visually from the inner design.
- Add multiple border lines:
- Increase the border count to generate concentric outline rings if you want to cover a wider area.
- Apply Style Stitches:
- Select each individual border line.
- Open the Styles drop-down list in the Object Properties panel.
- Choose a decorative pattern (e.g., motifs, waves, geometric patterns) for each line.
- Adjust Colors: Customize each border with complementary colors or keep them monochromatic for an understated, textured look.
Tip: If a style stitch pattern appears too dense or distorted around sharp corners, adjust the Pattern Length or Scale in the Object Properties panel for a cleaner corner transition.
Method 2: Layer Decorative Stitches on an Autoborder (Using Offset)
If you already have a satin autoborder and want an accent line running inside or outside the frame:
- Select the border: Click on the existing Autoborder line in your design.
- Duplicate the line: Press
Ctrl + D(or right-click and select Duplicate). A duplicate satin line will be placed directly over the original. - Change stitch type and color:
- In the Object Properties bar, change the stitch type from Satin to Running.
- Change the thread color to a contrasting shade so you can easily see the running line over the satin base.
- Apply a Style Stitch:
- Open the Styles list and select your preferred decorative pattern.
- Adjust position with Offset:
- In the Object Properties panel, locate the Offset setting.
- Enter a positive or negative value to shift the decorative running stitch line slightly inward or outward relative to the satin border.
Tip: Adding an offset ensures that the decorative running stitches do not sink directly into the dense satin stitches underneath, giving the decorative border crisp definition.
Method 3: Add Decorative Style Stitches to Lettering
Turn standard solid letters into stylized monogram artwork by placing decorative style stitches down the center of each letter.
- Select and duplicate lettering:
- Click to select the lettering object or monogram fill.
- Duplicate the object (
Ctrl + D).
- Convert to Center Line:
- Right-click the duplicated object.
- Select Convert fill to Center line from the context menu.
- Configure the line:
- Set the stitch type to Running.
- Pick a contrasting thread color to verify the center placement against the underlying fill.
- Apply the Style Stitch:
- Choose a decorative stitch style from the Styles panel to complete the custom lettering effect.
Tip: When combining style stitches on top of lettering fills, ensure your fabric is well-stabilized with an appropriate cut-away or tear-away backing to prevent bunching caused by multi-pass decorative stitching.
DRAWings PRO Help Group
Happy crafting and don’t forget to share your creations with us in the
DRAWings PRO Help Group!
Related posts





Projects
Digitizing a Knockout Layered Varsity Monogram with Nested Script Lettering
Layering script text over a bold collegiate letter is a staple in team apparel, varsity jackets, and custom fleece.How to Embroider a Photo onto a T-Shirt with PaintStitch™ and Sketch
A favorite vacation photo does not have to stay on your phone or disappear into a folder. With DRAWings PRO embroidery software, you can turn a photo into an embroidery design and stitch it onto a T-shirt as a wearable keepsake.How to Digitize an Optical Illusion Monogram Design for a Tote Bag
Learn how to design and stitch a stunning Optical Art-inspired monogram design using advanced embroidery digitizing software.