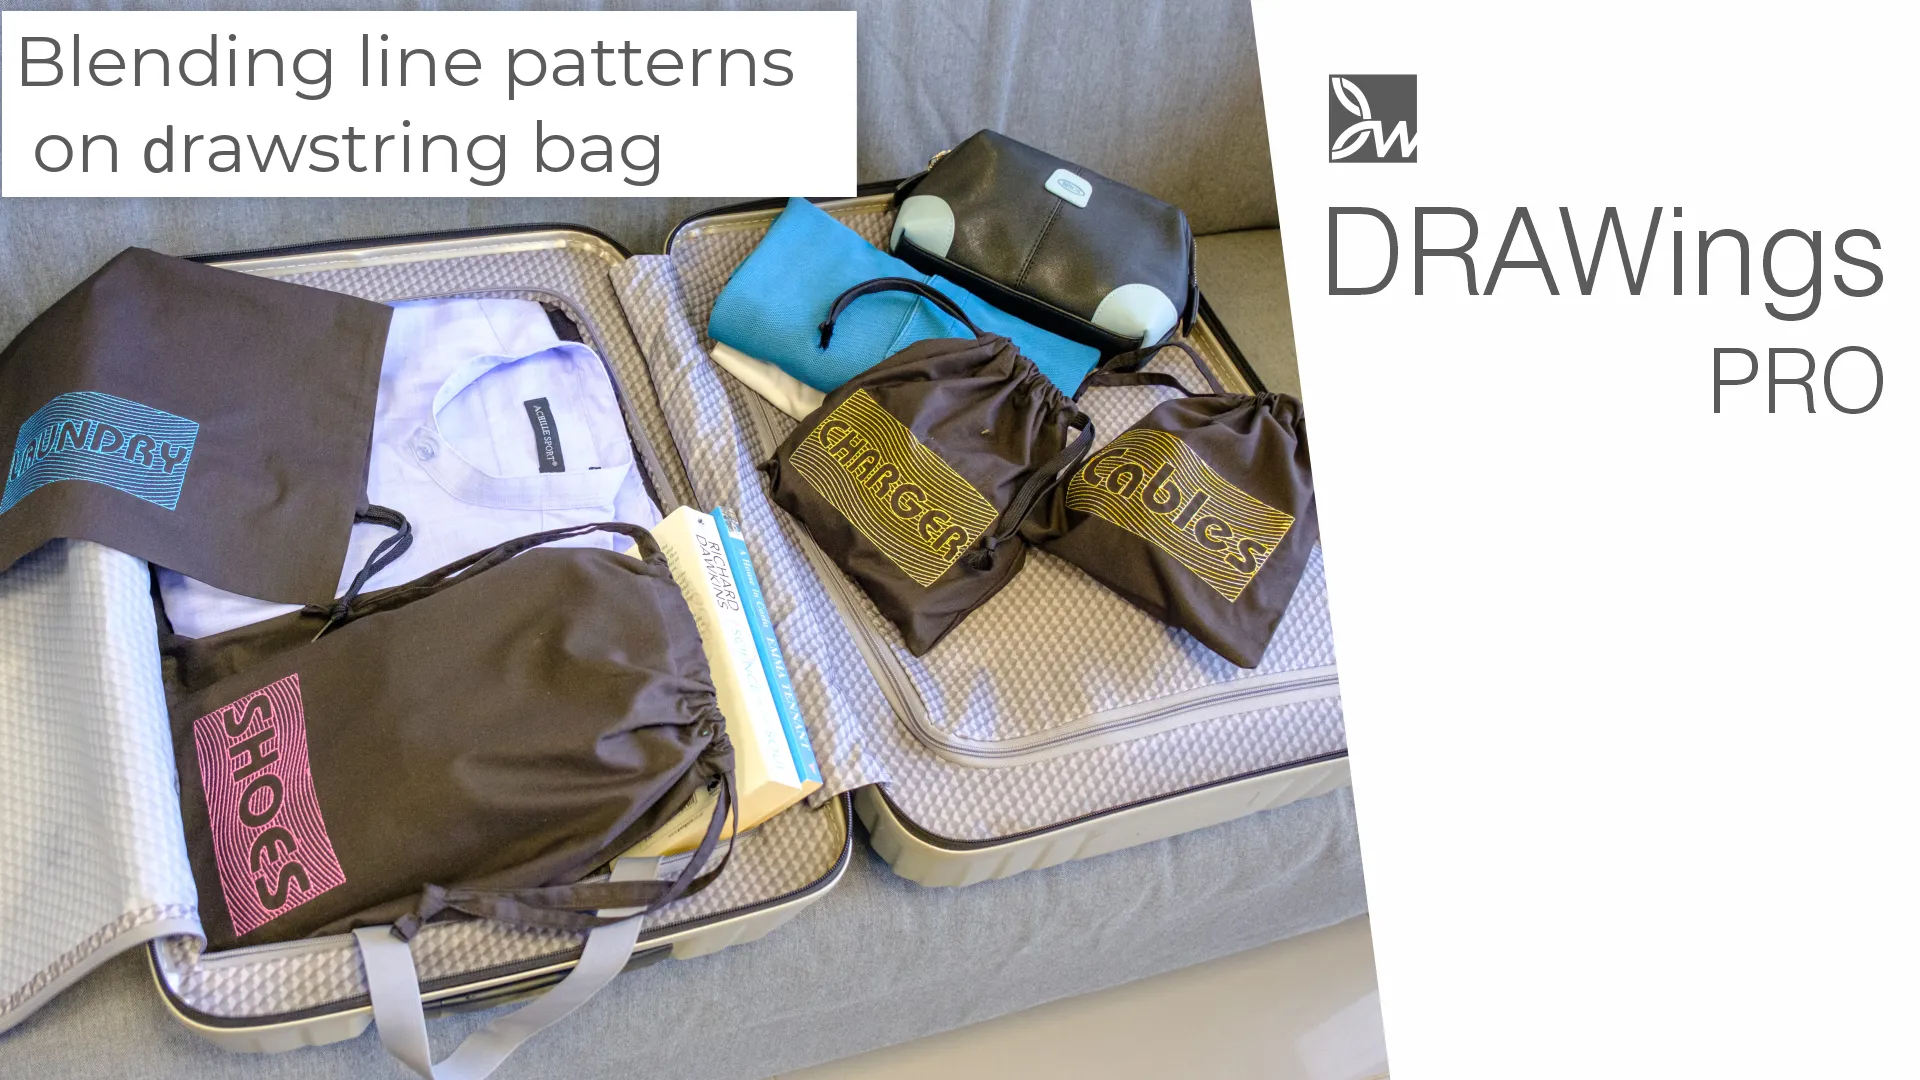
How to make a drawstring bag, how to label and decorate it
In this video we will show you how to make a drawstring bag and how to label and decorate it, using, a pattern of lines blended with text. We will actually show you how to create this drawstring bag from scratch. This is our take of having a luggage organized.
A lot of people travel with big suitcases that they have to check in, and then they have to find their things among all the other luggage when they get to their destination. This can be really time-consuming and frustrating. But if you have a small carry-on bag that you can use to organize them, then you don’t have to worry about losing your things or spending hours looking for them. Plus, it’s just more convenient.
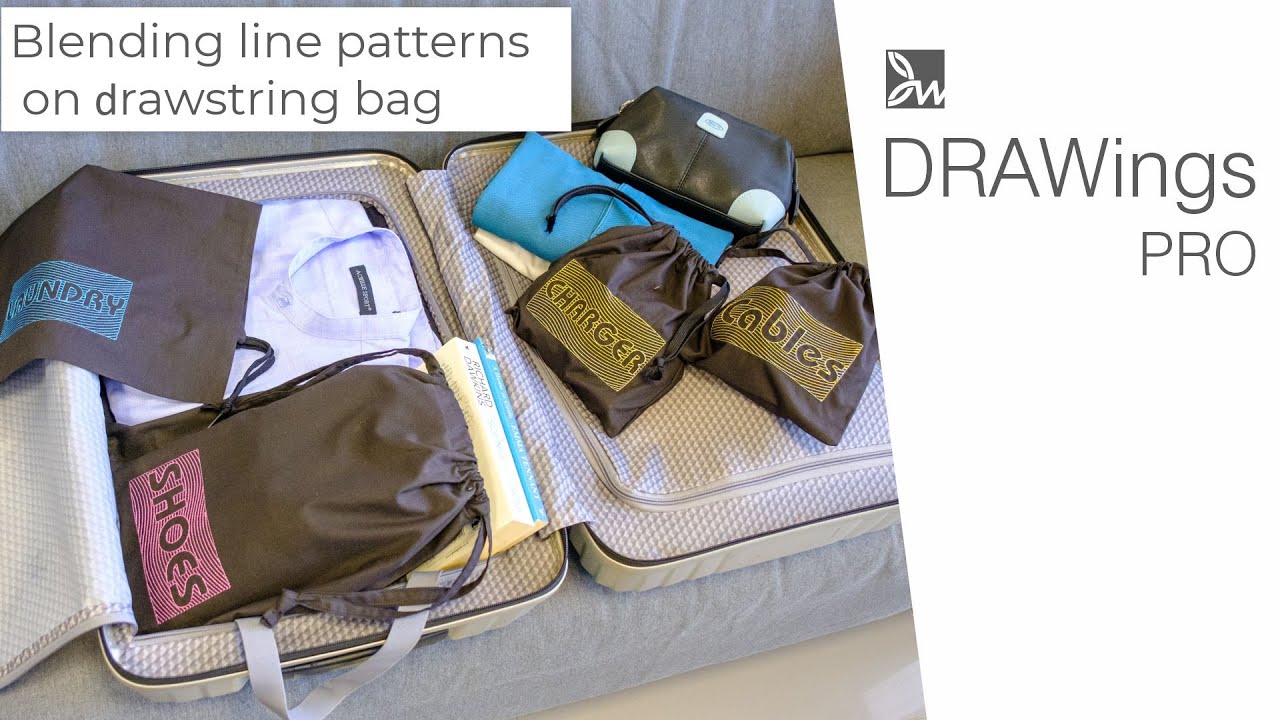
We’ve made several different sizes each one meant to pack something different and labeled them accordingly. The great thing about this bag is that you can make it as big or as small as you want, and you can use any type of fabric you like. So if you’re ready to learn how to make this drawstring bag, then let’s get started.
Create a drawstring bag design
Create a new design and select a hoop suitable for the size of the design you want to create. Start the “outline tool” to create a curved line. If the line isn’t exactly what you want it to be you may edit it using the “node editor” to edit the drawing.
Now, using the “Rectangular array” tool we will create a pattern-fill for this line. We only want vertical copies. Define the spacing between them by making sure clone objects option is enabled and apply the array. Have in mind that at this point you may actually edit the pattern by editing the nodes of any line and all the lines will be edited at the same time.
No matter what line pattern you have created, select all the lines, right-click and use “convert to Redwork” option. Draw a rectangle on top of the area that is to be covered, remove the fill and set an outline color.
Select both lines along with the rectangle, right click and use the “Knife” option.
Cut off the parts of the lines that are outside of the rectangle. Select the whole rectangle with the lines and make them a group, so that you can easily handle it later on. This is our fill pattern.
Create the label you want the bag to have
Select the “text tool” and type any text you like. Adjust the size and its position, if necessary. Select an outline color and remove the fill. Select both the lines and the text, and use Trim option from the Shaping menu.
Select the lines group, use the “break apart” option and we are done! You can make this any color you like just by editing the color.
You may create any type of line you like and using a different line you may create any line pattern you choose. Just use your imagination to create any pattern fill you can think of and blend it with any text you choose.
Prepare the file for the machine and sew it out
We are ready to embroider, so make sure you’ve gathered all the materials you will need. We will need the Outer cloth, a piece of 26 by 26cm or 10x10inches. This size is the size created in this video, so make sure you get a fabric suitable for the size you intend to make. You also need a string, stabilizer, threads, adhesive spray and of course your embroidery machine and hoop.
Start you machine and load the design. Draw auxiliary lines with a tailor’s chalk on the cloth to embroider the design at the correct position. Attach the stabilizer at the back of the cloth, so that it doesn’t shift and it’ s easier to hoop. Use tape or a pin to secure the cloth in place, so it doesn’t move. We find adhesive spray really convenient; It sticks firmly and can be easily peeled off.
Hoop by aligning the auxiliary lines drawn on the cloth with the center lines of the hoop. Set the bobbin and the needle thread, attach the hoop to the sewing machine, and start embroidery. When the embroidery is complete remove the hoop from the sewing machine and remove the cloth from the hoop.
Make the drawstring bag
Tear the stabilizer off and sew the bag together. Sew around both sides with zigzag stitch or over-edge stitch so that the cloth does not fray. Fold it in half, facing the right side down and mark 6 cm (2 in) from the top. Sew both sides to the marked point. Fold the unsewn parts to the width of the seam and iron.
Sew the unsewn parts on both sides, fold the top edge by 1 cm (1/4 in) and iron, fold once again, this time by 2.5 cm (1 in) and iron again.
Sew a little above the crease and turn the inside out. Pass the strings through, by passing one string from the left hole through the other left hole and tie the ends. Pass another string from a right hole through the other right hole and tie the ends together.
It’s done! Just fill these lovely bags and off we go!


You can download the .DRAW file of the project, for free, from the link below:
- Project’s .DRAW file: Drawstring bag files
It can open only with the latest version of DRAWings embroidery software
Check also, our related project “Create a unique bandana cap with your embroideries“