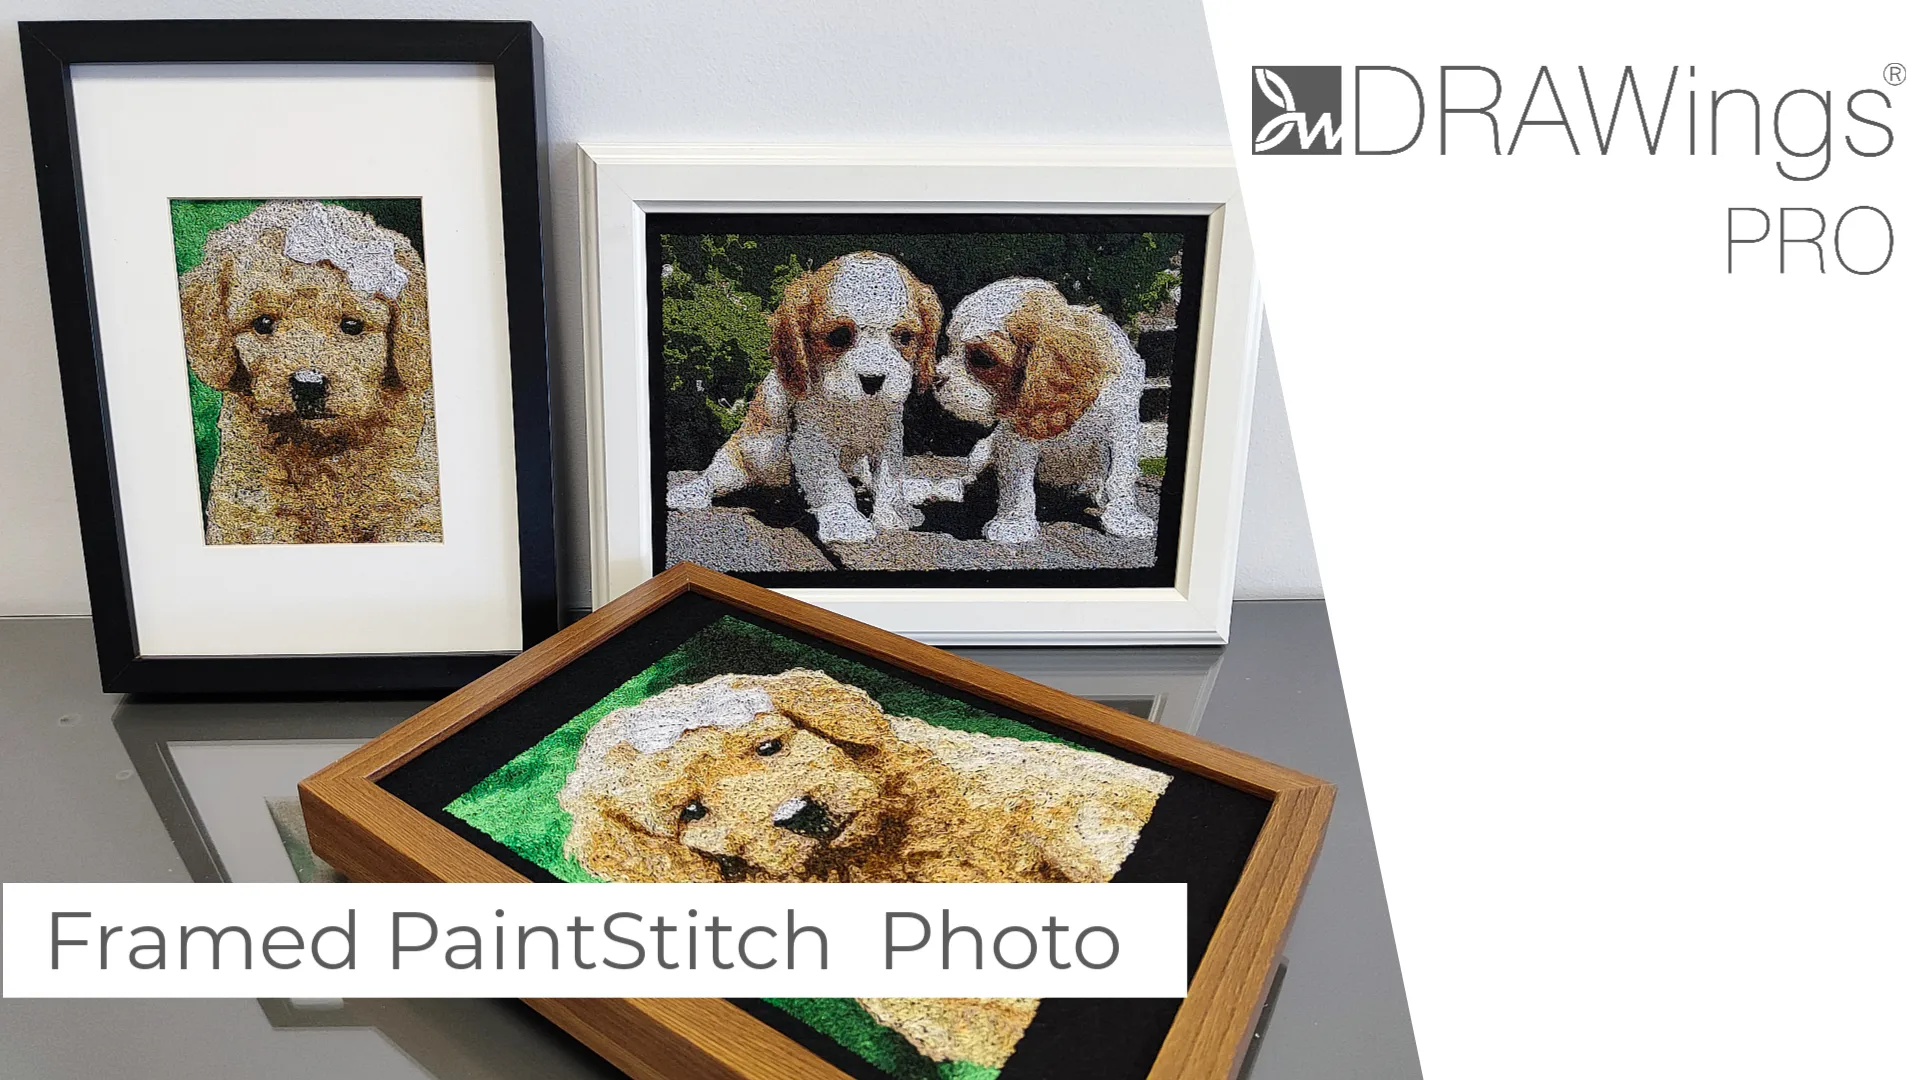
Create Photo-Realistic Embroidery with PaintStitch
Create Photo-Realistic Embroidery with PaintStitch: Embroidery has come a long way from traditional patterns and designs. With modern software like DRAWings PRO XII, you can now create stunning, photo-realistic embroidery art that brings your cherished memories to life. In this comprehensive guide, we will walk you through the process of transforming your favorite photos into artistically embroidered paintings. Whether it’s a picture of your adorable pet, a snapshot from a special event, or a treasured memory, we will show you how to make it happen. Let’s dive into the creative world of embroidery!

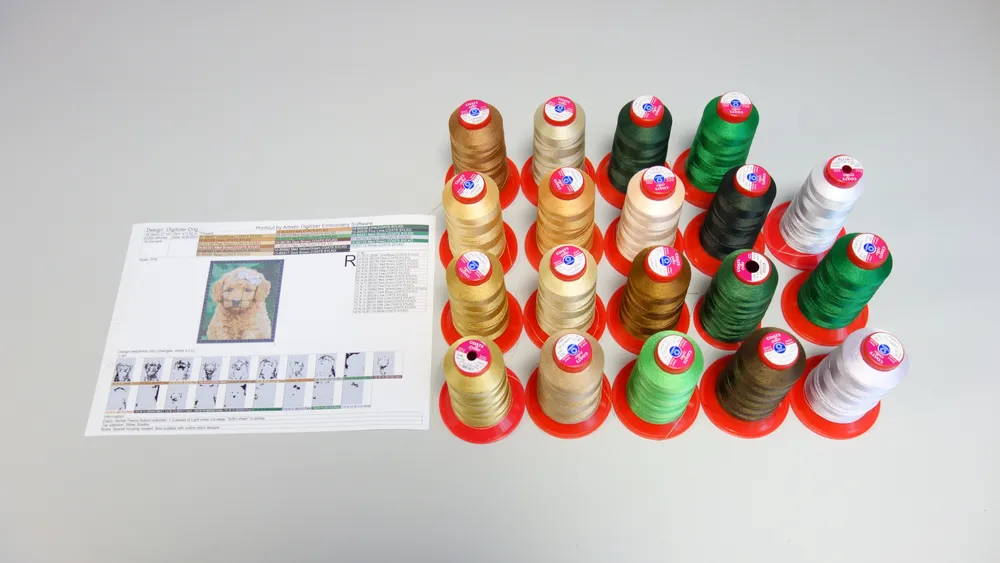
Materials Needed: Before you start, make sure you have the following materials on hand:
- DRAWings PRO XI or XII embroidery software
- High-resolution photo
- Embroidery machine
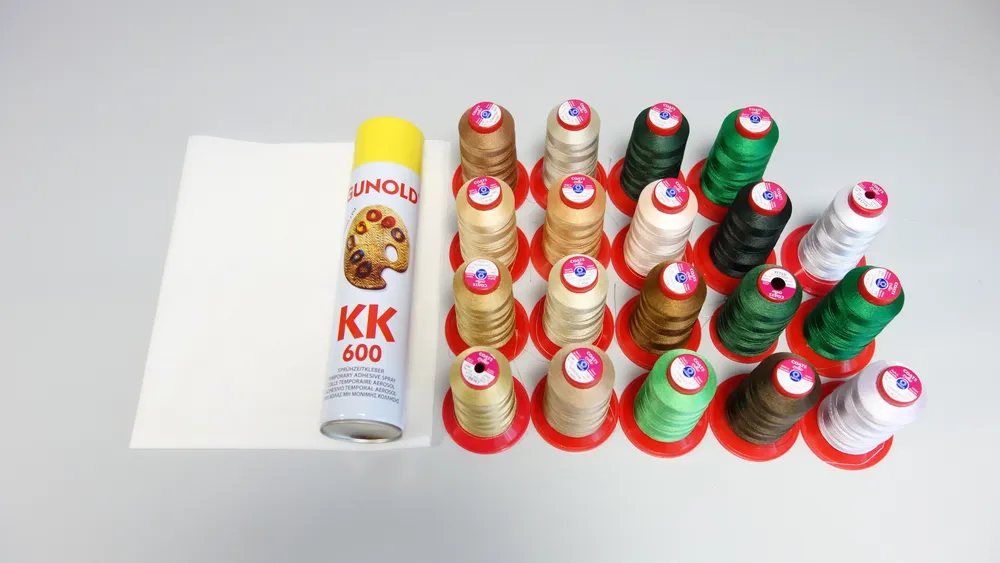
- Fabric of your choice (we recommend using black felt)
- Stabilizer
- Adhesive spray
- Assorted embroidery threads
- Embroidery hoop
- Frame for displaying your finished artwork

Step 1: Choosing the Perfect Photo
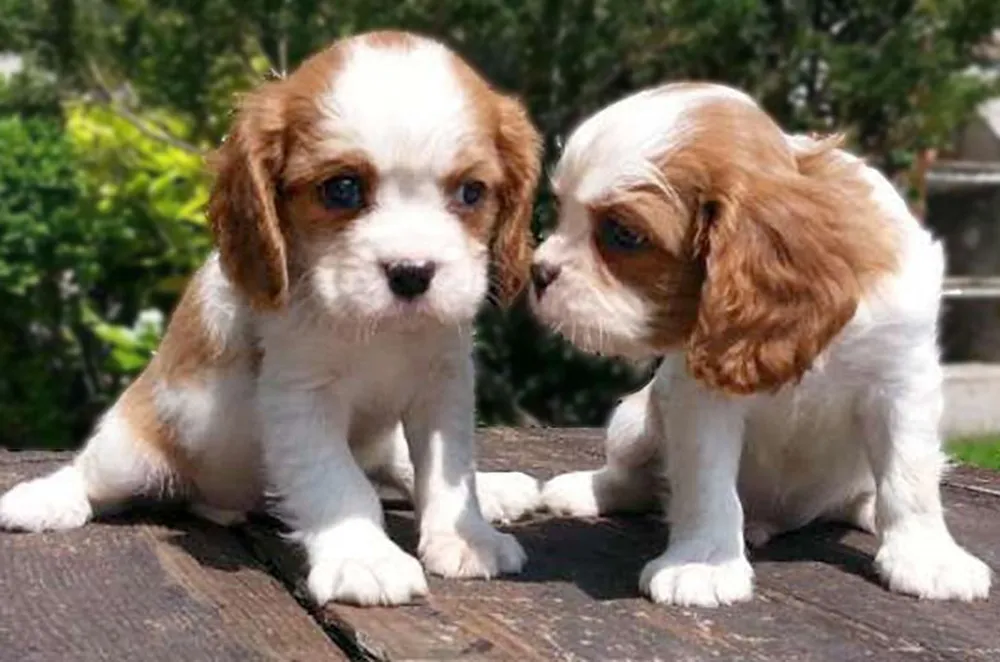
To begin your embroidery journey, the most crucial step is selecting the right photo. Your final embroidery will only be as good as the photo you choose. For optimal results, pick a high-resolution image that holds sentimental value to you. Whether it’s a beloved pet, a cherished memory, or a special event, ensure that the photo is clear and vibrant.
Step 2: Importing and Preparing the Photo
- Launch DRAWings PRO XII embroidery software.
- Start a new project with a blank design canvas.
- Select the embroidery hoop size that matches your desired dimensions.
- Import your chosen photo using the “From file” option.
Step 3: Resizing and Trimming
- Once the photo is on your canvas, you can adjust its size by using the blue circles for trimming and typing in values for width and height while maintaining proportions.
- When you’re satisfied with the size, press “OK” to proceed.
Step 4: Customizing the PaintStitch Embroidery
- Rotate the hoop as needed to ensure your design fits perfectly.
- The magic of photo-realistic embroidery lies in the PaintStitch properties:
- Choose an appropriate thread palette for accuracy.
- Adjust the number of colors to control the level of detail.
- Experiment with settings such as density, stitch length, smoothing, blending, brightness, and contrast to refine the design according to your preferences.
Step 5: Preparing for Embroidery
- Once your PaintStitch design is perfected, prepare the file for your embroidery machine.
- Create a printout of your design to keep track of the thread colors you’ll need.
Step 6: Embroidery Process
- Gather all your materials, including fabric, stabilizer, adhesive spray, and assorted threads.
- Apply adhesive spray to the stabilizer and attach the fabric securely to it, ensuring it’s smooth and wrinkle-free.
- Hoop the fabric in your embroidery hoop.
- Load your design into the embroidery machine.
- Thread the machine and start the embroidery process.
- Follow the machine’s prompts to change thread colors as needed.
- Watch as your photo transforms into a beautiful embroidered masterpiece.
Step 7: Finishing Touches
- Once all the colors are complete, remove the hoop from the machine.
- Take the fabric out of the hoop and carefully trim any excess stabilizer.
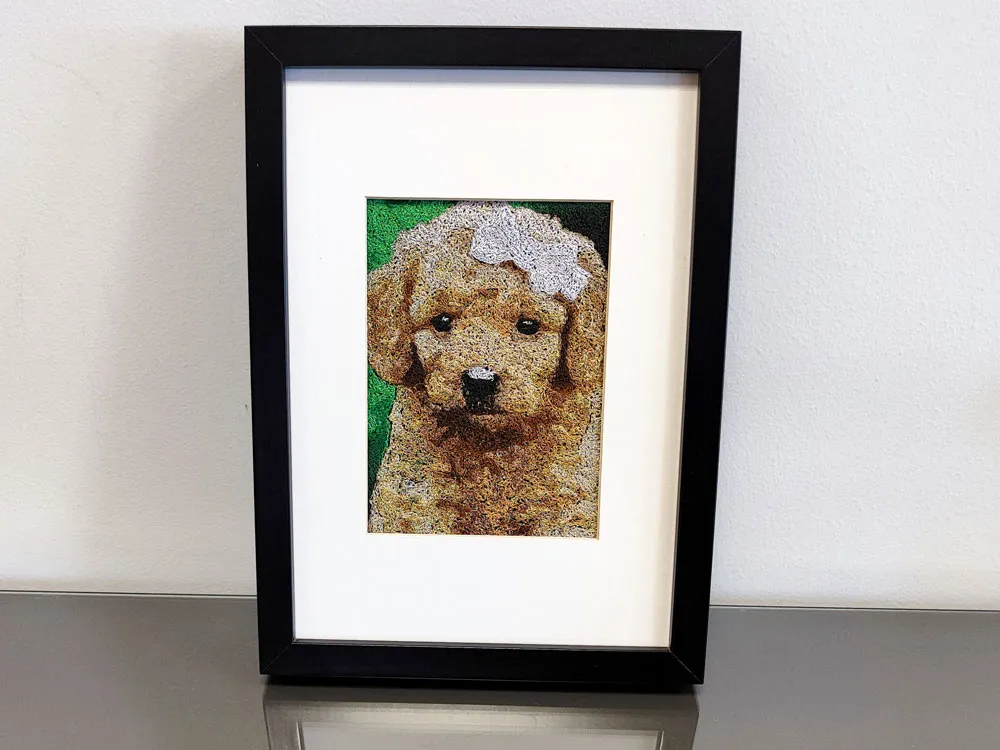
Step 8: Framing Your Embroidery
- To frame your artwork, remove the glass from the frame.
- Center the glass on top of your embroidered image.
- Use masking tape or tailor’s chalk to mark along the edges of the glass cover.
- Cut the fabric along the marked lines.
- Reassemble the frame with the fabric inside.
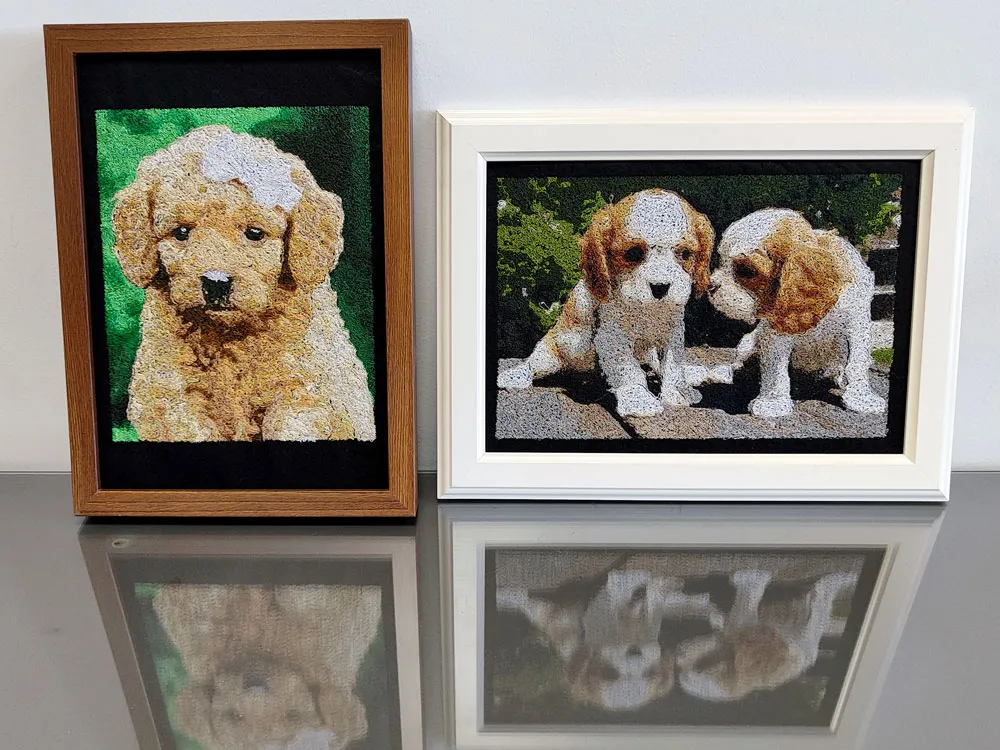
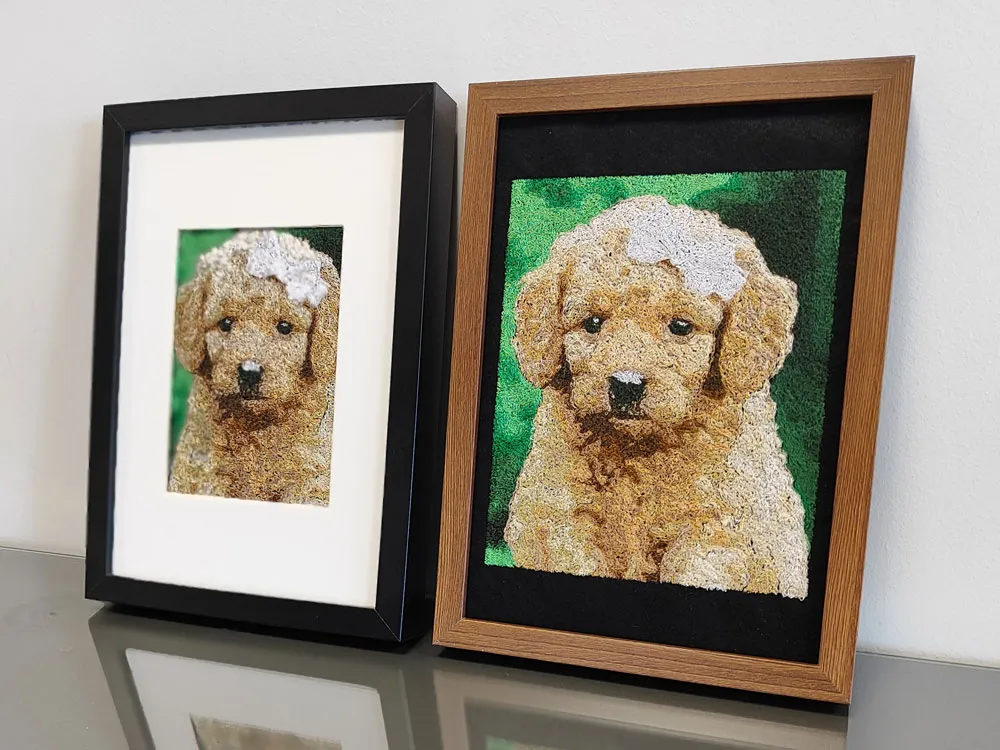
With DRAWings PRO XII embroidery software, the possibilities are endless. You can transform your favorite photos into timeless, photo-realistic embroidered art that captures the essence of your cherished memories. Whether you’re preserving your pet’s adorable face or commemorating special moments, this guide has shown you how to make it happen. Embroidery is a delightful blend of technology and creativity, and with this software, you can create unique, personalized works of art. Enjoy your embroidered masterpiece and the enduring memories it represents!
You can download the .DRAW file of the project, for free, from the link below:
- Project’s .DRAW file: Photo-Realistic Embroidery with PaintStitch
It can open only with the XI and later versions of DRAWings embroidery software
Check also, our related projects “DIY Drawstring Backpack with Applique Decoration“, “How to Make a Detachable Collar with an Embroidered Monogram” & “HOW TO MAKE A BEAUTIFUL RABBIT KEY COVER FROM SCRATCH” & “DIY: HOW TO MAKE A CUSTOM GLASSES CASE WITH YOUR OWN DESIGN“
Remember, DIY projects are all about creativity and adaptability, so don’t hesitate to experiment and make the drawstring backpack truly your own. Happy crafting!