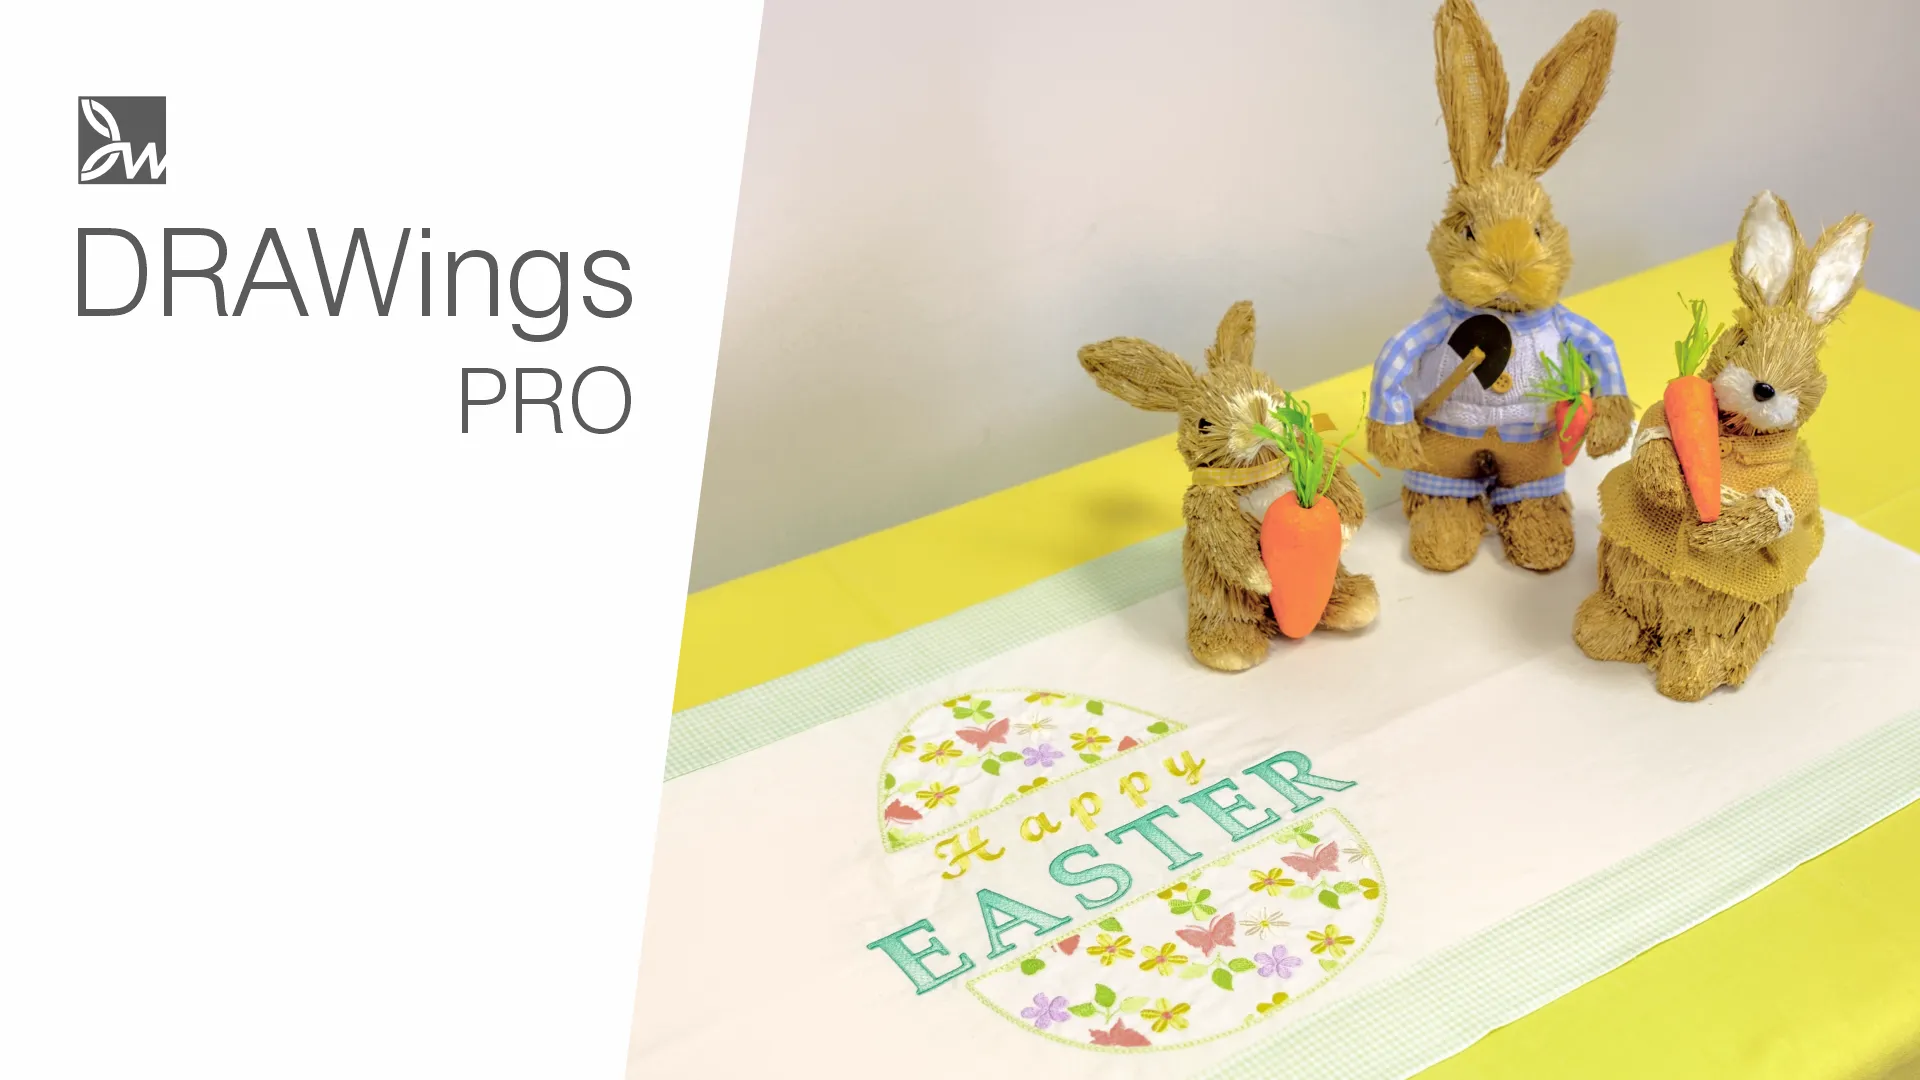
Celebrate Easter in Style with a Handmade Embroidered Table Runner
Celebrate Easter in Style with a Handmade Embroidered Table Runner! With Easter quickly approaching, there’s no better time to get creative and decorate your home for the Easter season! This video provides a great way to make a stunning and unique table runner perfect for any home.
Through this video, you will learn how to use Array on fill with multiple hoops to easily craft beautiful embroidered designs that can be used to accessorize any furniture.
When it comes to creating artful decorations, there is nothing quite like the intricate look of embroidered designs – add a touch of flair to your Easter celebration with this wonderful table runner.

Create the handmade embroidered table runner design
In this project, we will show you how to make a beautiful, embroidered Easter table runner, using Array on fill and multiple hoops. The easter egg design which will be placed on the middle of the table runner, will be about 25 cm in width and 28 cm in height. We will choose the biggest hoop of my machine; even so,…
even so, the design won’t completely fit in the hoop.
We will start with the Ellipse shape tool, so just click and drag to draw an ellipse. Select the shape you’ve just made and go to Tools options bar and uncheck the. Set the Width to 200 mm (7.9 inches) and the Height to 280 mm (11 inches) and Center it into the hoop.
Right-click on the shape and choose Convert to curves option, so that we can fully edit the shape later on. Switch to Edit nodes mode and choose two nodes in the middle of the ellipse. Move those nodes down by about 4 cm (1.6 inches).
To make the movement more precise you may enable the View of the Grid (View > Grid > Show). From Shape tools, select the Rectangle shape and draw a Rectangle on top of the egg shape. Make sure that proportional is disabled and set the Width to 300 mm and the Height to 100 mm.
Again, center the rectangle to the hoop, select both shapes and use the Trim option from the Shaping tools. Delete the rectangle as we don’t need it any more.
These parts look separate from each other, but they are still one object so, right click and apply Break apart to separate them.
Add decoration elements on the design
Choose some decoration elements from the clipart library and then use the Array type to make them fill the egg shape. From the Tools > Clipart library > Insert Clipart locate the item “Floral60” and click Insert. We can click and drag to define size and orientation, but a single left click places the item in the original size and orientation.
Having Proportional enabled, set the height at about 2.7 cm. Likewise, insert the “Floral Leaf33” and set it at about 2.5 cm in height. For this one, we will ungroup and delete the small parts as they can’t be embroidered nicely at such small size. Once again, follow the same steps to insert “Floral Leaf14” and set its height at about 2 cm. Also insert the “Floral48” with height at about 2 cm, the “Floral01” with height at about 2 cm and the “Floral02″ with height at about 2.3 cm.
For the flowers we can use the stitch flow to make them look more natural. For the petals, we can draw a divide line and set a point direction for the middle part. We will do the same for the other flower. Place them nicely, for example, rotate the butterfly slightly move those green parts and finally, the flowers.
Take your time to arrange the objects in any way you like and set colors for the elements. Once you are done with colors, select all the inserted elements and Group them together for easier handling later on.
To apply the Array fill, select the group of elements together with the upper part of the egg, right-click and apply “Create fill from shapes” from the “Array” option.
Edit the Array properties
Choose Circular placement in Fill, set the H.Spacing to – 3,0 mm and set the Start angle to 10 degrees. Take your time, experiment and adjust the array in any way that pleases you. Likewise, we shall apply Array fill at the lower part of the egg. Delete the grouped items that we used for the Array as we don’t need them anymore.
Select both parts of the egg and go to Outline properties. Set the stitches style to 07, set the Offset to 2,0 mm, and finally set a matching color for the outline. Let’s add some text in between the egg parts start the Lettering tool and type ‘Happy‘. Select a Font: xpg240, set the Font size at 39 and set Spacing to 4mm so that the letters are nicely distributed.
Set a color and go to Properties and select the Wide Satin style of Stitches. In the same way, start the Lettering tool and type ‘EASTER‘, Select a Font xpg 233, set the size to 58, set Spacing to 2mm so that the letters are nicely distributed. Set another color for this part and apply the same color to the outline.
Go to Outline properties and set the “Outline width” to 1.2 mm. This will add a Satin serial outline around this lettering. Then go to Fill and set the type to Step. Now, set –450% on Gradient. You can make it look even better using the Stitch flow tool to make stitches flow horizontally.
Add an extra hoop
We are done for the design so let’s have a look at the placing. This red color on top of the hoop area means that the design doesn’t fit in this hoop. Instead of trying to make the design smaller to fit the hoop, we’ll show you how to add an extra hoop.
From the tool’s toolbar, locate the ‘Machine/Hoop’ icon and click to enter machine/hoop mode. While on this mode, you may only affect the hoop. Drag this hoop to the lower part, so that the hoop gets this part of the design. Also add a new one using the plus button to cover the upper part of the design.
First, select the position for the new hoop in relation to the previous one. Position this at the top and then click on the hoop to be added. To fit the green text part though, rotate the hoop at the bottom since its height can nicely fit the width of the text.
Move it to get the green part inside. The red color is gone. This means that our design fits the hoops. Notice that there are 2 hoops listed now and you can click to select any of them and move it. The one that is highlighted blue is the selected one. The area where the two hoops overlap is highlighted in blue.
The line with the red handles defines how the design will be split.
You may adjust the line by moving the nodes. Keep in mind that this line doesn’t always have to be a straight line. You can place the mouse over any point on the line and double-click to add a node. Using this node you can split the design in a customized way. For this design though a straight line will do just fine.
Export the designs and make a printout
Switch back to Selection mode. The design is ready, so if we export to the machine, 2 files will be exported. Likewise, if you switch to slow redraw you need to select a hoop first, to see the embroidery part for the specific hoop.
When working with multiple hoops, the printout can work as a guide for the process.
Make print out the design
Before making any changes select the printer you will use. This is important so that the margins and settings are adjusted accordingly. Remove parts of the print that are not needed by clicking on the options at the right side of the print dialog. For this printout we mainly want the design scale to be 100%
Now, proceed with the printout.
I suggest that you print the design on transparent paper. Transparent paper allows you to align the design easily, ensuring that the design is centered and correctly positioned. Now we are ready to embroider!
Embroider the design on the table runner
The size of the finished table runner is about 42 cm by 102 cm, that is, about 16 inches by 39 inches.
For this project we will need:
- A piece of fabric that is 43 cm by 107 cm.
- Two strips of assorted fabric that are 6.5 cm by 106 cm each.
- Stabilizer and Adhesive spray
- Embroidery threads
- Hoops
- The printout


Use the printout to position the design in the hoop
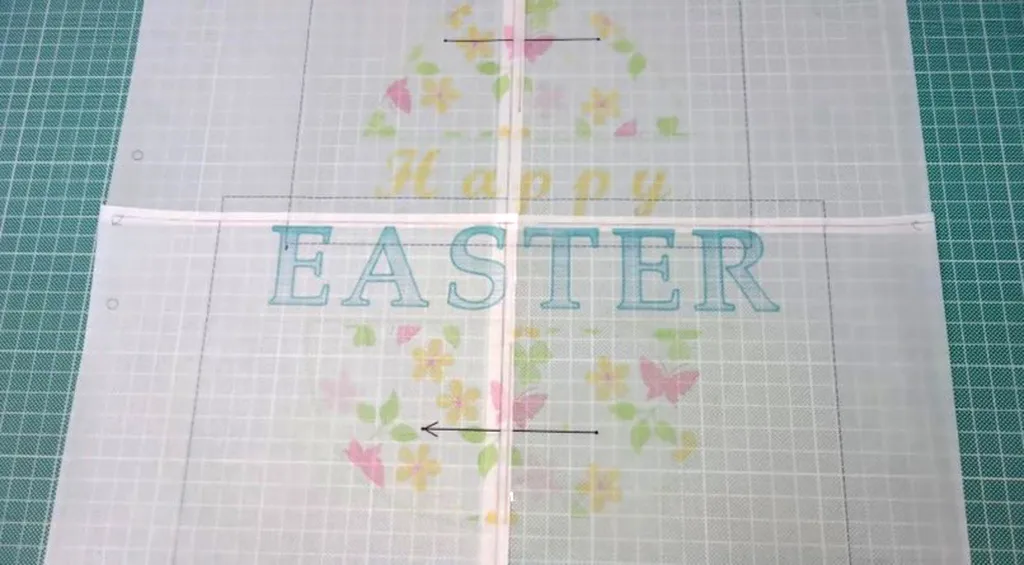
The printout is an actual size visual guide, showing the design into the hoops. We printed it on transparent paper to help us see through the printout and make hooping easier. Use a ruler to draw a line through the alignment guides on the corner of each paper.
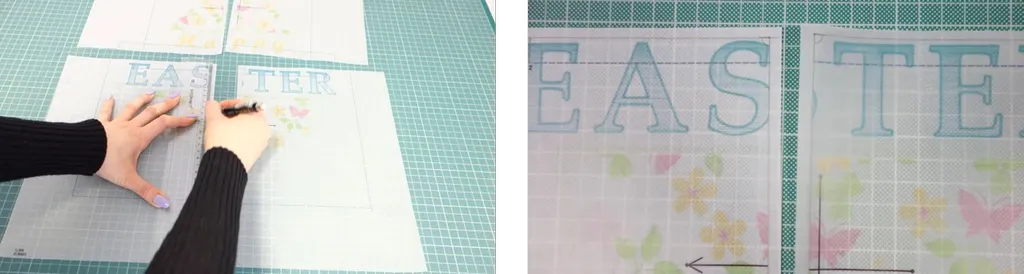
Use a tape to tape the parts together. Align the signs at the center and on the edges of the drawn lines and carefully tape the pages together. Always make sure that the design has stayed perfectly aligned. When they are all taped together, put them aside and move to the embroidery.
Embroidery process
Fold the cloth in half and make a mark on the middle of both sides. Draw a center line. Place the taped printout on top of the fabric so that the center line of the printout aligns with the fabric’s center line. Try to center the printout vertically so that you have the same space left above and below the design.
Secure the printout with tape. The arrow on the printout marks the direction of the hoop. You can write the direction on the fabric; that’ll be useful when checking the hoop direction while embroidering.
Place a needle on the center of the cross line of the printout and into the fabric. Mark the spot where the needle was placed. Repeat the process for the other center of the cross line. Draw horizontal lines based on those marks.
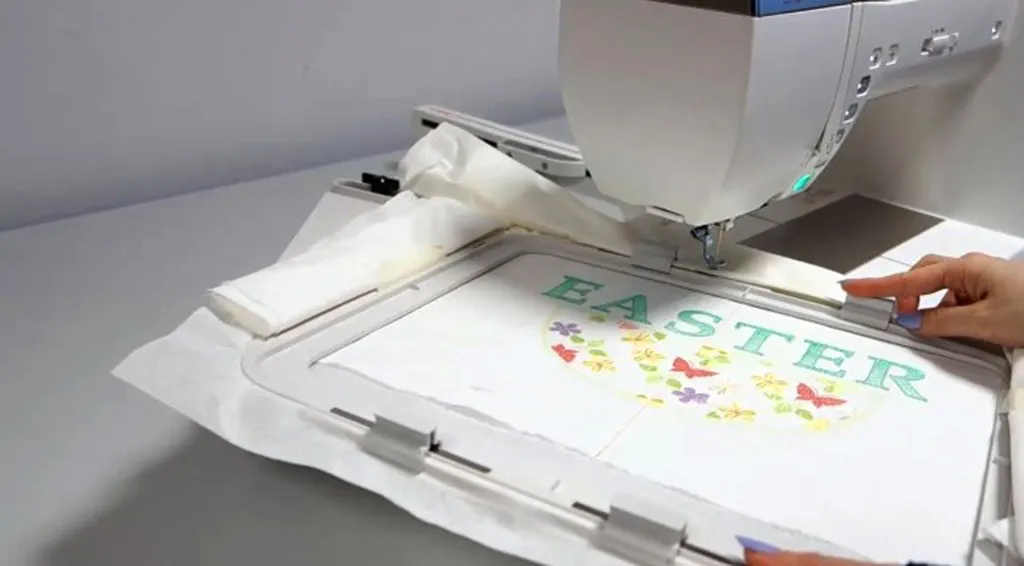
Spray an adhesive spray onto the stabilizer and place the fabric, smoothing out any wrinkles or bubbles. Make sure that you select the correct hoop for the first design. Using the template’s guidelines, hoop the fabric so that both lines align, for the design to be centered on the hoop.
You may use masking tape to hold the excess fabric so that it does not interfere with the embroidery. Open the first design, set the bobbin and needle thread attach the hoop to the sewing machine and start embroidering.
Follow through with all the colors until everything from the first hoop is embroidered. When the embroidery is complete, remove the first hoop from the sewing machine.
Prepare the second hoop to sew out the rest of the design
Unhoop the fabric, hoop the fabric using the second hoop, following the lines. Open the second design and continue embroidering until the embroidery of the second hoop is concluded as well. When the embroidery is complete, remove the hoop from the sewing machine and unhoop the fabric.
Carefully remove the stabilizer from the back of the fabric. It’s time to hem the fabric’s edges. Mark 2.5 cm from the edge of the fabric. Fold over the edge by 0.5 cm and press down with a seam roller or iron.
Fold another 1 cm to the mark you made and press down. Pin the hem, repeat this on the other side, sew along the edges and pin the two decorative strips to the runner fabric; the right side of the strips with the wrong side of the main fabric together.
Make sure that the same length remains from both edges. Sew the two pieces together along the edge. Lay the main runner fabric with the right side facing up. Fold the decoration fabric so the right side is also facing up.
Press the seam with a seam roller or iron. Carefully fold the edge inside.

Fold the upper part of the fabric inside by about 1 cm. Make sure that the height of the decorative fabric is 5 cm. Press with a seam roller or an iron. Sew the upper and lower strips of the fabric. Finish the edges with ladder stitches and it’s done!
Enjoy your newly embroidered table runner!
Have a wonderful Easter holiday!


You can download the .DRAW file of the project, for free, from the link below:
- Project’s .DRAW file: Handmade embroidered table runner design
It can open only with the XI and newest versions of DRAWings embroidery software
Check also, our related projects “How to make a drawstring bag, how to label and decorate it” & “Create a beautiful PaintStitch tote bag“