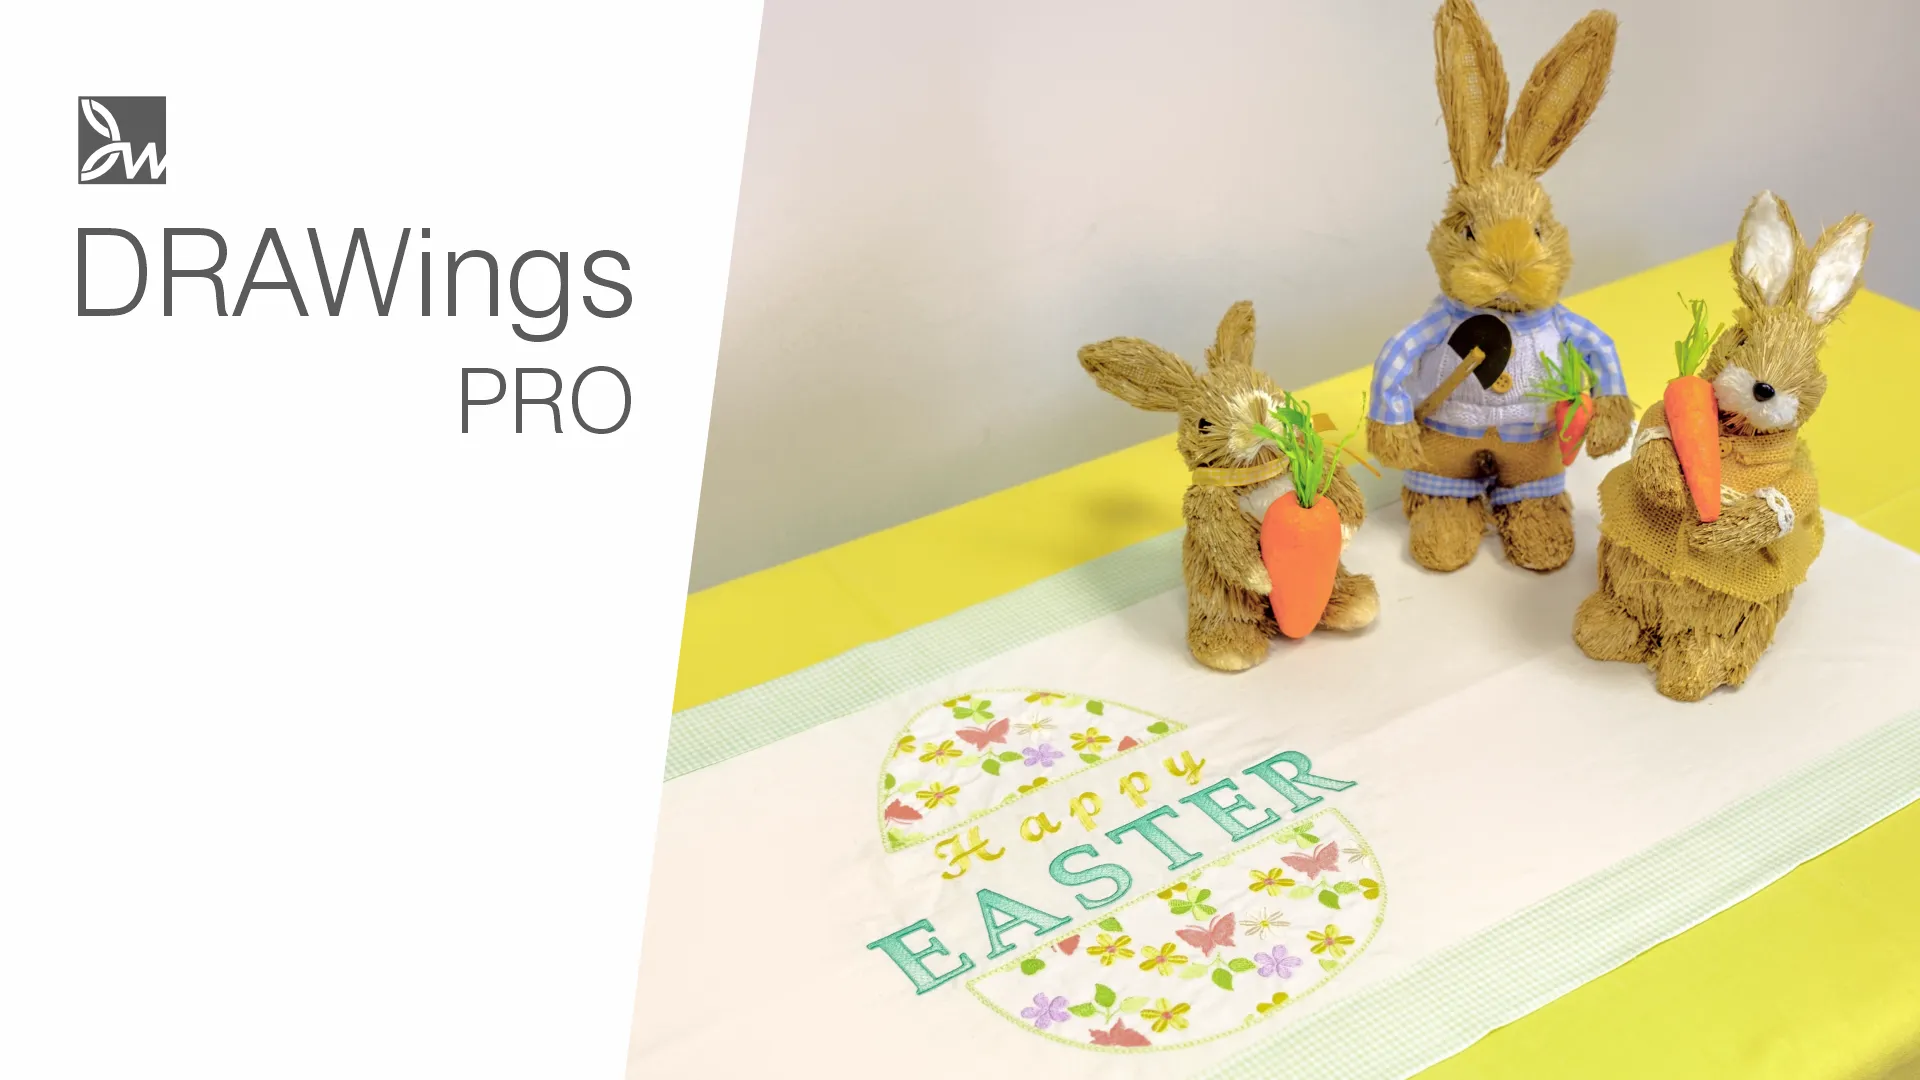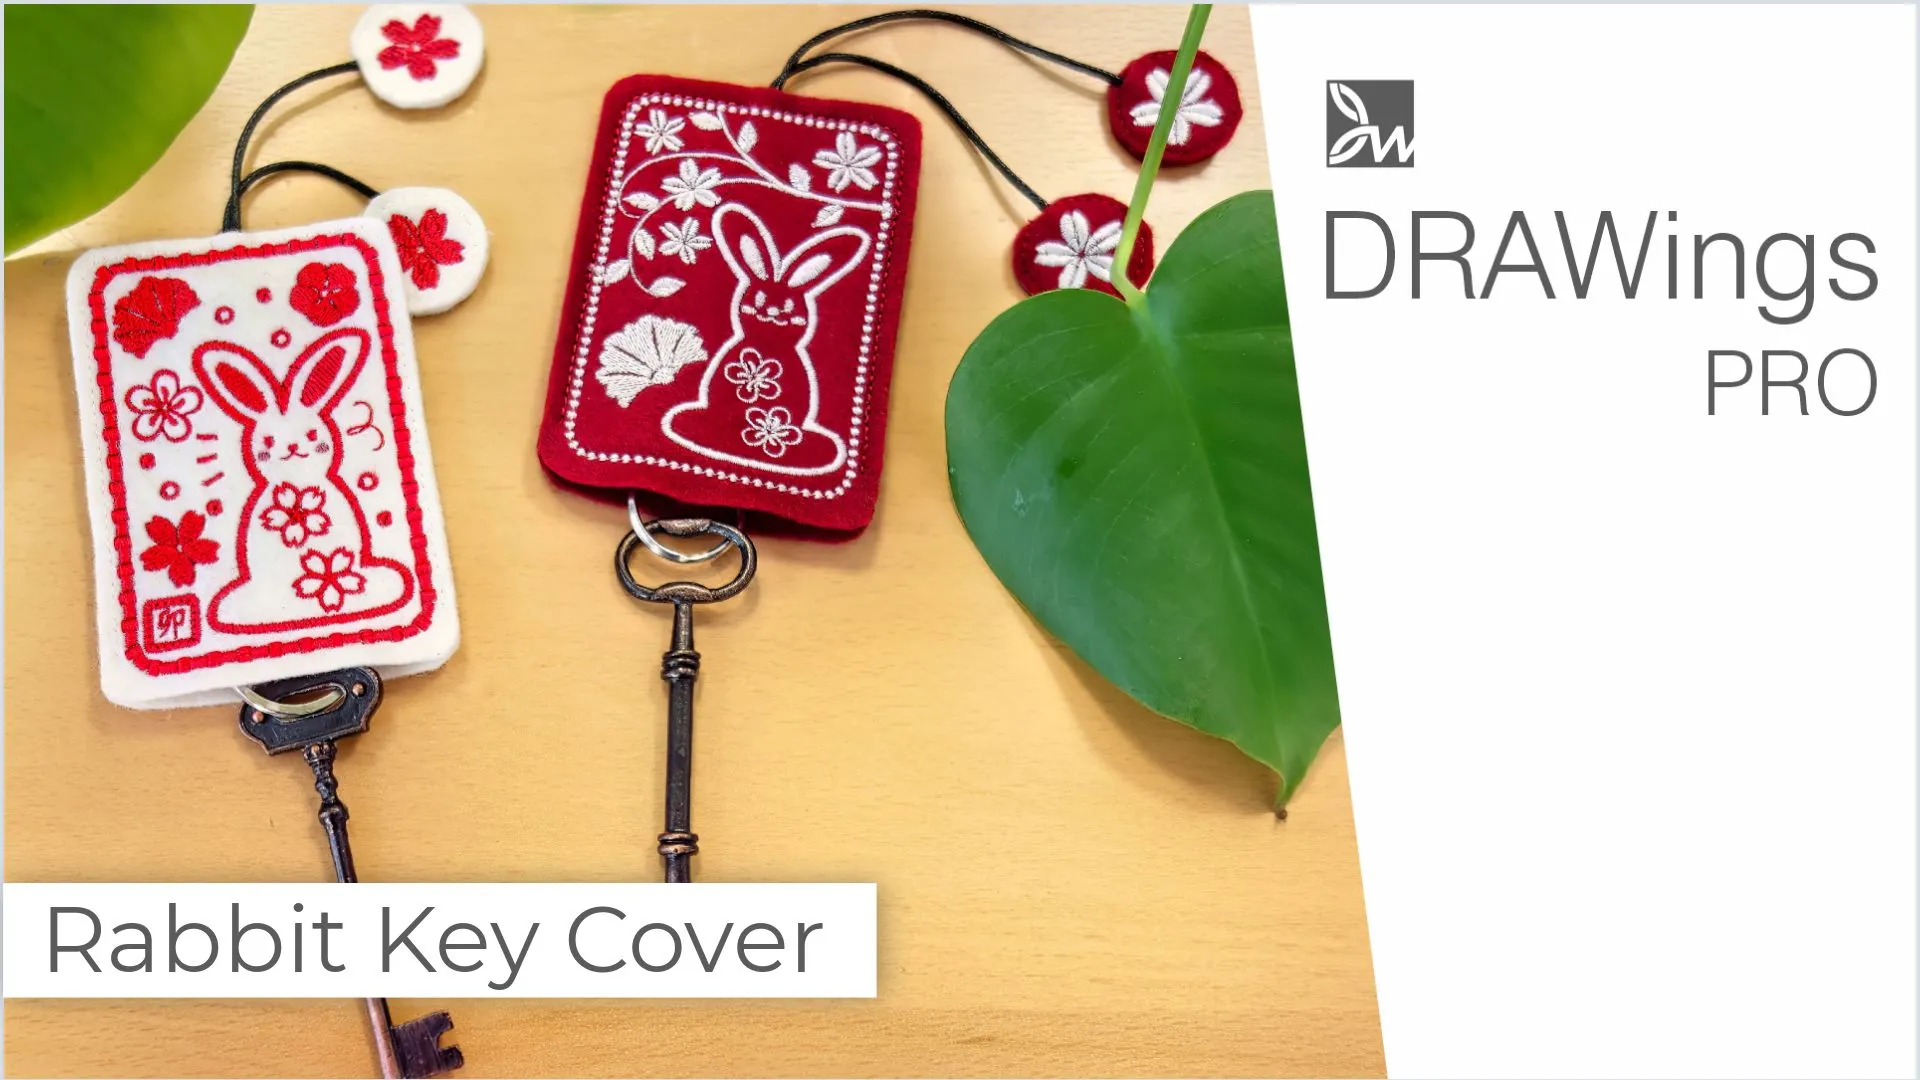
How To Make A Beautiful Rabbit Key Cover From scratch
Are you looking for a unique and handmade way to represent your style? If so, then the Japanese-inspired felt key cover is the perfect accessory for you! In this video, we will show you how to transform a simple piece of felt into an artful key cover featuring an embroidered rabbit, florals and traditional designs. Unlock your creativity and learn something new with this fun and easy tutorial. You’ll be surprised how quickly you can create a key cover that expresses your individuality. Get caught up in the beauty of Japanese art today!
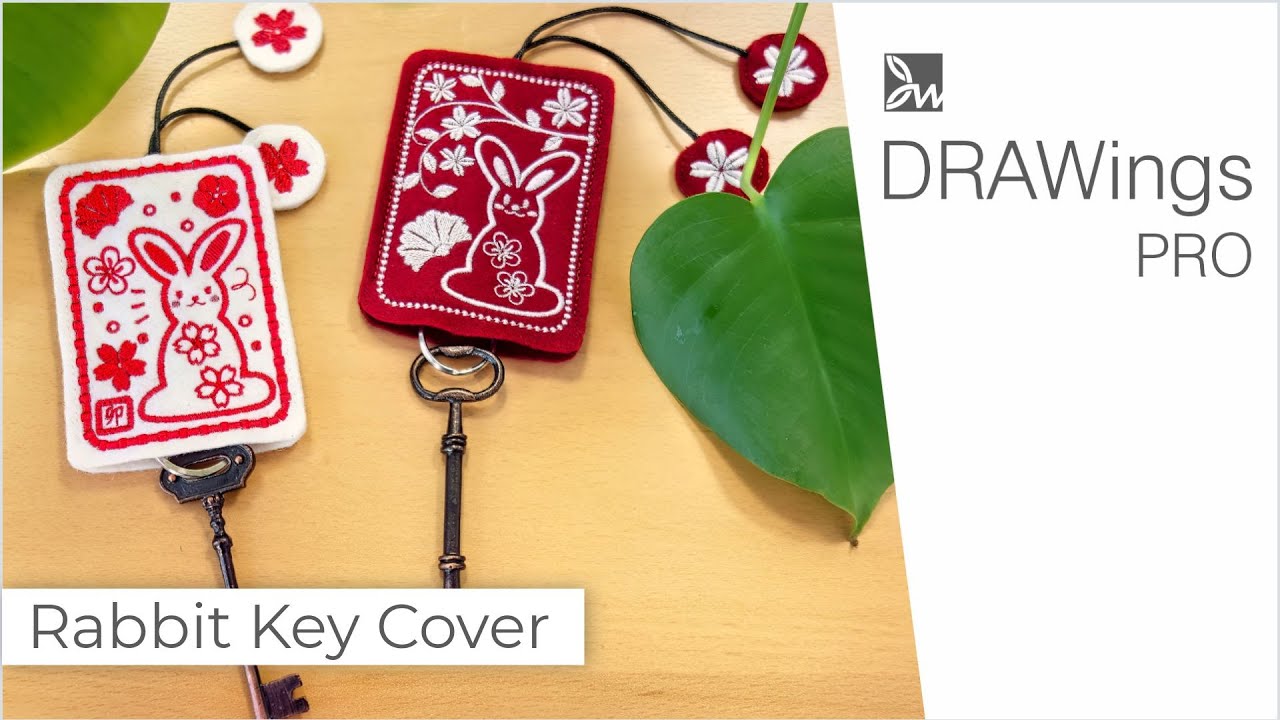
Create the rabbit key cover design
We will choose a hoop that is bigger than 10 cm (approx 4 inches) in width and height and select Felt fabric. Make the outline for the key cover. Start the “Rectangle” tool, set 20% on “Roundness” and draw a rectangle. To set the size, uncheck the “Proportional” and set the “Width” to 60mm, and the “Height” to 90mm.
Center it to the hoop, remove the fill color as we will only use the outline, and pick a color for the outline. Select the oval-Bean style of stitches to decorate it and by using the auto-border tool we will make a Running stitch around it.
Using this Running stitch we will stitch together the front and back fabric. The auto-border must be set to the outside by 2mm and the type should be Running. You may choose a different color for this running stitch so that when the machine prompts you to change the thread you will place the back fabric.
We need to keep an area open from which the cord will go through.
Enable the view of the grid so that you can be more accurate. Start “Edit nodes” mode… and right click on the outline, approx. 4mm to the left from the center and use the split outline option. Do the same for the other side. Select any of the nodes of the middle part and delete those nodes. Feel free to adjust the opening according to your preferences.
Likewise, we will make an opening at the lower part, from where the keys can be pulled out. To do so, split the outline at these 2 nodes right click on any of the nodes of the new part, use Select polyline option and delete all selected nodes.
Create the Rabbit embroidery design
We’ll use the body part from the clipart library but we’ll draw our own cute rabbit face later on. So, open the clipart library, locate “Rabbit03” item and click Insert. Click and drag to define the position and size of the rabbit. You may hold the “Shift” key down to make sure that it is positioned straight. Once you release the mouse, the placement will be finalized.
Edit the rabbit according your preferences
For our design the rabbit should be about 61mm in height, so you may also set the size right after placing the rabbit. Move it to the lower right corner, “Ungroup” it so that we can remove any unnecessary parts and delete the bow tie, the yellow outline and some underlay parts which are below the ears. Remove the fill color of the rabbit, set the outline to red and use the same red for the ears.
Edit the rabbit outline
For the rabbit outline, set it to “Satin serial” and set the “Outline width” to 2mm. We can also edit the outline, for example you may want to change its corner a little.
Edit the rabbit ears
We will also edit the ears. We will move the nodes at the edges to make the ears more pointy. Use the “Convert outline” from the right click menu to make it a fill object and gain more control on the stitch flow. In the “Stitch Flow” we can “Divide” the corner and change the direction of the stitches, if necessary.
Make the face of the rabbit.
Use the “Ellipse” shape and draw an ellipse for an eye. Remove the outline and set the color to red. Set the size to 2.2mm in width and 3.5mm in Height. Make a duplicate of the eye and move it to the right position.
For the nose, use the “Ellipse” tool once again and draw a slightly smaller and horizontal circle lower than the two eyes. Set the “Color” to red and remove the outline. Set the size to 2.8mm in “Width” and 2.0 mm in Height.
For the mouth draw another ellipse, but make it a vertical one this time. Set the size to 5 mm in “Width” and 6 mm in “Height”. Duplicate the design after checking the “Proportional”, and scale it at 115%. While holding the “Ctrl” key down, move the circle slightly upward.
Then select the two circles together and apply the “Trim” option from the “Shaping” tool. Delete the bigger circle and put this part in place and edit its shape if you like. Make a duplicate of this part, apply “Mirror X”, move it while holding the “Ctrl” key down, so that it can maintain the parallel line and bring the nose to front.
For the cheek, simply duplicate one of the eyes and rotate it by 90 degrees. Check the “Proportional” option, scale it to 90 %, properly place it, and duplicate it once again for the other cheek.
Decorate the more the Rabbit key cover design
We will add some items from the “clipart library” to decorate the design. Place these flowers into the body of the rabbit, and create this floral to be placed next to it. You may tilt and position it in any way you like.
Add a floral vine effect to the white area to embellish the background. To do so, go to “Digitize tools” and start the “Magic wand” tool. Then click on the white area and a shape is created in the shape of the area. Right click on the shape and from the appearing menu use “Array” and “Create floral“. Select flower and leaf and proceed.
We want to move the floral vine starting point by enabling the “Stitch flow” tool and click and drag to specify the position and the length of the stem. Take your time to create the look that pleases you. For example, you may adjust the scale of the flower and leaf to make the elements bigger. You may even adjust the scale of the branch, if you like. Once you are satisfied with your floral design, click “Separate to objects”.
We are going for a single color design, so we will set the red color for the floral. Ungroup this floral part and fine tune the design if you like. For example, we can customize the flower a bit more. Change the petal into “Satin” stitch, which will allow us to add divide lines so that the petals get a realistic effect.
For a clean-cut look, we may use the “knife” tool to cut off any unnecessary parts. Using the “Outline shapes” tool define a line that crosses the part that is to be cut, select the created line along with the branch and right click and use the knife option. The design is almost ready.
At this point, we need to make sure that the blue running line which will hold the 2 fabrics together is embroidered last. In the slow redraw it is visible that the blue comes between the red parts, so we need to change the sequence. Switch to manual mode and simply move the blue running line to the bottom of the sequence. The design is ready and you can send it to the machine.
Create the charms for the cord
In a complementary design, we will create charms for the cord. Using the ellipse shape we’ll draw a circle.
Hold the “Ctrl” key down to create a perfect circle. Set the size to 25mm, delete the fill color as we only need the outline and enter 0 on the Y axis.
We can continue by adding some decoration into this circle. You may either choose something from the clipart library or use something from our previous design. Select the circle along with the flower and apply “Align center” tool.
Choose the outline and duplicate it, set a different color from the first outline, select all parts, make a duplicate and move that duplicate part to a new point. Switch to manual mode to adjust the sequence.
We’ll use the black outline as guide stitch to place the fabric and the blue outline at the end to stitch both fabrics together. This design is also ready.
Create the key holder with felt fabric
For the key holder project we will need:
- A synthetic cord of about 36 cm, that is 14 inches
- A Keyring
- A suitable Hoop
- Stabilizer
- Threads
First, mark the 4 edges of a cross-center line on one of the cloths, set the stabilizer to the hoop and draw a cross line using the guide template on the stabilizer. Place the cloth at the center of the hoop using the cross line you made and pin it for stability, making sure that any pins are out of the machine’s way.
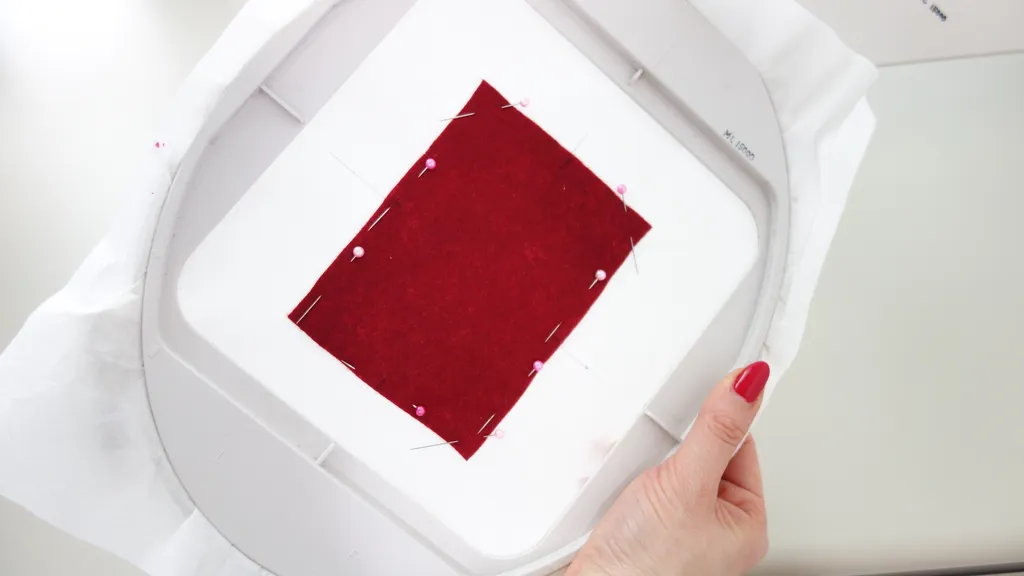
Sew out the rabbit design together with the decorations
Set the thread and bobbin and load the file to the machine.
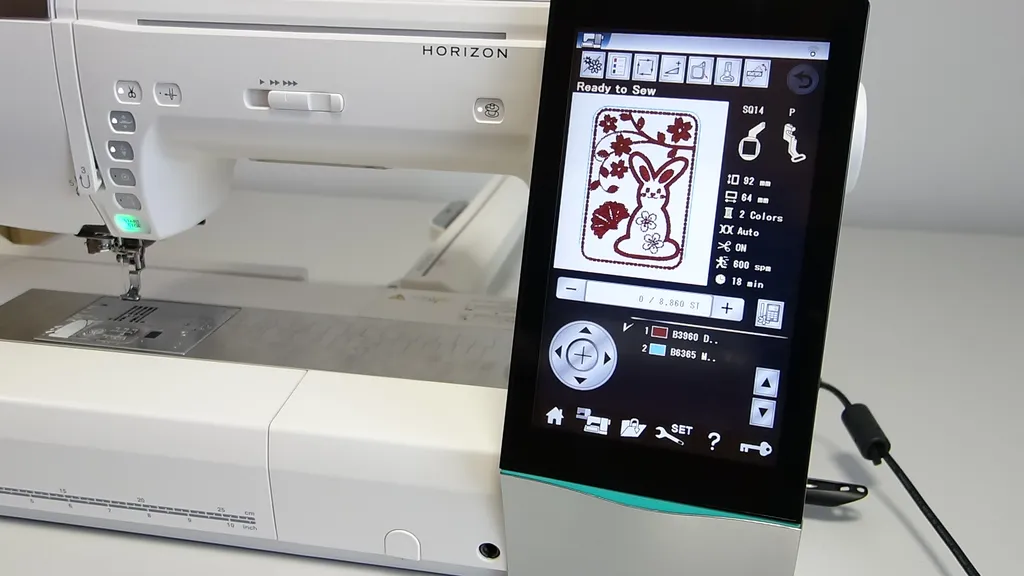
We chose to go for white thread on red felt. So, the preview is different but, since I’ve added the red fabric and the white thread, it will be ok. Attach the hoop to the machine and start the embroidery.
The machine will stop before the outer line remove the hoop from the machine and remove the pins. Place the other cloth at the back of the hoop, hold it and turn it around so that you can pin it in place.
Again make sure that any pins stay out of the machine’s way. Set the same thread color and bobbin as the color of cloth. Attach the hoop and start embroidering the outline. Remove the hoop from the machine and take the pins out.
Remove the stabilizer from the hoop. Tear the stabilizer and trim it with scissors if necessary. Use scissors to cut around the felt, approx. 3 mm away from the outline; Be extra careful not to cut the outline stitch.
Sew out the charms
Then we will continue with making the charms for the cord. Hoop the stabilizer and set it to the machine.
Load the file and start embroidering the outline first. We will use this as a guide stitch. Place the tips of the cord at the center and secure them with masking tape.
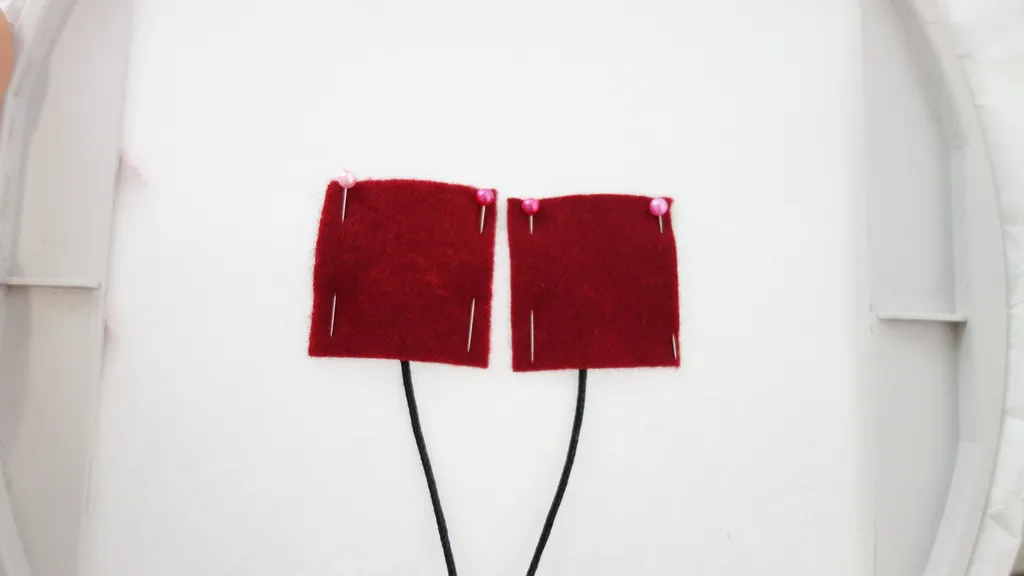
Place the two pieces of cloth on top of the guide stitch. The bottom line of the square should be slightly below the guide stitch. Secure them with pins. Again, make sure that the pins won’t harm your machine!
Set the hoop to the machine and start embroidering the design.
Remove the hoop from the machine, flip the hoop and place the other two pieces of cloth to the back of the hoop. Secure them with pins carefully, attach the hoop to the machine and start to embroider the outline.
Tear off the stabilizer, use scissors to cut the outline making sure you don’t cut any stitches, thread the cord through the opening and attach a keyring to the cord and it’ s done!
Enjoy a prosperous and peaceful rabbit year!


You can download the .DRAW file of the project, for free, from the link below:
- Project’s .DRAW file: Rabbit Key Cover
It can open only with the XI and newest versions of DRAWings embroidery software
Check also, our related projects “How to make a drawstring bag, how to label and decorate it” & “Create a beautiful PaintStitch tote bag“