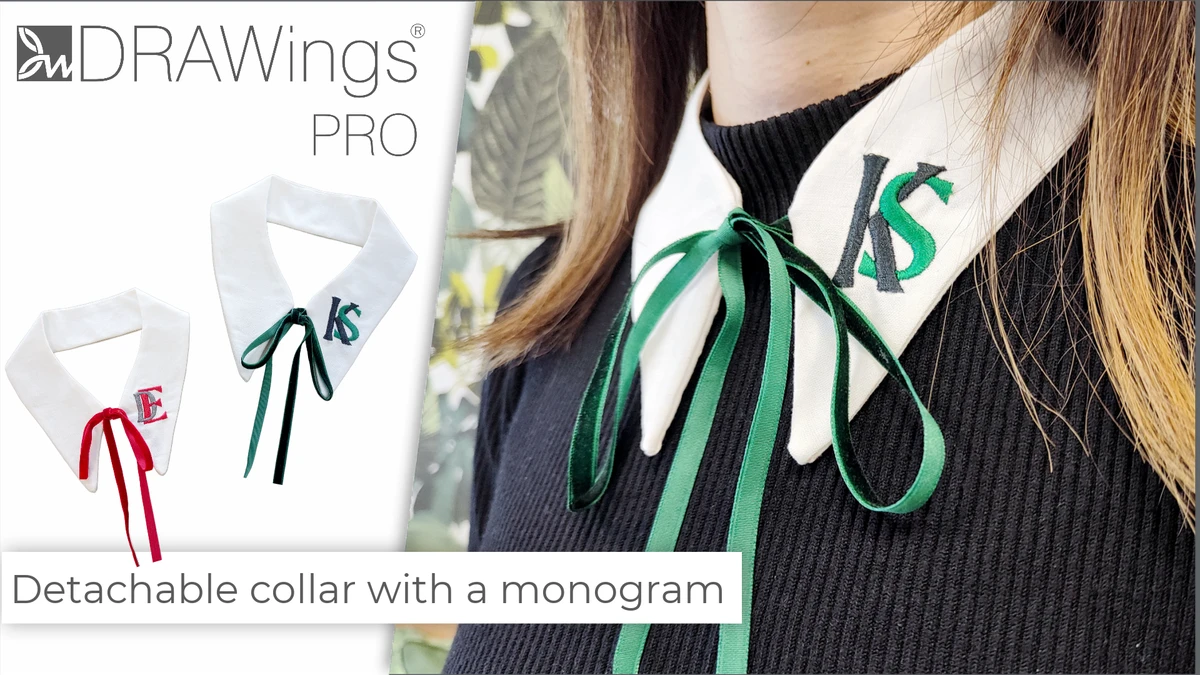
How to Make a Detachable Collar with an Embroidered Monogram
Looking for a way to add a touch of personalized style to your wardrobe? A detachable shirt collar with an embroidered monogram is the perfect solution. In our tutorial video, we’ll guide you through the process of creating this chic accessory, complete with an interlocking monogram design that adds a classic and sophisticated touch.
With our step-by-step instructions, you’ll be able to craft a detachable collar that can be worn with any shirt, making it a versatile addition to your wardrobe. Whether you’re looking to add a unique touch to your professional attire or just want to elevate your casual look, this detachable collar is a stylish and practical accessory that’s sure to impress.

Make a Detachable Collar with an Embroidered Monogram
For this project, we are providing a set of files in. DRAW format so that you can make your own collar, as shown in the video. The one called “Design template” is to be used as a guideline so that you place the monogram in the correct position and at the right size.
The rest, named “Collar pattern”, are patterns provided in multiple sizes so that you may choose the one that is suitable for you. Leave those patterns aside for now, and load the provided “Design template” draw file.
Make the Embroidered Monogram design
Select the Monogram tool from the Lettering section. The New Monogram dialog will appear.
Have in mind that you can move the dialog around, so that you can have a clear view of your monogram.
Type the characters for the monogram. Most probably you’ll want to use your own initials, so adjust the monogram options accordingly.
Set Monogram options
At the top part of the Monogram tool is where you define the monogram area. Set the Width and Height at 55 mm. You may need to uncheck the Proportional, if it’s already checked, to define the width and height. The software automatically fits the selected template and its frame into this monogram area.
Select a template you We are using Template number 22: this is a template for 2 characters, which we are going to fit into the collar. This template is almost square, so after selecting it, the size of the letters gets bigger to best fit the monogram area.
We will not use a frame for this project, so choose “No frame“, if a frame is already selected. Select the Font you want. We are using the Font xpg181.
From the stretch option, the software fits the monogram into the defined monogram area. The stretch option defines the percentage of the covered monogram area, which means that If you wish to make the monogram smaller or bigger you may use the stretch option.
Set the Stretch at 100% so that the monogram fills an area of 55 by 55mm. To finalize the monogram, click OK. You can work on your own version to personalize it as you wish.
Edit the monogram design
Remove the outline as we won’t need it and select a color for the monogram. We can even enhance it using the node editor. In this mode we can edit the monogram template. You may move any node or edit any of the lines, to create your own, custom template. The software will fit the characters into the shape you make.
For this project we will leave the shape as is but I want to make the S smaller. To do that, Right click on any node of that S and from the appearing menu use the Select Polyline option. All nodes of the S template are selected. Using the control handles at the corners you can click and drag to scale the monogram area of the S and make it smaller. You may also rotate, slant or stretch one dimension.
Move it to the top of letter K to blend letter S together with K. So, move it until you get them blended as you like. Take your time. You may also want to stretch the K a little bit. Notice that the letters are overlapping each other at some points.
So, if you move your mouse on top of any area where the letters are overlapping you will get a blue highlighted area in the shape of the common part. Click on that area and this part comes to the front.
You may arrange the letters in any way you like to get those interlocking characters. When you are satisfied with the design, switch to normal selection mode.
Change the fill type to Satin and then right click on the shape, and use the Break apart option. We break the monogram into its sub-parts to give a different color to the S letter.
Finally, we will use the stitch flow to design this Satin bar as we like. Select each part and apply directions to any area needed. In general, since Satin stitch goes from one side to the other, we are adding directions to make the satin flow parallel to the character’s shape. Move and adjust the lettering into the template area.
Adjust embroidery sequence
The design looks ready, so let’s switch to slow redraw for a closer review before embroidering.
As you can see, all black parts are embroidered first and then go the green parts; so all green parts are on top of the black ones. But what if we want to have only certain parts be on top of others? Then, we need to adjust their sequence.
To do that we will press on Auto button to switch to manual mode. Place the red guideline to be the first of the sequence. First, we want this big line of letter K then we want the lower part of the Green after that, the lower part of the Black followed by the other 2 green parts and finally, the top black part. You can check the sequence once again just to be on the safe side. And the design is ready!
Adjust the embroidery parameters
We have to check at some embroidery parameters which are automatically adjusted by the software.
In particular, I’d like to share some information about compensation. Compensation is added to make a design part a bit bigger while stitching out. The compensation value is calculated according to the fabric type and the type of embroidery that will go on that particular fabric. It is added to minimize shrinking of the fabric caused by the embroidery. But this can’t be the same for all embroidery machines.
So, it’s always good practice to test your design beforehand and experiment with the compensation to get the best and more accurate results your machine can provide.
Prepare the files for your machine
We will print out the pattern first, measure your neck and load the suitable pattern file. For example, we will load the Collar pattern for neck size 12 to 13 inches. Go to File menu and use the Print Artwork option. When using the print-out as your actual pattern, you’ll want to print in Actual size. Select your printer, click on Design only, make sure that the scale is at 100% and proceed with the printout.
Pickup the printed papers and lay them out one next to the other. Tape them together to create the life-size pattern. Use a pen to draw lines on this opening.. the lines will help you align the parts when taping together.
Carefully cut the paper around the pattern with scissors and tape the two pieces together so that the solid lines align perfectly. Leave the pattern aside for now and let’s get to make our collar.


Make the detachable collar with an embroidered monogram
Now that we have gathered all the materials, we may begin sewing and embroidering.
For this project we will need:
- 2 pieces of stabilizer.
- Adhesive spray,
- Embroidery threads,
- Hoop and the printed pattern


Place the pattern on the wrong side of one of the fabrics, pin the pattern to the fabric, trace the pattern, the opening for turning and the place-holders for the ribbon.
Hoop the stabilizer, load the design to your machine, set the bobbin and needle thread and attach the hoop to the machine and press the start button and embroider only the guide stitch.
Remove the hoop from the sewing machine and place the fabric along the guide stitch, making sure that the lines we drew earlier on the wrong side are aligned with the guide stitch.
Use adhesive spray or pins to secure the fabric in place. If you use pins, make sure that they won’t harm your machine. Attach the hoop to the machine and we’re ready to embroider the monogram.
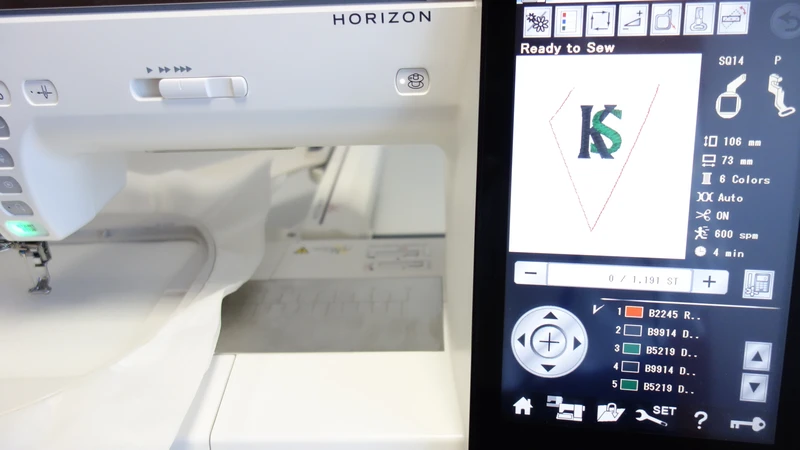
We will start with the Black part then change the thread to green to do this little lower part and keep on with the color changes until we are done.
When the embroidery is complete, remove the hoop from the machine, unhoop the stabilizer, carefully remove the pins and cut the stabilizer.
Then lay the other fabric, right side facing up, place the embroidered fabric on top of it, wrong side facing up, and right sides together, facing inwards. Make sure that the line we drew earlier is facing up; we will be sewing this line later.
Place the ribbons, fold them and secure with masking tape so they won’t be sewn accidentally. Place the ribbons inside the two fabrics, making sure that the ribbons and embroidered fabric are facing right sides together.
Allow approximately 1.5 cm off the edge of the ribbon, that is about half an inch, from the line we drew. Secure the fabrics, making sure the ribbons are inside the line. Let’s sew along the line we drew earlier. Start sewing from an opening, leaving about a 6 cm, 2.3 inches, gap.
After finishing sewing, trim around the edges, leaving about 5mm, that is, slightly less than a quarter of an inch. Make sure you also trim the corners and edges of the ribbon. Turn the collar right side out, remove the masking tape carefully and use a pointed tool to shape the edges of the collar.


Iron the collar flat, making sure to press the seam allowance of the opening to the inside and close the opening by using ladder stitch. Your project is done!
Enjoy wearing this detachable collar with your original customized monogram design!


You can download the .DRAW file of the project, for free, from the link below:
- Project’s .DRAW file: Detachable Collar with an Embroidered Monogram
It can open only with the XI and later versions of DRAWings embroidery software
Check also, our related projects “HOW TO MAKE A BEAUTIFUL RABBIT KEY COVER FROM SCRATCH” & “DIY: HOW TO MAKE A CUSTOM GLASSES CASE WITH YOUR OWN DESIGN“