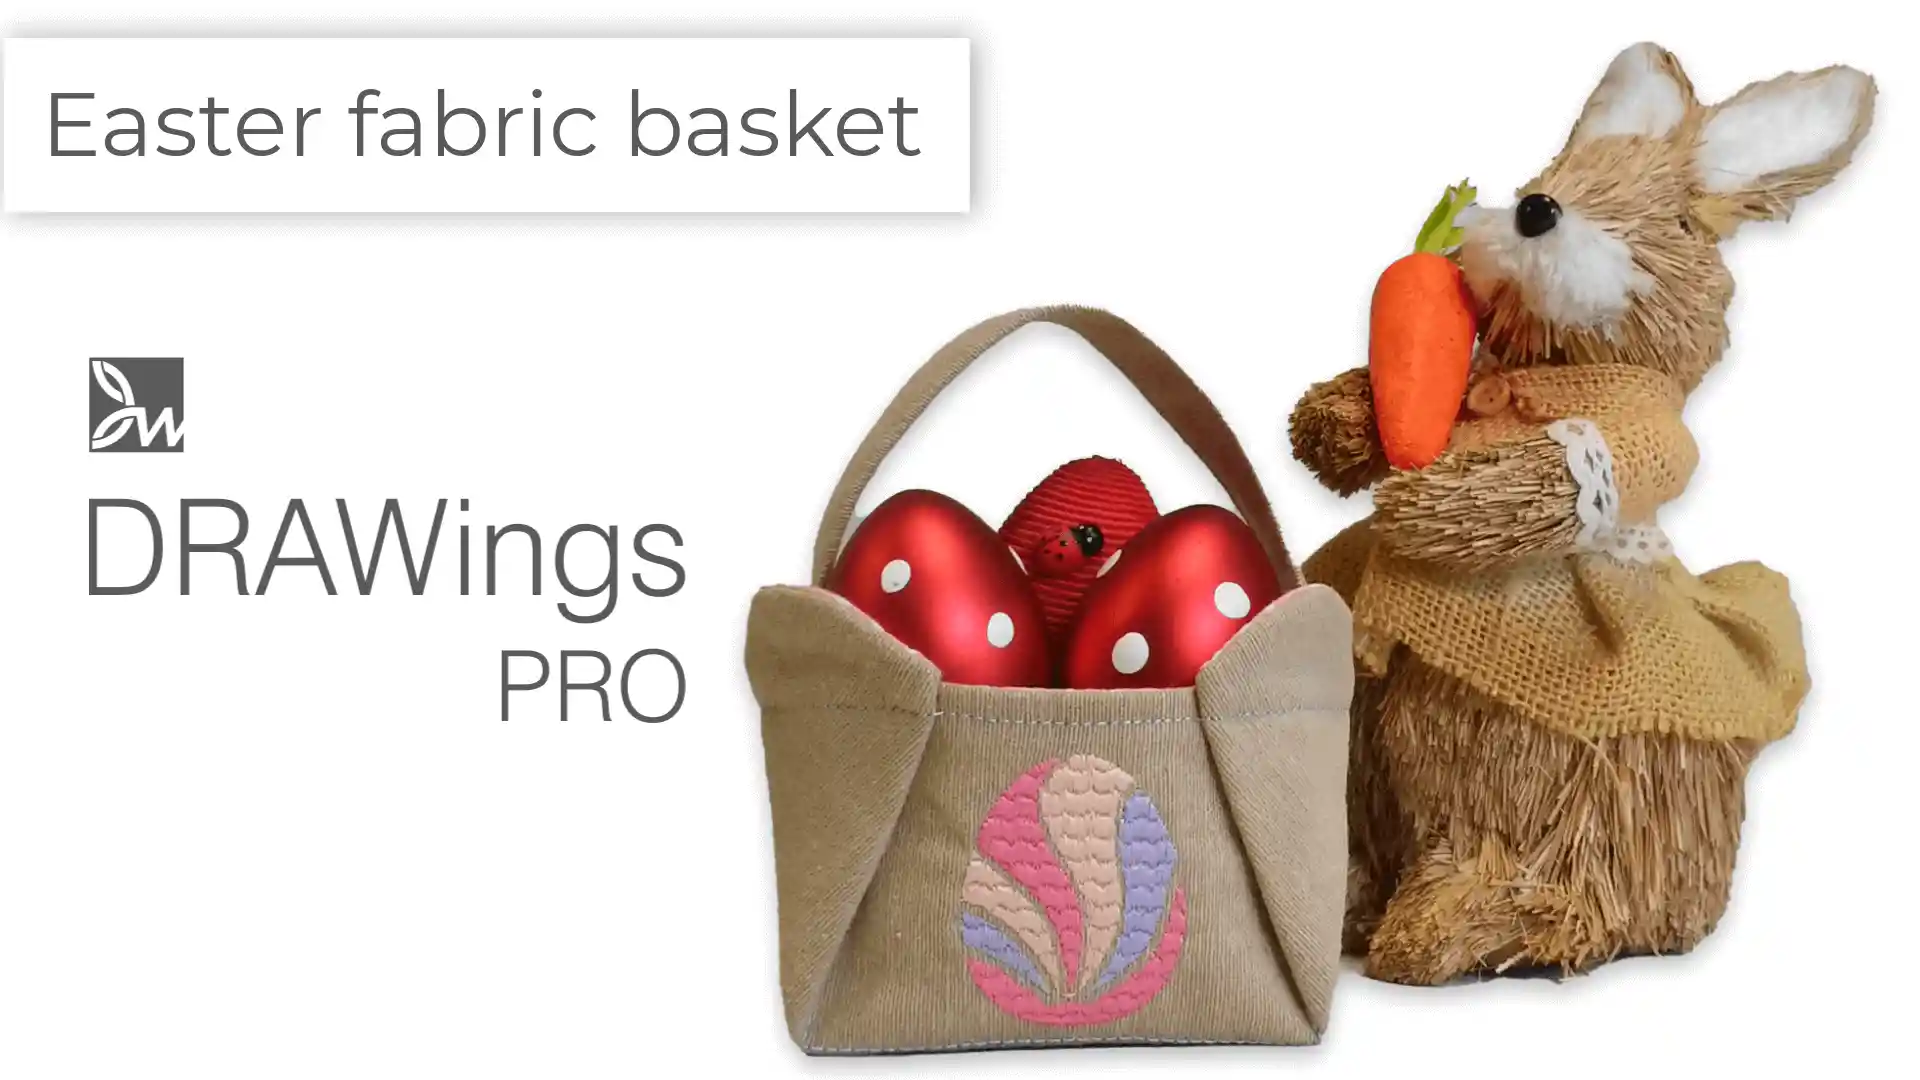
Create an adorable Easter fabric basket with embroidered eggs in minutes
Easter is a time when families get together to celebrate and enjoy each other’s company. It can also be a time for Easter crafts, which can add an extra touch of fun and festivity to the holiday. In this article, we will show you how to make an Easter fabric basket with embroidered eggs on it. We will first show you how to create the Easter egg design, and then how to make the Easter basket itself.
Spring has sprung and Easter is on its way!
In this video, we will show you an easy way to create an Easter fabric basket.
This project comes in two parts. In the first part, we will show you how to create an Easter egg design and how to make it special using simple shapes and the circular array tool. In the second part, we will show you how to make an embroidery basket from scratch and decorate it using the Easter designs you will have already created along with some text.

Create an Easter egg design
We can start by creating an ellipse that resembles an egg. Start the ellipse tool and click-and-drag to create the ellipse. Set the size you prefer; in our case the template we’re using, we will need the egg to fit in a 50X50mm area.
Select the ellipse, right-click your mouse, and use the “Convert to curves” option. This is done so that we can freely edit the shape of the ellipse using the node editor. Start the node editor, while simultaneously selecting two nodes on the horizontal center of the ellipse. Right-click on top of the selection and use the “Auto smooth node”. Keep the two nodes selected and move them lower to form the egg shape.
Tip: For easier handling with the circular array tool later, it is a good idea to move the egg on the upper part of the axis.
Select the egg’s color and decorate it
At this point, you may select any color for the egg and remove the outline. Draw a line using the outline shapes tool. We will draw a curved line but you can actually draw any line you like. With any kind of line and the array tool, you can create a whole different decoration for the egg. Have in mind though, that for the purpose of this project, we want the lines to go a little to the outside of the egg in order to work as our cut lines later on. You can edit the line using the Node editor if necessary.
For the created line, we’ll set the Outline type into Satin serial and its width to 1.5mm. Then select the line, right-click and use the “Convert outline to object” option. Our line is ready, so let’s start the Circular array tool. A preview of the array appears, and you may customize it. For this design, we need 6 lines to be evenly arranged radially, between 145 degrees and 45 degrees. Move the array center to change its position.
Additionally, you may need to move the arc and change the distance from the center so that their bottom ends touch each other. Take your time to find the placement that pleases you and when you are done, click “Apply” to finalize the array.
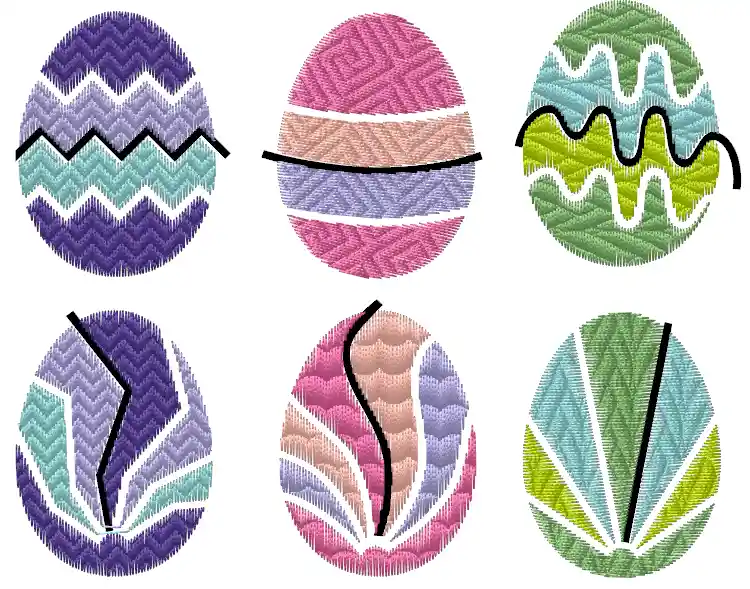
Select the lines and the egg at the same time and click “Trim” from the “Shaping” menu. Delete all the lines to see the unique design of your egg. Right-click on the egg and apply “Break apart”, so that you can set colors and stitches for each part. With all parts selected you can apply the stitch type and pattern of your choice. You can set the direction of the stitches and patterns with the “Stitch flow” for a beautiful finish.
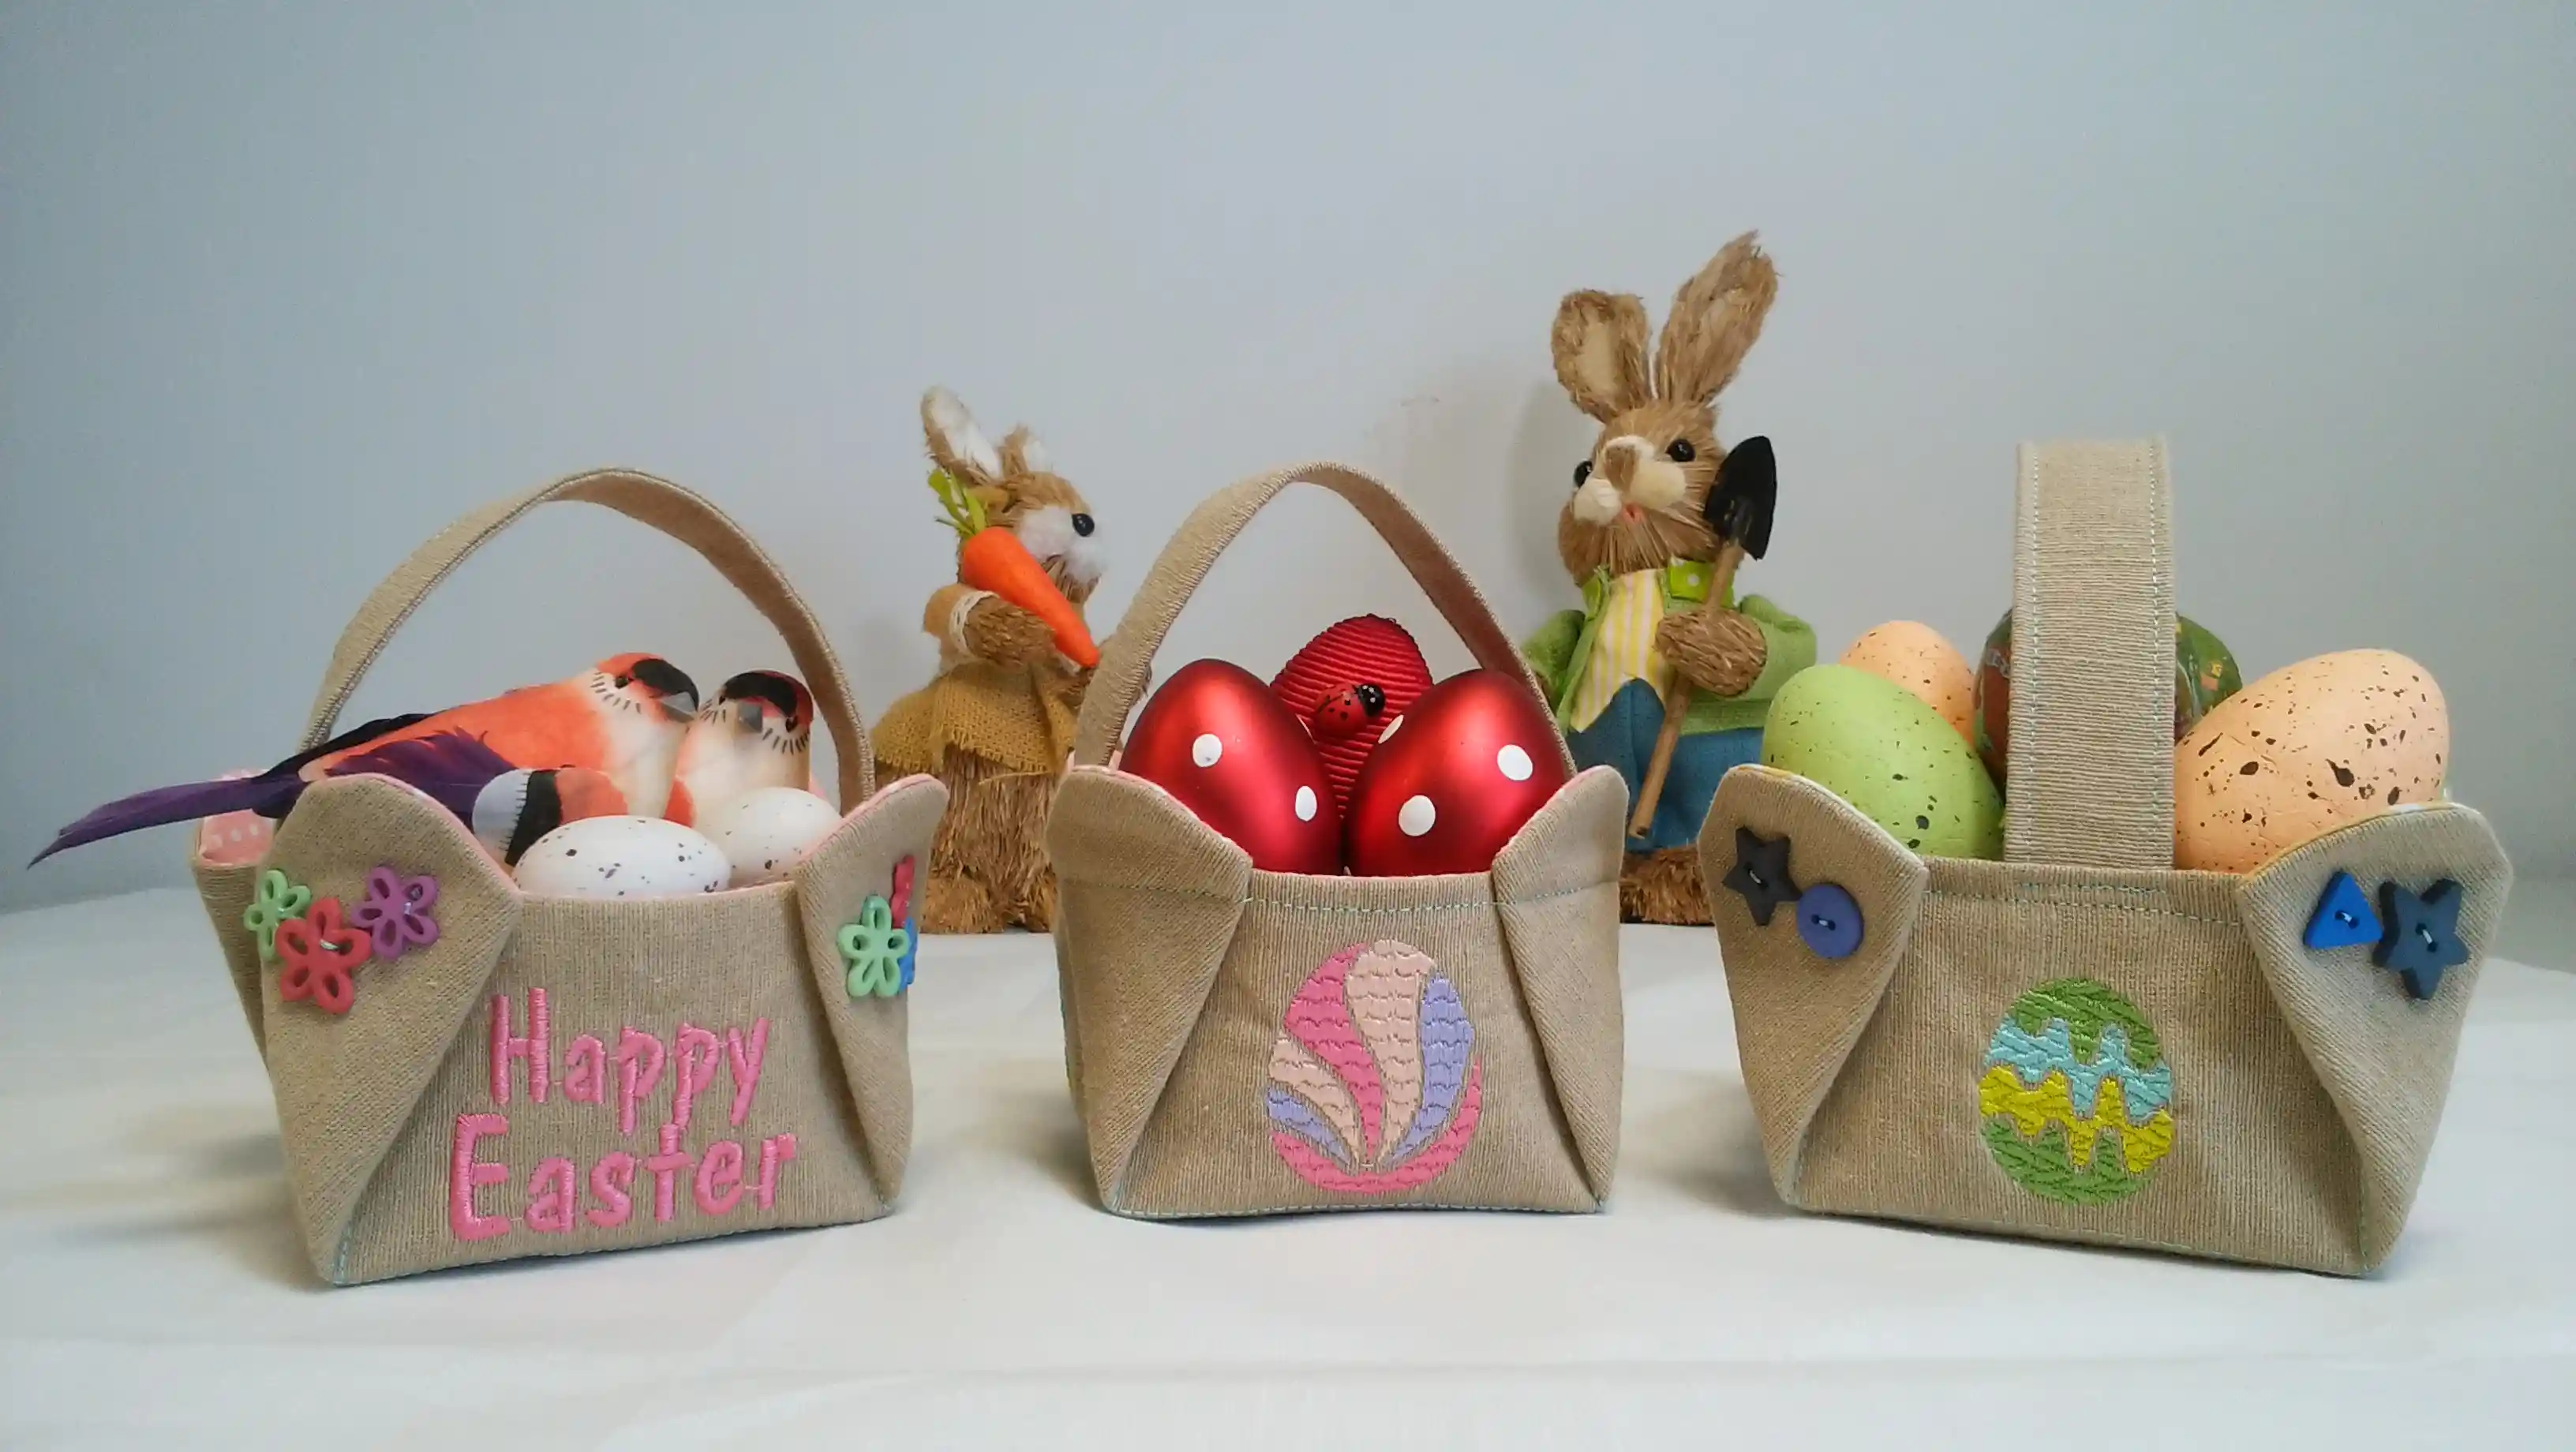
Select colors for your design and you are done with the egg! Using a different line and array placement you can create many unique eggs.
Make fabric easter baskets from scratch
Here, we will show you how to make a fabric easter basket using a hoop 230 mm x 230 mm (9.1” x 9.1”). Let’s create a square using the Rectangle shape. Hold the Ctrl key down while dragging to make sure that the shape remains square. Right-click to finalize the process, set the size at 220mm (8.7inches) and position the object to the center of the axis.
Then set Roundness to 20% and remove the fill of the object. For the outline apply Running with a double style. Right-click and use the “Convert to curves” option so that you can fully edit the shape using the node editor.
We need to make a 6 cm or about 2.3inches, non-sewn part, on the side, where we attach the handle. Switch to node editor. The view of the grid may help you at this point. Hover your mouse over the line, right-click and click the “Split Outline” to cut the line in places. Then delete this node to remove that part and start the “outline shape” to draw a straight line. The line needs to be an end-to-end length just inside the rectangle.
To draw the straight line, click to define the first node, hold the Ctrl key down and define the second node and then, by using the Esc key three times, finalize the line and release the tool. From the “Tools options” bar, set the position of the line to X at 0 and Y at 45mm or 1.8inches. Then click “Duplicate” and move the new line to -45 to place it to the other side. Click “Duplicate” once again and set the parameter as X at 45(that’s 1.8”), Y at 0 and then Rotate by 90 degrees. Click “Duplicate” one last time and set the parameter as X at -45(that’s -1.8 inches) and Y at 0.
Combine it with the design and adjust the embroidery sequence
Place the embroidery designs so that they fit within the trapezoid shown in pink. Make sure that the top and the bottom of the design is 5mm away from the lines. The design is almost ready now; we only need to check the embroidery sequence.
Switch to manual mode, and move the inner lines at the beginning and the outer line to the end. Check how the design is embroidered with “Slow redraw”. if you are done, prepare your design for the sewing machine.
Prepare the items for embroidery (basic sewing supplies)
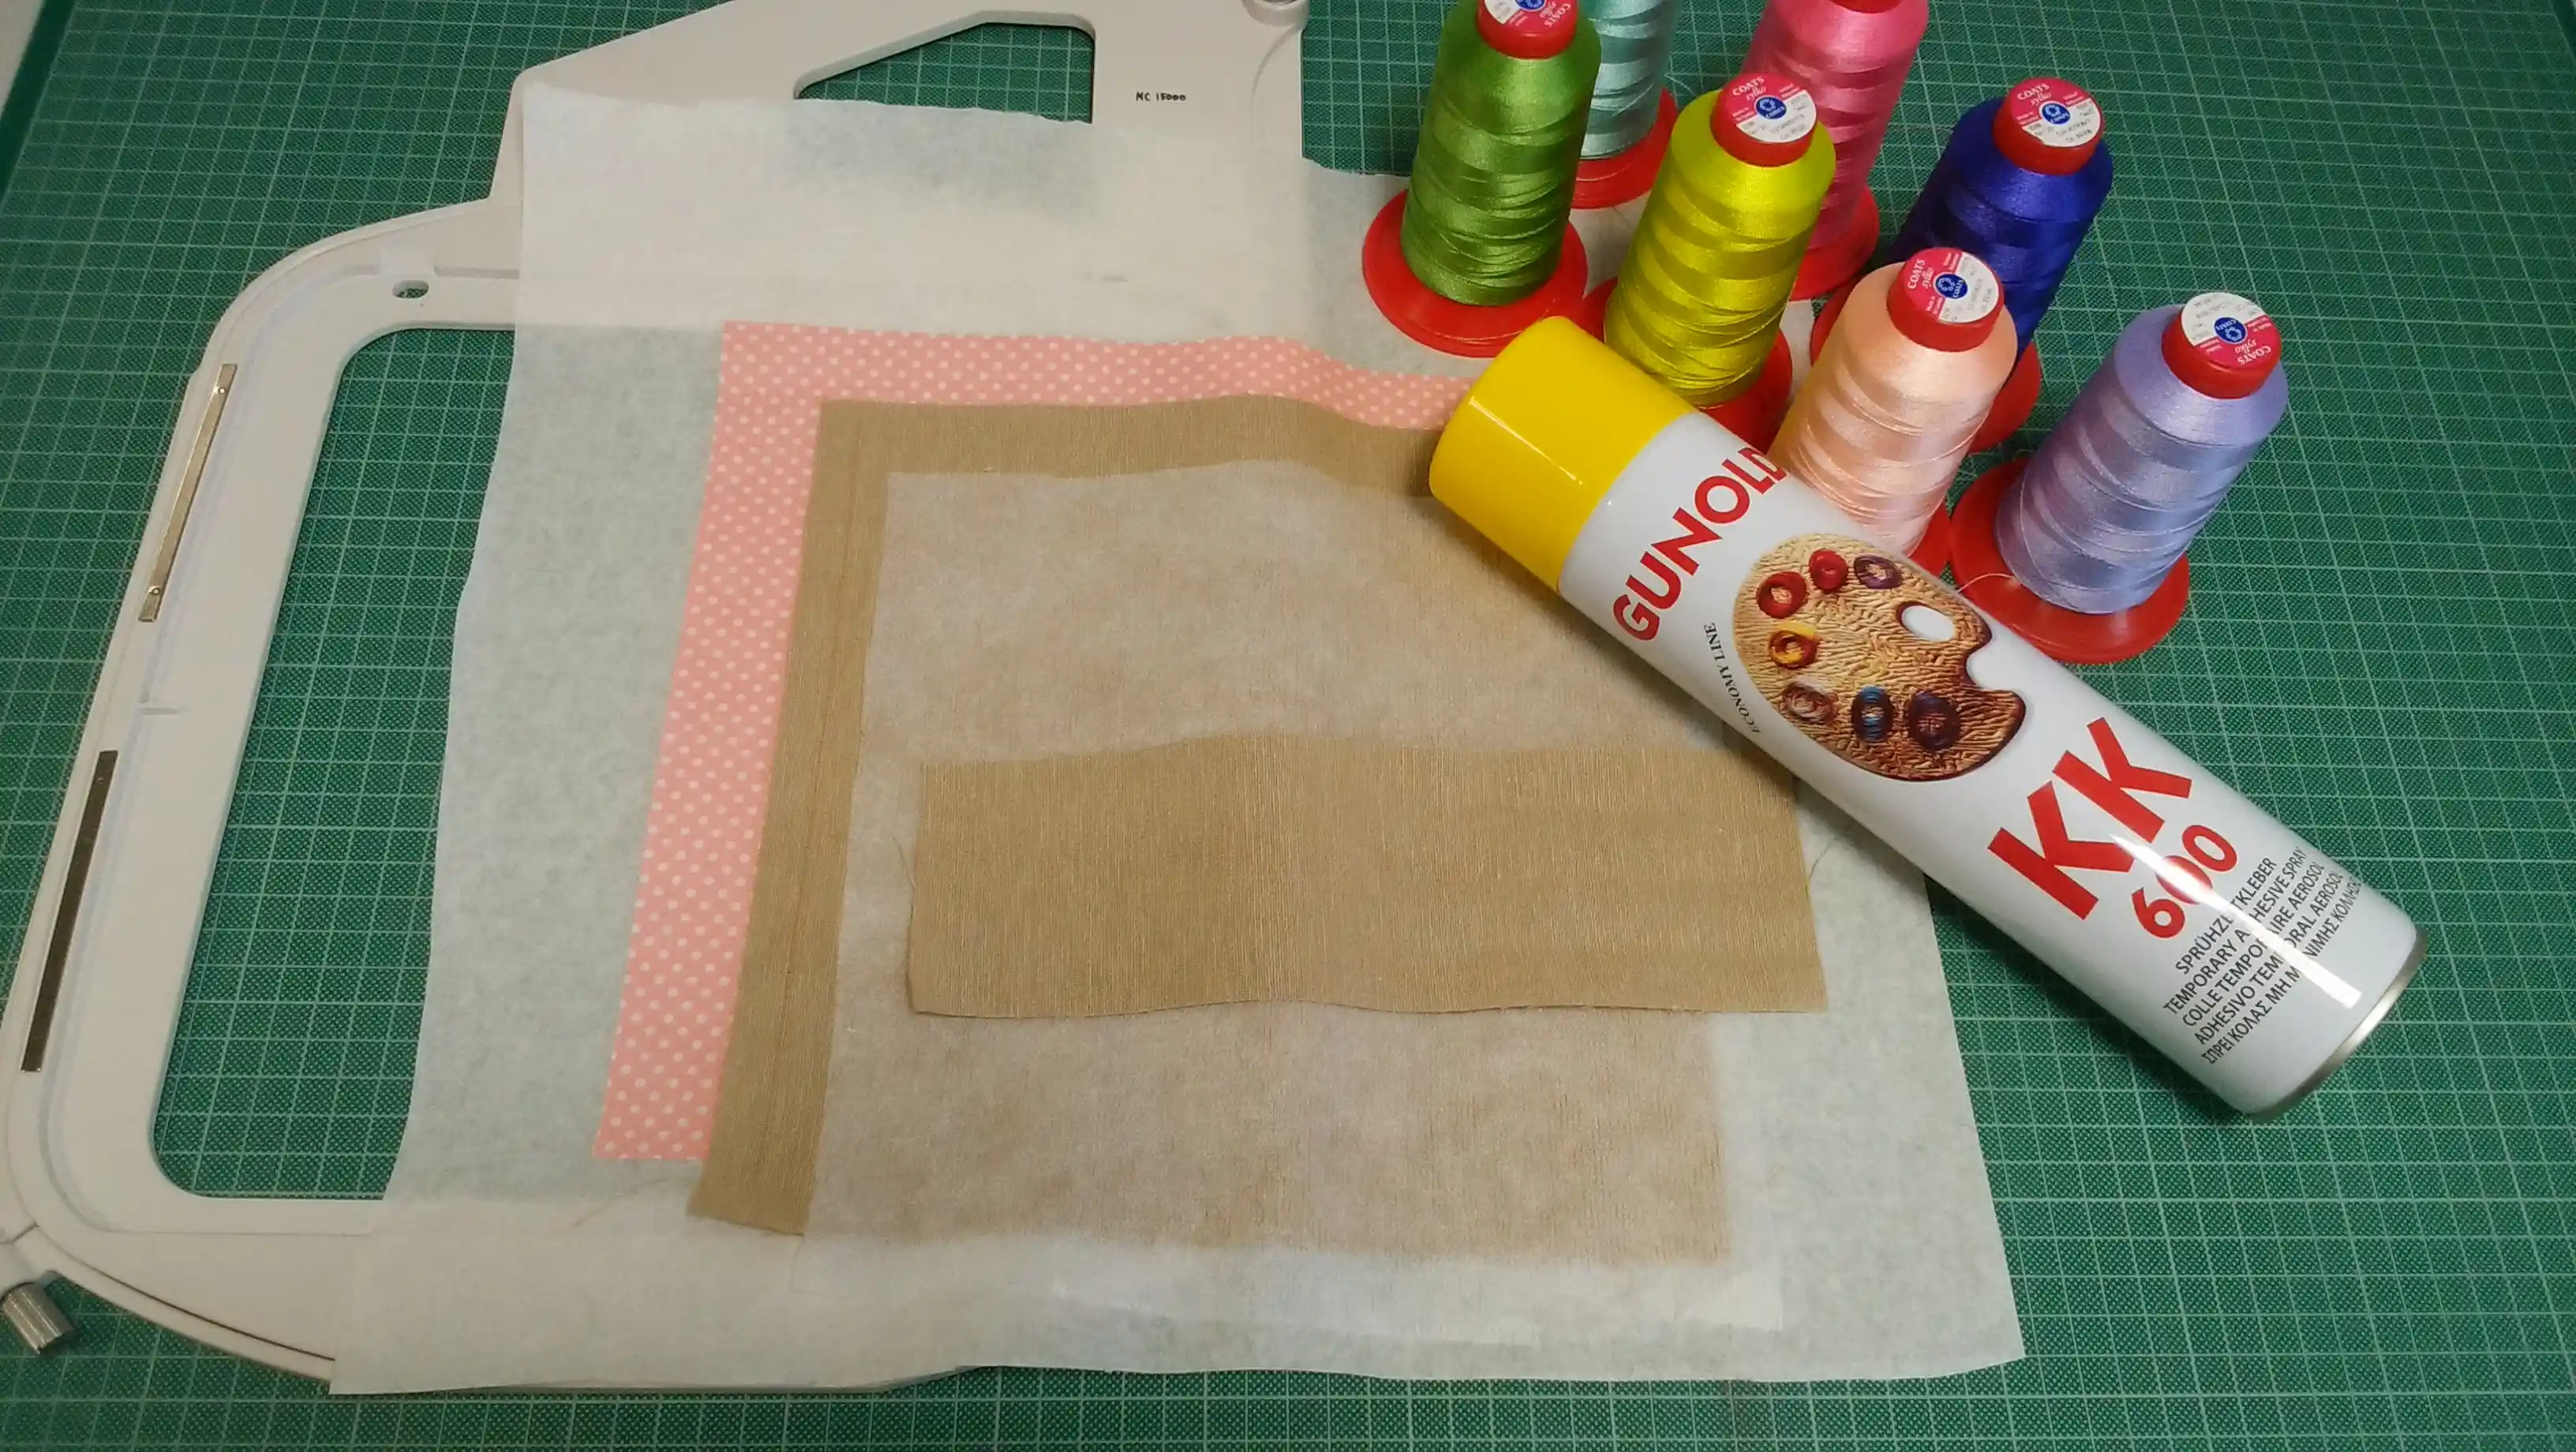
We are ready to embroider now, so make sure you’ve gathered all the materials you need. We will need
- Outer fabric,
- lining,
- fabric for the handle,
- Interfacing,
- Stabilizer,
- Embroidery threads and
- Adhesive spray
We will start by making the handle. Take a fabric for the handle and fold it in half and iron it. Open it and bring both sides to the center crease, iron again, fold in half and iron once again.
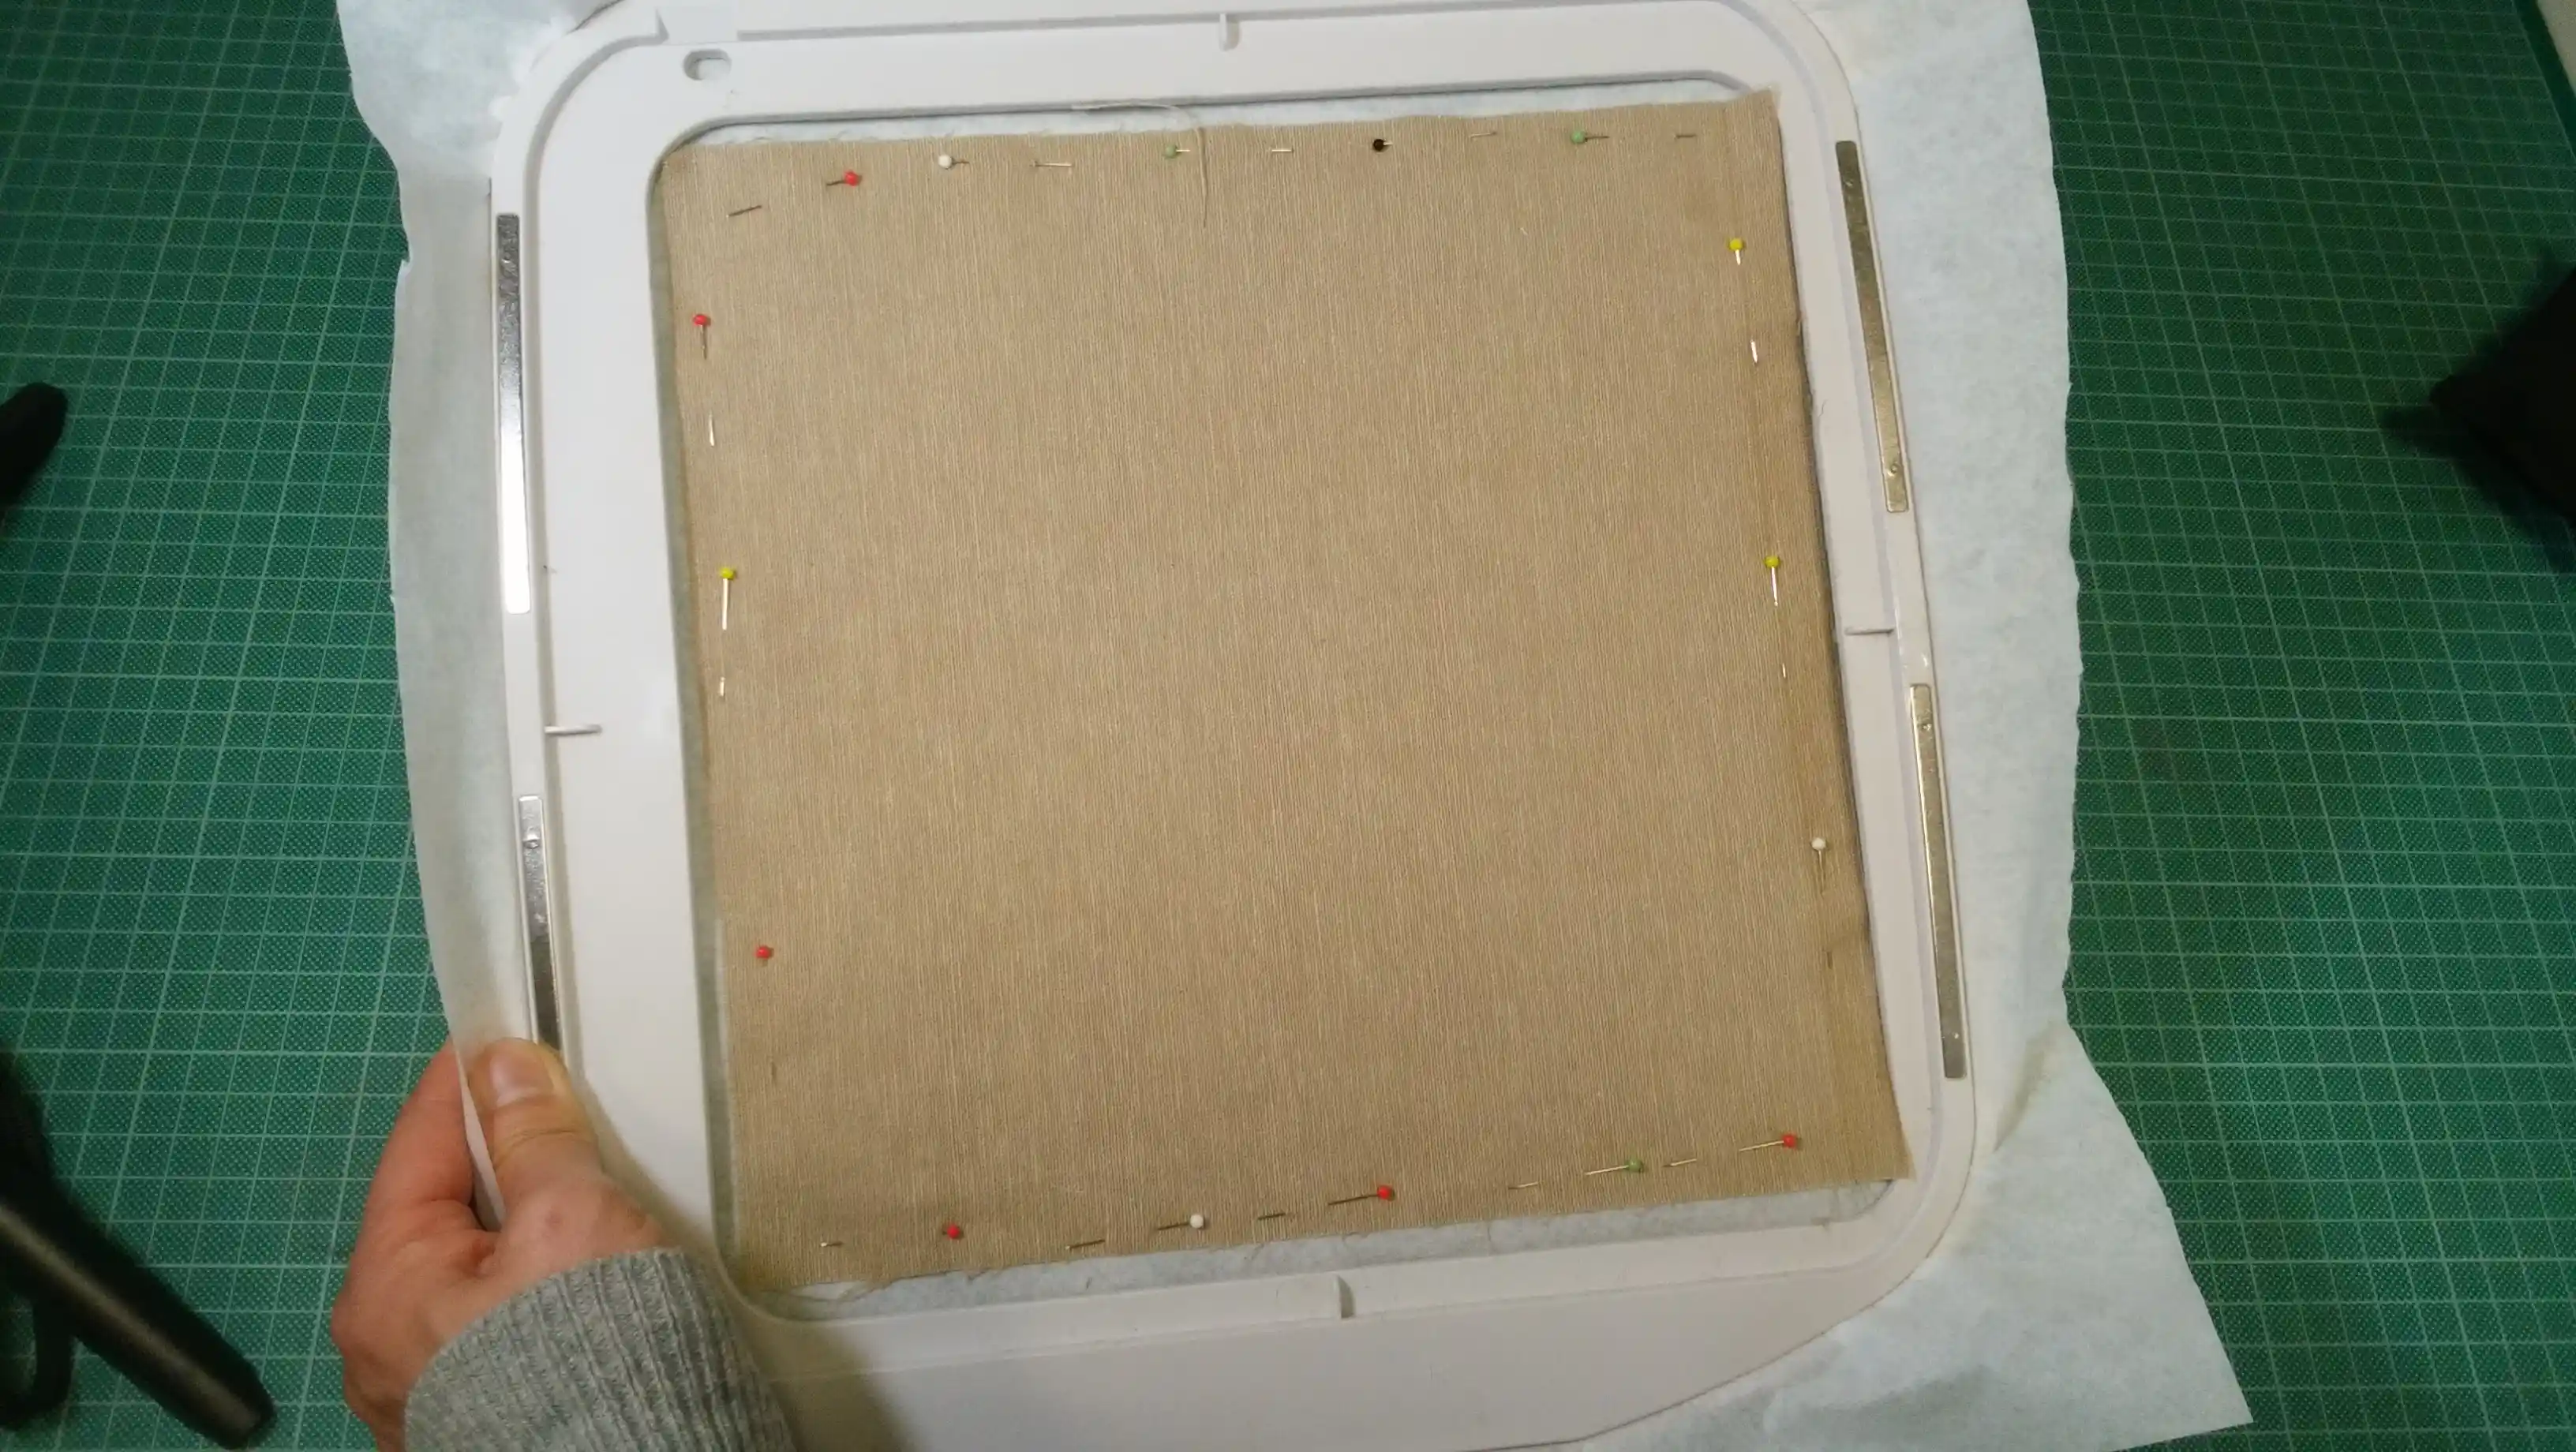
Sew both ends, iron the interfacing to stick it on the outer fabric, hoop the stabilizer and place your outer fabric on the hoop using an adhesive spray. Alternatively, you can hold your fabric in place with pins or tapes. When using pins, be extra careful not to harm the machine.
Embroider the design
Open the design, set the bobbin and needle thread, attach the hoop to the sewing machine, and start embroidery. You should embroider all parts except for the outer line. When these parts are embroidered, detach the hoop from the machine, place the handle and tape it to keep it firmly in place.
Tip: Make sure that the other side of the handle rests on the non-stitched area.
Now, place the lining matching the right sides. This is the side where the handle will be sewn by the outer line while the other side should be left unsewn. Press Start to sew the two fabrics and one side of the handle together.
Detach the hoop from the machine and un-hoop the stabilizer. If it was pinned, remove the pins as well. Tear off the stabilizer on the outside of the seams. Leave the rest of the stabilizer to ensure the strength of the basket. Cut the outside 5mm (or a quarter of an inch ) off the seam with scissors.
Finalize the fabric easter basket
Pull the right side out. When the right side is all out, iron it to smooth out any wrinkles. Fold it in a triangle and pin it so that the lines match. Sew along the lines of the four corners. Place the other side of the handle between the outer fabric and the lining and sew. Fold the corners down and pin them.
Now you can either sew around with your machine or you can only stitch the corners together by hand. You can also embellish those corners using cute buttons or other trimmings. You can use it for eggs, cookies or an Easter egg hunt!
Enjoy!
Happy Easter…


You can download the .DRAW file of the project, for free, from the link below:
- Project’s .DRAW file: Easter fabric basket
It can open only with the latest version of DRAWings embroidery software
Check also, our related project Embroidered heart brooch
Related FAQ
How do you make fabric Easter baskets?
Easter baskets can be made in a variety of ways, but one of the simplest and most popular methods is to create them out of fabric. You will need some basic sewing supplies, including fabric for the outer layer, lining, interfacing, and stabilizer. You will also need embroidery threads and an adhesive spray. You can read the fabric basket tutorial above for more detailed instructions.
How do you attach fabric to a basket?
You can attach fabric to a basket by using a hot glue gun. First, cut the fabric to the size you want it to be. Then, use the hot glue gun to put a line of glue around the edge of the fabric. Place the fabric over the top of the basket and press down firmly. Let it dry for about 30 minutes before using it.
How do you make a textile basket?
Textile baskets are made by weaving together strips of cloth. You can use any kind of cloth, but cotton or linen work best. Fold the cloth in half lengthwise so that it’s twice as wide as it is tall. Cut a long, thin strip of cloth and tie it around the top edge of the folded cloth to create a loop. Weave the strip down through the middle of the folded cloth, then up to the top edge. Pull it tight and tie a knot to secure it. Repeat this process with additional strips of cloth, until you have created a sturdy basket shape.
What can I use instead of an Easter basket?
You could use a tote bag filled with Easter eggs, candy and other treats.
How do you make an Easter basket out of a towel?
Take a large towel and fold it in half. Decorate the folded edge with ribbon, lace or fabric flowers. For the handle, fold one end of the towel over about 4 inches and tie it securely with ribbon. Twist the other end of the towel to form a loop and tie it securely as well. Fill with Easter eggs, chocolate bunnies and other treats!
How do you make cheap Easter baskets?
To make cheap Easter baskets, you can use paper lunch sacks or plastic grocery bags threaded with a handle.
You can also dye egg cartons and hide the eggs inside. Add coloring with water-based markers to the creases of old toilet paper rolls for colorful nests, stuff them with air plants for a greener, more natural option and attach them to tree branches. Add small playthings like toys or candy and craft items such as shoelaces cut into lengths of six inches that are then folded in half to form loops so kids have something fun to do while they’re picking up eggs at home.
What kind of interfacing do you use for fabric baskets?
There are a few different types of interfacing that can be used for fabric baskets, depending on the desired outcome. Fusible interfacing is a good option for sturdy fabric baskets, as it will help to keep the fabric from stretching or tearing. Bondaweb is a type of fusible interfacing that can be used to create a textured surface on the fabric. If you want a basket with a softer texture, you can use batting or fleece as interfacing.