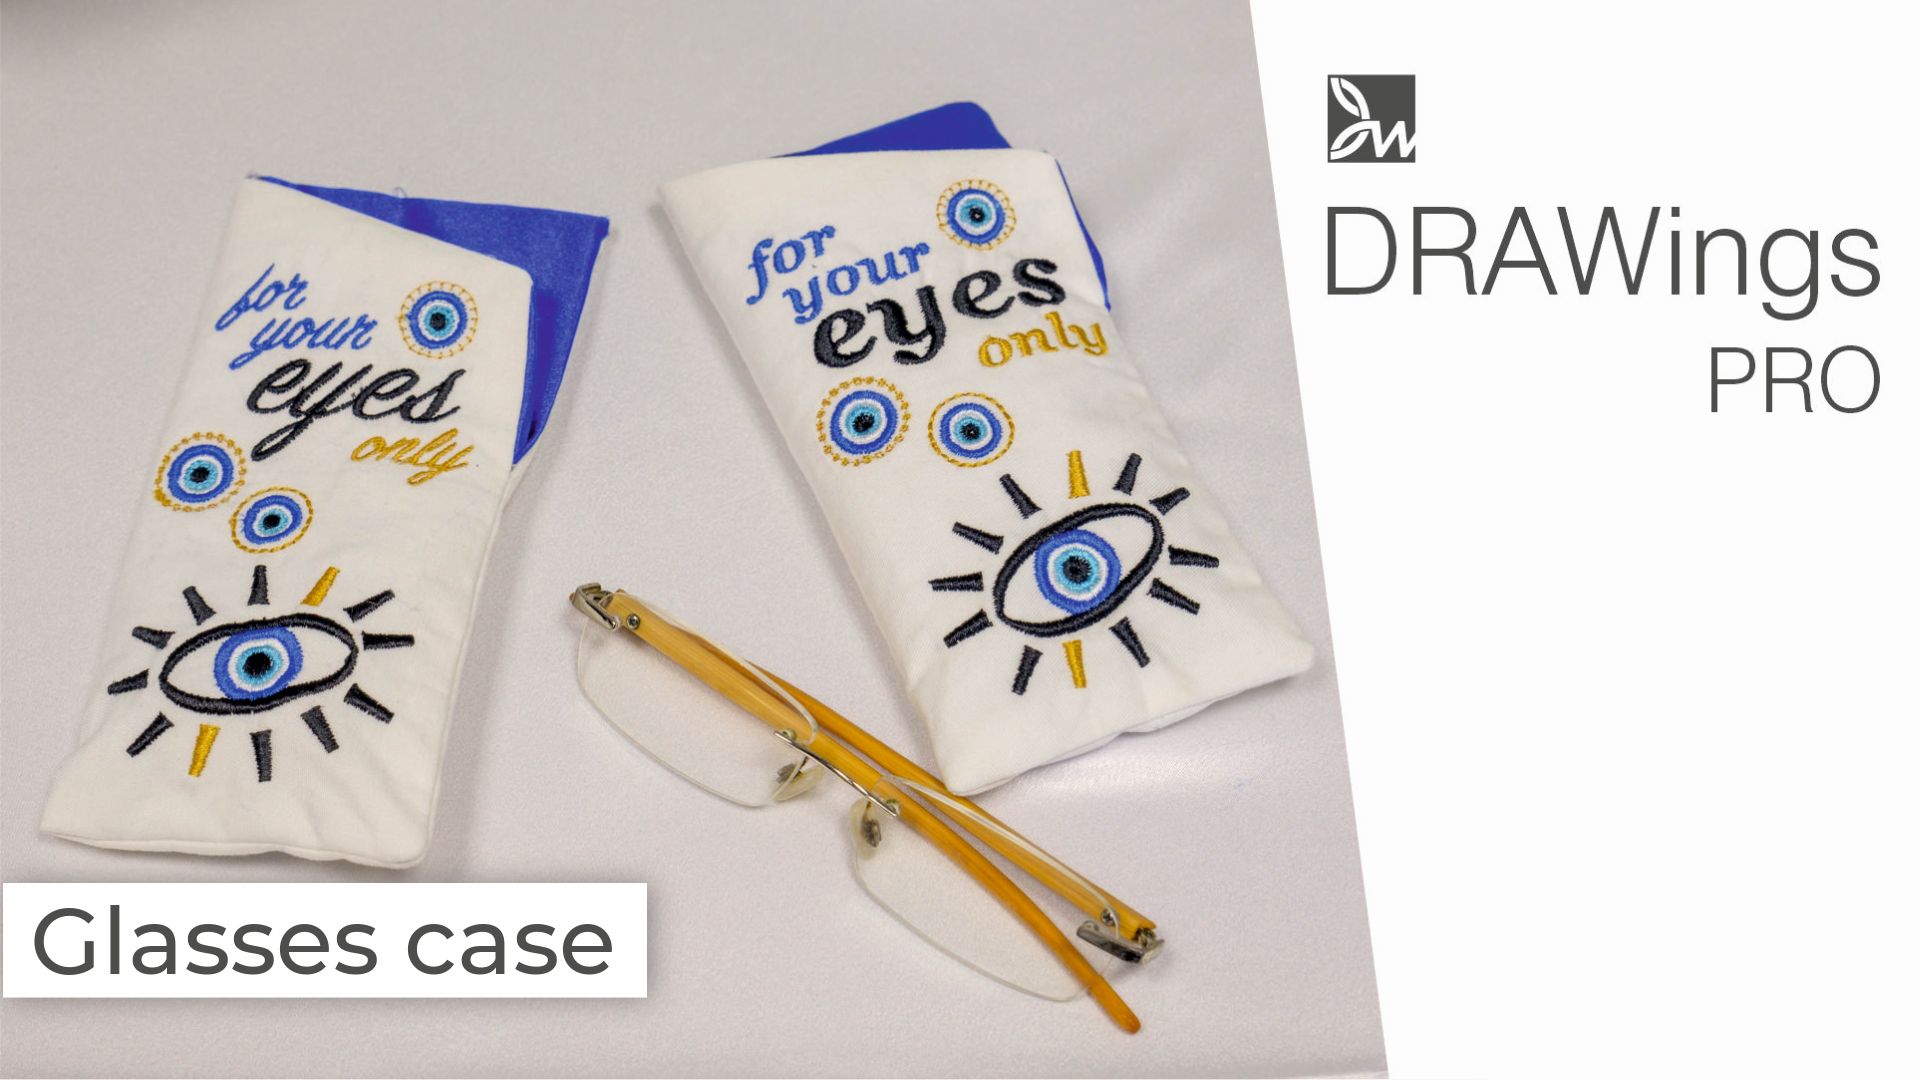
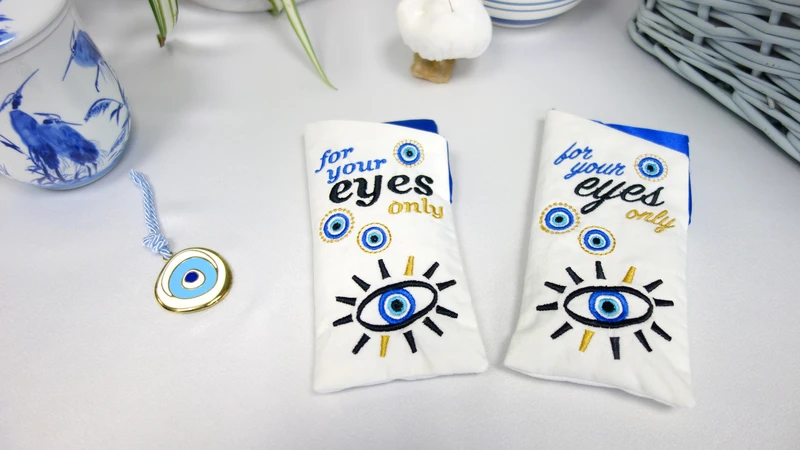
DIY: How to Make a Custom Glasses Case with Your Own Design
Making a custom glasses case can be a fun and rewarding craft project that adds a personalized touch of style to your eyewear. With just a few easy steps, you can create a unique, one-of-a-kind case using materials that you likely have around the house. The best part is, crafting this case requires no special skills and it can be done in about an hour – perfect for those who are short on time or in need of an unexpectedly thoughtful gift. In this tutorial, we’ll show you just how easy and convenient it is to create your own beautiful eyeglass case!

I guess almost all crafters need a pair of glasses at hand when crafting at least at some point in their life. I like to store my eyeglasses in a soft customized case, one that I can even use with just one hand. The attached soft lens cloth makes it even handier and neat. Let’s see how you can make one for yourself or as a last-minute gift!
Create the design for the custom glasses case
We will start by creating a design for the case. The finished glasses case will be about 16 cm in height (that is around 6.3 inches) and 7.5 cm in width (again, that is approximately 3 inches). This means that we will need a square of about 18 by 18 cm (or approximately 7 inches), so select a hoop accordingly.
Create the outline of the case
We will start by making an outline of the case. Using the Rectangle shape tool we will design a rectangle into the hoop. Having the rectangle selected, go to “Tool > options”, and Uncheck the “Proportional” option.
Then enter 160,0 mm in Width, and 165,0 mm in Height. Center it to the hoop by entering 0,0 mm on the X and Y position. Right click on the rectangle and use the “Convert to curves” option, so that you can fully edit the shape later and then remove the fill color, as we don’t need it.
Edit the shape and create this cut corner
To do that we will add two nodes so that we can adjust the shape better. Double-click on the right outline about 3 cm from the top. Double-click on the center (0) of the top outline and delete the node in the corner. Now, right click on the curved line and use the “To line” option. Select a color for this outline if you like, to make it more prominent. For the time being, we will use this shape as a design area guideline. Later on, we will use it to sew all fabrics together and make the opening for the case.
Create the eyes design
Select the “ellipse shape” and draw an ellipse. Make sure that the proportional checkbox is disabled and set the size to 32 mm in width and 26 mm in height. Remove the outline color, make a Duplicate of this ellipse and move it downwards, vertically for about 4mm. Choose the two ellipse shapes together and, using the “Shaping” tools, apply the “Trim” option. Delete the full circle and keep the trimmed part. Set the color to black. Make sure that Proportional is unchecked and change the size to 38 mm in Width and 12 mm in Height so the circle becomes flatter.
Duplicate this part use Mirror y option and move the mirrored one down vertically to make an outline for the eye. Select both parts and from the Shaping tools use the Weld option this time. Design the pupil of the eye, with the ellipse shape tool draw an ellipse into the eye, and set its size to be 18 by 18 mm. We will set the color to this blueish one and remove the outline. Additionally, use the “to back of design” option to place it behind the outline.
Select the pupil and the outline and using the align tools, align the pupil to the center. Then select the pupil, make a duplicate, scale it by 70 % making sure that proportional is on and set the color to white. Again duplicate the white part this time, and scale it to 70% Set the color to light blue. Likewise, duplicate this last part, scale it to 65% and change the color to black. Using the stitch flow, add a point direction to the black one. Select all the pupil parts and group them together for easier handling later on. The eye is ready, so let’s design the eyelashes.
Create the eyelashes design
We will use the Trapezoid shape this time. Before you click and drag to draw the shape, enter 50% on the “Slant” option, and check the “Trapezoid” option, if it’s not checked already. Set the size to 4.2 mm in Width and 9.8 mm in Height with proportional unchecked. Remove the outline color, and change the fill to black.
Add more eyelashes all around the eye
Select the outline of the eye, right click, and use the Autoborder option. We will make a running autoborder and set offset to 1mm. Select the autoborder along with the eyelashes, right click on it and from the appearing menu go to Array and use the “Create outline from shapes” option. Set the offset to 5mm and once you are satisfied with how it looks, use separate to objects option. Delete the auto border and the initial eyelash.
All eyelashes are grouped, but you may ungroup them and delete anyone you don’t like. Remove some of the eyelashes from the part below the eye, to make it look more natural. Change the color in one of them to make it more sassy. Duplicate the eyeball and put it aside for the moment, so that we can use it later on. Place the design in the lower right corner; leave about a 1,0 cm margin from the right and bottom. You may also tilt it.
Create the lettering on the custom glasses case
Start the lettering tool. Type the word “For” and scroll through the available fonts to find a font you like. Then click at a new point and type the word “your”. Likewise, type the word “eyes” and “only”. Take your time to adjust the sizes and colors as you like.
Decorate the pupil
Ungroup, the pupil parts, add running outline with 2mm offset, change the color to gold and select a Stitches style to decorate the line. Then create a duplicate of all of them and move them to a new position. Scale the design if you like and decorate using any other style. Likewise, we can make other copies, use other styles and even add more autoborder lines with styles. Feel free to customise your own design as it pleases you the most. Just make sure the design fits in this right area of the hoop.
Make the opening on the outer line
To do that precisely, we will start the guideline mode. Add a horizontal guideline and set it to 10mm on the y axis to assist us. Start “Edit nodes” mode. Right-click on the left outline at the point where the guideline meets the shape and select the “Split outline” option. Do the same for the right outline, switch back to selection mode, right click on the outline and use break apart to separate the upper from the lower part. Delete the lower part.
Adjust the sequence manually
We want to stitch this outline at the end so we need to manually set the sequence. First of all, select all objects and use the ungroup option. Then click on “Auto” to change to manual mode and “Optimize” using the “Advanced” mode. By using the sequence manager you may adjust the embroidery sequence. First of all, move the red outline at the end of the sequence. We can also move this golden part to go together with the other golden parts. Remember that you can proof the sequence using the “Slow redraw”.
Make the actual custom glasses case project
For this project we will need:
- Fabric for the outer side of the glasses case that is 18 by 18 cm (approximately 7X7 inches)
- Another fabric for the inside of the glasses case that is again 18 by 18 cm.
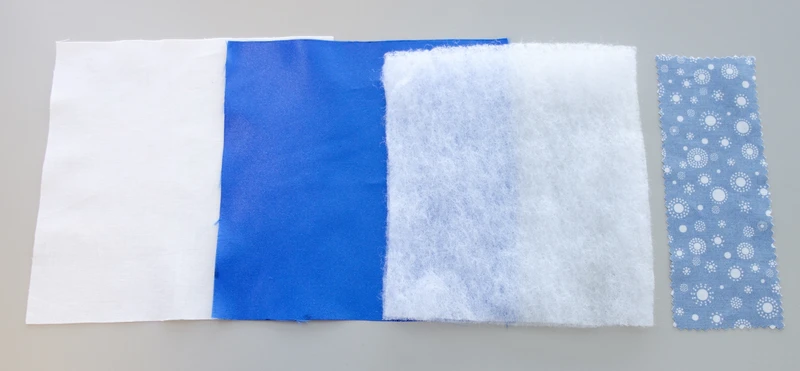
- Cotton batting of your choice about 16cm x 16 cm (approx. 6.3 inches X 6.3. inches).
- Optionally, a cleaning cloth about 17 cm long and 6 cm wide.
- Assorted threads,

- Stabilizer
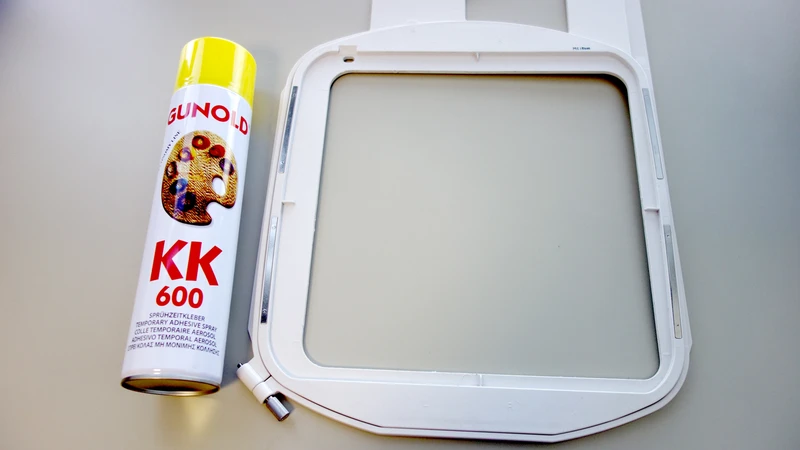
- A Hoop that fits an 18×18 cm (that is 7X7 inches) design
- Adhesive spray to hold parts in place.
For the outer fabric, mark the center and an edge of the cross-center line with an erasable pen so that you can hoop it centered. Hoop the stabilizer, mark the center and center lines using the guide template. Place the outer fabric on the stabilizer using the lines you just made.
Use a temporary adhesive spray on the stabilizer so that the cloth will stick to it. Make sure to leave a few seconds for the glue to dry up a bit before sticking the fabric, otherwise it may leave stains.You may also pin it around for more stability; if you use pins, make sure they are kept out of the machine’s way. Attach the hoop to the machine, set the bobbin and thread for the first color.
Embroidery process and adjustments on the glasses case
Load the embroidery file, start the embroidery process and proceed with all the colors of the design. We will embroider all parts except from the last outline part. When this part of embroidery is done, remove the hoop from the machine, and take the pins off carefully, so that the cloth does not shift from its centered position.
Sew the cleaning cloth
For those who would like to sew the cleaning cloth, place the cleaning cloth on top of the embroidered fabric, right sides should be together. Place it about 1,5 cm off the center and 1,5 cm away from the edge. Secure it with a pin. Place the outer fabric on top of it; right side should be inside. Pin it to keep in place. Again make sure the pin doesn’t harm your embroidery machine.
Add the last outline of the design
Attach the hoop to the machine and now it’s time to embroider the last outline. This one will sew all fabrics together. Remove the hoop from the machine, take the pins off, remove it from the hoop and cut the stabilizer at the same size as the fabric. Secure the cleaning cloth safely away, using some masking tape so it won’t be sewn inside. We will fold it to sew the outline. Before sewing, you may draw a line with an erasable pen leaving 1 cm off the seam allowance. Be careful not to sew the inner fabric at it will be used as opening, pin the fabric and sew the outline. Cut the corner and any excessive fabric.
Finalize the design
Use a temporary spray to stick to the fabric. Cut it around the edge of the fabric and turn the inside out. We need to sew the opening. Put the inner fabric to the inside adjust the shape and it’s done! Enjoy crafting!


You can download the .DRAW file of the project, for free, from the link below:
- Project’s .DRAW file: Custom Glasses Case
It can open only with the XI and newest versions of DRAWings embroidery software
Check also, our related projects “How to make a drawstring bag, how to label and decorate it” & “Create a beautiful PaintStitch tote bag“