Embroidered Cherry Blossom Coasters!
In this project we will show you how to create a Cherry Blossom Coaster. Coasters are practical and beautiful at the same time. I use them to protect furniture from ring marks and at the same time embellish a table setting. Use your imagination to make any kind of coaster or mug rug you like. It’s a fun project with which you may experiment with different techniques, make good use of any leftover stash and they make nice gifts too. Enjoy!

Create the coaster design
The finished size of our coaster is approximately 100 mm or 4 inches.

- Start the Ellipse tool and draw an ellipse. If you hold the Ctrl key down while drawing you will get a perfect circle.
- Select the shape you have created and type 105 mm or 4.1 inches for the width and height.
- Enter 0 for X and Y to center the shape to the hoop.
- Keeping the Shape selected and click on the duplicate button.
- Now having the new shape selected, enter 90% for Scale X or Y to create a circle that is slightly smaller than the original circle.
- Select the outer circle and remove the fill
- From the stitches option of this outer liner select Double. These are the stitches that will sew the front and back fabrics together. Enable the view of the grid temporarily.
Add the flowers in the design
- Select the inner circle and click on the Array option for the outline.
- Select a Flower and proceed.
- Drag the mouse to make the flower about 20 mm (0.8”) in size
- Set the offset to -10 mm(- 0.4”) so that the pattern is set inside the running stitches and set the spacing to 2.0 mm or just enough space to fit 10 patterns.
- Actually, any number of patterns can be placed, as long as they fit within the running stitch; here we have 10 repeats of the pattern.
- Next, place an array to fill. Click Array in Fill Properties.
- Select a leaf and click Insert.
- Drag the mouse to place a leaf diagonally within a 15 mm (0.6”) square.
- Select Contour from Fill under Properties. (You can choose any fill you like, but here we will use the Contour.)
- Using the node editing tool, move the control handle displayed on the shape to adjust the leaves so that they are centered and well-balanced.
- Once the array is in place, set the colors and stitches to add arrangements to the leaves and flowers. To do so, you need to separate the array into objects.
- Select the shape and click Separate to Objects under the Properties fill.
- Do the same for the outline.
- Flowers and leaves can now be edited as their respective objects, and the original shape is displayed as artwork. The artwork outline and fill are not needed here so select the artwork and delete it.
Make embroidery adjustments in the flowers
- Arrays separated into objects are grouped. We will set one color for the flower group and one color for the leaf group, so I will set colors at this point.
- Ungroup the objects so that changes can be made to each object individually.
- Hold down the Shift key and select every other flower to place the outline and remove the fill.
- Apply satin serial to the outline of the flower and remove the fill.
- Hold the Shift key down and select all the filled flowers and a pattern.
- Set the Underlay.
- Set the Length if you prefer.
- I believe that setting the length to 8 mm (0.3”), makes the pattern of this flower look more like cherry blossoms,
- so I will set the length to 8mm (0.3”).
Make embroidery adjustments in the leaves
- Hold the Shift key down and select all the leaves.
- Select the Sea waves 1 pattern.
- Set the Underlay.
- You may also set the Length, if you prefer. We found out that the pattern gets a more leafy effect when it is set to 8 mm (0.3”), so I will set the Length accordingly.
- Last but not least, use the stitch flow to adjust the direction of the stitches so that the pattern looks perfect.
- The design is now complete and we only need to set the sequence.
Set the embroidery sequence
- If it is set to auto, click it to choose manual.
- Bring the running stitch last.
- Check the order of embroidery with Slow redraw. When you are satisfied with the output, send it to your sewing machine.
Create multiples coasters
- If you want to make several coasters at the same time using a large hoop, then, select the design.
- Use the Rectangle array of the vertical tool Array.
- Enter the number of copies you want to make and move the control handles to place them in the hoop and then click Apply.
- Ungroup.
- Move all running stitches to the end and rearrange them so that objects of the same color are embroidered together.
Embroider the coaster design
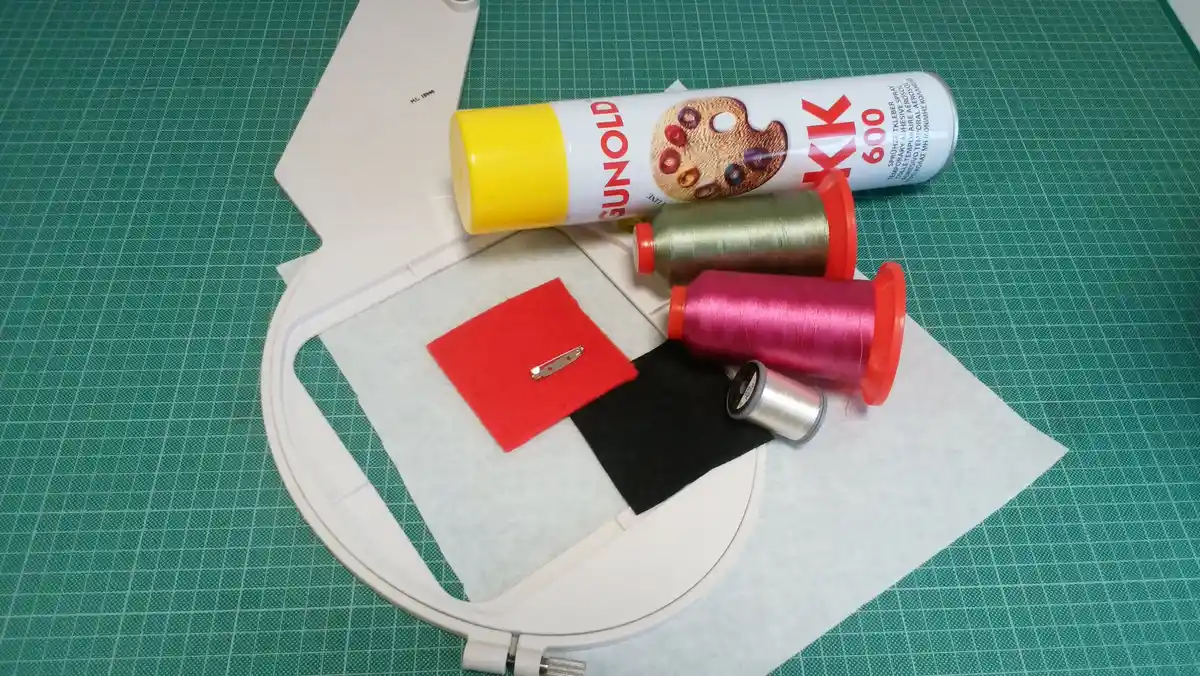
We are ready to embroider now, so make sure you’ve gathered all the materials you need. We will need a piece of outer fabric 150 mm by 150 mm (6” by 6”) and 2 Pieces of fabric for the back at the same dimensions, 150 mm by 150 mm (6” by 6”). Additionally we will need standard material, like Stabilizer, Embroidery threads and Adhesive spray.
- We will start by folding each of the back fabrics in half and then ironing them.
- Hoop the stabilizer and place your front fabric to the hoop using an adhesive spray.
- Open the design.
- Set the bobbin and needle thread, attach the hoop to the sewing machine, and start embroidery.
- When the embroidery is complete, detach the hoop from the machine, and place the back fabrics so that the creases of the cloth intersect at the center by 10 mm (0.4”).
- Tape it to prevent the fabrics from slipping.
- Attach the hoop to the sewing machine and press the start button to sew the fabrics together.
- Detach the hoop from the machine and un-hoop the stabilizer. Tear off the stabilizer.
- Cut the outside 5 mm (1/4 “) off the seam with scissors. Make cuts at 5 mm (0.2”) intervals
- Pull the right side out and gently push from the inside so that the curve comes out neatly.
It’s done!! Use your imagination to make any kind of coaster or mug rug you like. It’s a fun project with which you may experiment with different techniques, make good use of any leftover stash and they make nice gifts too. Enjoy!


You can download the .DRAW file of the project, for free, from the link below:
- Project’s .DRAW file: Cherry Blossom Coasters
It can open only with the latest version of DRAWings embroidery software
Check also, our related project “How to make a drawstring bag, how to label and decorate it“