Craft a Festive Pumpkin Applique for Halloween
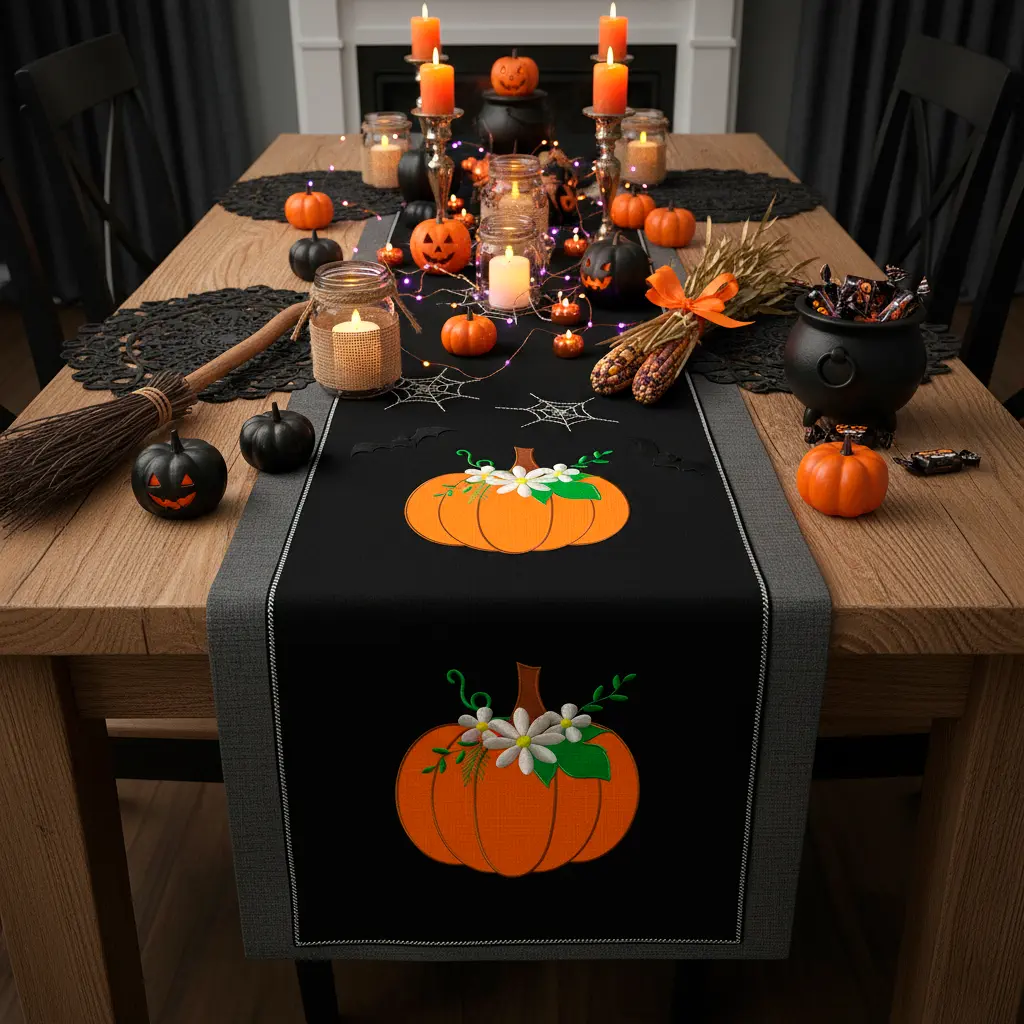
Perfect for fall decorating, this delightful pumpkin design combines appliqué techniques with decorative embroidery to create a stunning seasonal piece. Whether you’re making a table runner, pillow cover, or wall hanging, this project will add a warm autumn touch to your home.
Materials You’ll Need
- Fabric:
- Orange fabric for the pumpkin body
- Green fabric for the large leaf
- Brown fabric for the stem
- Backing fabric (black works beautifully for contrast)
- Supplies:
- Fusible web or appliqué adhesive
- Embroidery thread in coordinating colors (orange, green, brown, white, yellow)
- Stabilizer (tear-away or cut-away)
- DRAWings PRO XII software
- Embroidery machine
Design Overview
This charming pumpkin features three main appliqué elements – the round orange pumpkin, a large green leaf, and a brown stem at the top. These are outlined with satin stitch for a polished finish. The decorative white daisies and delicate greenery adorning the top are created using satin and running stitches, adding dimension and whimsy to the design.
Step-by-Step Instructions
1. Creating Your Design in DRAWings PRO XII
Open DRAWings PRO XII and begin sketching your pumpkin shape. The pumpkin should have a pleasingly plump, rounded form with gentle vertical curves suggesting the natural ridges. Add the large leaf shape overlapping the pumpkin slightly, and position the stem at the crown.
For the decorative elements, draw your daisy flowers with rounded petals and circular centers. Add curling vines and smaller leaves to create movement and visual interest around the top of the pumpkin.
2. Converting to Appliqué
Select your pumpkin, leaf, and stem shapes and convert them to appliqué objects in DRAWings PRO XII. The software will automatically generate the necessary stitch sequence:
- Placement line
- Tack-down line
- Cover stitch (satin stitch border)
Assign satin stitch as your cover stitch type for clean, professional edges on all three appliqué pieces.
3. Adding Decorative Stitching
The vertical lines on the pumpkin can be created using Satin serial stitches to suggest the natural segmentation.
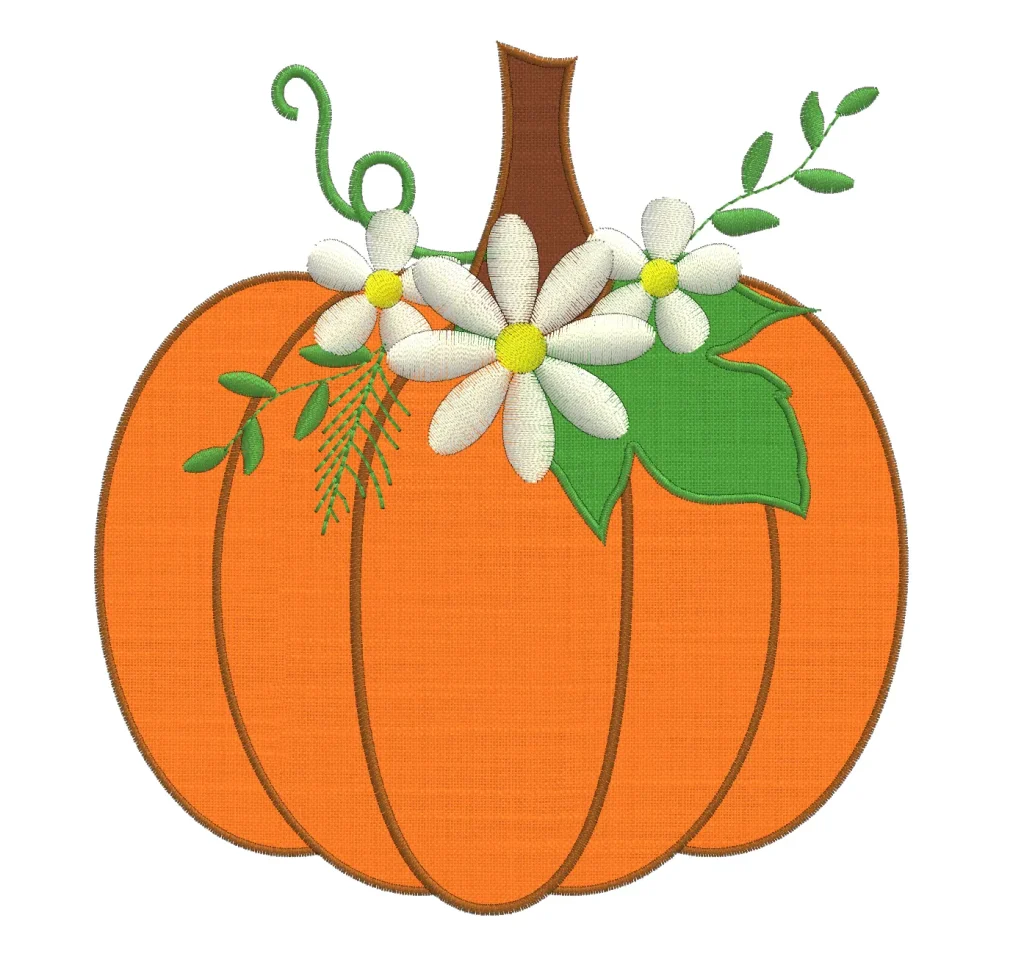
For the flowers and foliage:
- Use satin stitch to fill the daisy petals and smaller leaves, giving them body and texture
- Create the flower centers with satin stitch in sunny yellow
- Add delicate vines and stems using running stitch for a light, airy feel
- Include small accent leaves in satin stitch
4. Preparing Your Fabrics
Cut your appliqué fabrics slightly larger than needed. Apply fusible web to the wrong side of your orange, green, and brown fabrics according to the manufacturer’s instructions. This will help keep everything in place during stitching.
Prepare your backing fabric by hooping it with appropriate stabilizer. A medium-weight tear-away or cut-away stabilizer works well for appliqué projects.
5. Embroidering Your Design
Load your design into your embroidery machine and begin the stitching process:
- The machine will stitch the placement line for the first appliqué piece (typically the pumpkin)
- Remove the hoop and position your orange fabric over the placement line
- Return to the machine for the tack-down stitch that secures the fabric
- Trim excess fabric close to the tack-down line, being careful not to cut into stitches or backing
- The machine will complete the satin stitch border to cover raw edges
- Repeat this process for the green leaf and brown stem
Once all appliqué elements are complete, the machine will stitch the decorative flowers, leaves, and vines on top.
6. Finishing Touches
After embroidery is complete, remove your project from the hoop. Carefully tear away any excess stabilizer from the back. Trim any jump stitches and loose threads.
Press gently from the wrong side to smooth the design without crushing the satin stitching.
Design Tips
- Color Variations: Try using different orange tones for a more realistic pumpkin, or go bold with unexpected colors for a modern twist
- Size Adjustments: This design works beautifully in various sizes – scale it down for coasters or up for a decorative pillow
- Embellishment Ideas: Consider adding small beads or French knots to flower centers for extra dimension
- Fabric Choices: Textured fabrics like linen or burlap add rustic charm, while cotton batiks create a more polished look
Project Ideas
This versatile pumpkin design is perfect for:
- Table runners and placemats
- Autumn throw pillows
- Kitchen towels
- Tote bags
- Wall hangings
- Seasonal banners
The combination of appliqué and embroidery creates a rich, layered look that brings your pumpkin to life. Whether you’re decorating for Halloween or simply celebrating the beauty of fall, this charming design will become a seasonal favorite you’ll treasure for years to come.
Happy stitching, and enjoy creating your beautiful autumn pumpkin!
Happy crafting and don’t forget to share your creations with us in the
DRAWings PRO Help Group!
You can download the .DRAW file of the project and the image used, for free, from the link below:
- Project’s .DRAW file: Craft a Festive Pumpkin Applique for Halloween
It can open only with the XII and later versions of DRAWings embroidery software
Share your experiences in our Facebook group