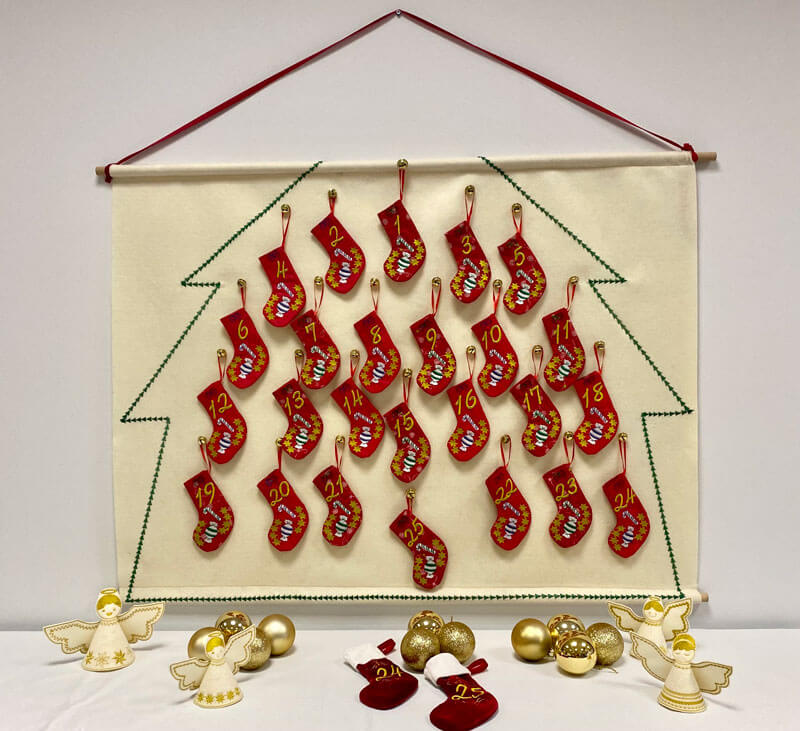
Advent Stocking Calendar
In this project we will show you how to create an Advent Stocking calendar.
View the video bellow to learn how to do it!

Let’s create the design of the stockings first. We will use a 14 cm x 14 cm hoop to make a mini stocking. Feel free to arrange the size, shape and design according to the hoop you have.
Using the Outline shape we will digitize the shape of the stocking. Fine tune the shape using the node editor if you like and once you are done, select the created shape, go to Properties and set the Style of Stitches to Double.
We will add the date number by selecting the Text tool and clicking where you want to place the date. Type the number of the date, choose a font and adjust the size. Once the number of the date is added, align it to the stocking and select a color.
Decorate the design
Keep in mind that the first cm of the stockings will be folded inward later, so make sure you leave enough room and don’t place a design there. Then decorate the Stocking with a few clipart items. Select Insert clipart option, browse through the clipart library and select the clipart you want to use.
Click Insert and the clipart library will close, so that you can have a better view of the design area and position the clipart properly. Click and drag to the position you want to place the clipart and release the mouse to finalize the placement. Then change the color and the stitch type to step.
We will also remove the outline as it’s not necessary. Duplicate this star object and mirror, so that it’s placed on the back of the stocking. We’ll follow the same procedure, to add any other clipart we want. This time, we will set the color to green and we will add 2 more clipart items. The clipart you insert might need to ungroup them, to change their colors.
Change into manual mode so that we can adjust the embroidery sequence. Move the stocking to be the last one to be embroidered and re-arrange the objects so that all with the same color are embroidered together.

Select all objects, right-click and use the Namedrop option. Enter the series of the numbers in the dialog and click ok. The design contains 3 stocking designs, one on top of the other. On the sequence manager, if you click on number one, the first group is selected. This is the first stocking design. If you click on number 3, you will see the next stocking design. To preview how they will be embroidered use the slow redraw tool.
Each stocking design goes after the previous one. Practically, you send the design to the embroidery machine and after each stocking is embroidered, you change the fabric and hoop a new one. In this way you can make multiple designs, just by changing the date number!
Embroider the design
Then you can start embroidering the stockings. Collect all the materials you’re gonna need: Hoop, Fabric, Stabilizer and Threads.

Hoop your stabilizer and fabric.

Load the design on the embroidery machine and the name drop list will be displayed on the sewing machine in an overlapping manner, just like the display on the software. The actual embroidery is done one by one.
In color changes, you can see the 4 colors for the first stocking and for the next one. After finishing the first stocking, you need to set a new fabric on the hoop and press the start button to continue with the next stocking. Set the bobbin and needle thread, attach the hoop to the machine and press start.

When the embroidery is complete, tape or pin the string. Place a cloth for the back of the stocking, right side down. Press Start to stitch the outline of the stocking. Remove the stocking from the hoop, Tear off the stabilizer, and cut out the outside of the stitch with pinking scissors.
Remove the tape that kept the string in place. fold the mouth of the stocking about 1 cm and tuck the folded edge with a tape or cloth glue. Turn inside out and your first stocking is ready! Hoop a new cloth and repeat the same process for the number of name drops. Don’t forget to fill those stockings with goodies!


You can download the .DRAW file of the project, for free, from the link below:
- Project’s .DRAW file: Advent Stocking calendar
It can open only with the latest version of DRAWings embroidery software